![[Updated April 2023]: System Interrupts High CPU Usage](https://cdn.techloris.com/app/uploads/2020/04/system-interrupts-1.jpg)
[Updated April 2023]: System Interrupts High CPU Usage

Interrupts are normal for computer hardware like a mouse and keyboard to communicate with the CPU in Windows Operating System, and the system interrupts a process as a Windows component.
Although Interrupts are often seen running in the Task Manager, they should not cause any problems as they run in the background.
Recommended: To easily install drivers automatically, use the tool below.
Some Windows 10 users are experiencing CPU usage issues while the system interrupts are running. This should not be the case because interrupts only use a tiny portion of CPU resources. However, if they are causing the CPU to overload, follow the steps below to fix the issue.
Common Reasons For System Interrupts Taking 100 CPU
In this section, we will discuss some of the most common reasons why system interrupts might consume 100% CPU in a Windows system. Understanding these causes can help you identify and resolve the issue more effectively.
- Outdated or Incompatible Drivers: One of the primary reasons for high CPU usage due to system interrupts is outdated or incompatible device drivers. Ensuring that your drivers are up-to-date and compatible with your system can significantly reduce the likelihood of this issue.
- Faulty Hardware: Damaged or malfunctioning hardware components can also cause system interrupts to consume 100% of your CPU. This can include issues with your motherboard, RAM, or other connected devices. In such cases, diagnosing and replacing the problematic hardware is essential.
- BIOS and Firmware Issues: An outdated BIOS or firmware can sometimes result in system interrupt issues. Updating your BIOS and firmware to the latest version can help alleviate this problem.
- Conflicting Software or Services: Conflicting software or services running in the background can lead to high CPU usage due to system interrupts. This can include antivirus programs, third-party applications, or Windows services. Identifying and resolving these conflicts can help reduce CPU usage.
- Malware or Virus Infections: Malware or viruses can cause an increase in CPU usage, including system interrupts. Running regular antivirus scans and keeping your system protected can help prevent this issue.
- Power Management Settings: Incorrect power management settings, such as Windows Fast Startup, can sometimes cause high CPU usage due to system interrupts. Adjusting these settings and disabling unnecessary power-saving features can help reduce CPU consumption.
By understanding these common reasons for system interrupts taking 100% CPU, you can effectively diagnose and resolve the issue in your Windows system. Ensure that your drivers are updated, your hardware is in proper working condition, and your system is free of malware or conflicting software to maintain optimal performance.
See Also: How to Fix System Thread Exception Not Handled Error in Windows 10
Method 1: Check for Windows Updates
The first thing to do is to check for Windows updates. You could be running a version of Windows with performance issues that cause high CPU usage.
To check for Windows updates, follow the steps below.
Step 1: Press on Windows Key or Click on the Start menu.
Step 2: Click on Settings.

Step 3: On Windows Settings, Click on Update & Security.

Step 4: Click on Check for Windows Updates or Download.

Step 5: Wait for the update to finish.
Step 6: After the update, Windows will ask you to restart your computer to apply the updates.
Step 7: After updating, go to the task manager and check if the System Interrupts High CPU Usage issue has been fixed.
See Also: Windows Update Stuck? Here is What You Need to Do!
Method 2: Run Windows Check Disk
Try running a check disk scan using the command prompt. CHCKDSK is a system tool for Windows that scans system files and checks their logical integrity.
Step 1: Press the Windows key + S and search for Command Prompt.

Step 2: Right-click on the CMD and run it as Administrator.

Step 3: A pop-up screen will appear; Click Yes.
Step 4: Type “chckdsk” in the CMD and press enter.

Step 5: Wait for it to finish and Reboot your computer.

Method 3: Disable Audio Enhancements
System Interrupts are used by hardware devices to communicate with the CPU; Audio Enhancements for your speakers or headphones can cause high usage in the CPU. Try disabling these enhancements and see if the issue is solved.
Issues with Audio? See this Post: How to Fix Audio Service is not running on Windows.
Step 1: Right-click on the speaker button on your taskbar.

Step 2: Select Open Sound Settings.

Step 3: On sound settings, click on Device Properties.

Step 4: On your Default Device Properties, Click on Additional Device Properties.

Step 5: Click on the Advanced tab.

Step 6: Under the Advanced tab, Uncheck Enable audio enhancements.

Step 7: Click on Ok.
Step 8: Restart your computer and check if the System Interrupts High CPU Usage has already been fixed.
Method 4: Check for Viruses and Malware
Computer viruses and malware can cause instability in your computer system. Scanning for viruses and removing them can fix the CPU’s high usage problem.
Step 1: Press the Windows key + S, search for “Windows Defender,” and then run it.
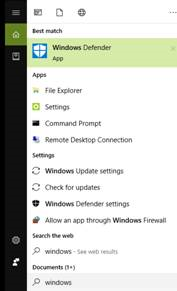
Step 2: Click on scan now and wait for windows defender to finish checking your system for viruses and malware.

Step 3: Reboot your computer after the scan has finished and check if the System Interrupts High CPU Usage has been fixed.
Method 5: Unplug External Devices
A common offender is USB hardware. To prevent external hardware from interrupting the CPU, disconnect all external USB devices or disable your USB Root Hub.
To disconnect external any external devices, such as your USB root hubs, that may be causing the CPU usage issue, open the device manager by following these steps:
Step 1: Press the “Windows” and “R” keys and type in “devmgmt.msc” in the run command line and press enter or click on “OK.”

Step 2: In the list of devices, expand “Universal Serial Bus Controllers,” right-click on your USB Root Hub, and click “Disable.”

Step 3: Once you can disable USB root hubs, try to see if the system interrupts the CPU usage issue persists.
Method 6: Update Your Device Drivers
Another reason you might encounter a CPU usage issue is that you may have an outdated device driver. Getting updated driver software is essential to avoid getting system interrupts process issues.
Regardless of hardware drivers such as network adapters, internal devices, playback devices, or any associated driver, all drivers should be kept updated to avoid hardware or driver issues that can lead to hardware interrupts or system interrupts CPU usage issues.
There are two ways that you can update a hardware driver and other important drivers. You can either manually update them through the device manager or use third-party Windows diagnostic tools. Here are some steps to update your drivers or disable internal devices.
Step 1: Press the “Windows” and “R” keys and type in “devmgmt.msc” in the run command line and press enter or click on “OK.” You may also find the device manager in Control Panel.
Step 2: Look for “Network Adapters” in the list, expand the network adapters dialog, right-click on your Network Adapter and click “Update Driver.”

Step 3: Select “Search Automatically for Drivers” and follow the subsequent prompts to install the new driver for your WiFi adapter completely.

Step 4: You may also check the manufacturer’s website for the latest driver of your Wi-Fi adapter to get the newest driver. Once the update is complete, check if the System Interrupt CPU usage issue has been fixed.
If you wish to update hardware drivers aside from your network adapters, follow the same steps above but select the appropriate device you want to update.
Method 7: Disable Any Failing Hardware
If a faulty driver can bring down the entire system, imagine what happens when the hardware fails. In that situation, updating your drivers will not help at all. To check for any faulty hardware, you can use third-party applications such as MemTest86, CrystalDiskInfo, or HWiNFO.
Here’s a sample of MemTest86 detecting failing hardware:

If there is any failing hardware detected on your computer, it is most likely the culprit causing high CPU usage on your computer. Prevent all hardware interrupts issues by replacing or fixing defective hardware.
Wrap Up
We hope that our tutorial was helpful, that you could lessen the high CPU consumption due to System Interrupts, and that everything is back to normal now. If you have any other ideas about addressing the issue that this article is not included, please let us know in the comments area below.
You might also like: The Best Antivirus Software for 2020
Frequently Asked Questions
How do I fix system interrupts 100 CPU?
To fix system interrupts 100 CPU, you need to follow these steps:
Download and install the latest drivers for your devices.
Check for any hardware or software conflicts and resolve them.
Update your BIOS and firmware.
Scan for viruses and malware.
Run a system file checker tool to repair any corrupted system files.
Why is my CPU suddenly at 100 %?
Your CPU is suddenly at 100% because there is a process that uses up all the available processing power. This can happen if there is a program that is doing a lot of computationally intensive work or if there is a process that is stuck in a loop. If your computer is constantly running at 100%, it could indicate that you need to upgrade your CPU.
Can malware cause 100 CPU usage?
Malware can cause high CPU usage, which may lead to 100% CPU usage in some cases. However, it’s important to note that malware is not the only thing that can lead to high CPU usage. Other things, such as background processes, incorrect system settings, and hardware problems, can also cause high CPU usage.
What happens when a CPU is interrupted?
An interruption is an event that disrupts a program’s normal flow of execution. When a CPU is interrupted, the current instruction stops, and the CPU executes a special interrupt handler routine.
The interrupt handler routine typically saves the state of the CPU and other important registers, disables interrupts, calls a subroutine to service the interrupt, restores the state of the CPU and other registers, and re-enables interrupts.
What are the common causes of high CPU usage issue in a Windows system?
A faulty hardware driver can often lead to system interrupts 100 CPU problems in a Windows system. A hardware error or an issue with the BIOS version may also contribute to these problems. Disabling certain settings, such as Windows Fast Startup, can help mitigate these issues.
How do I identify if a hardware or driver issue is causing system interrupts 100 CPU?
To determine if a hardware or driver issue is causing problems, access the Device Manager dialog box and investigate the status of your hardware devices. You can also try disabling individual device drivers to isolate the problematic component. If you notice high CPU usage related to audio devices, you might need to disable sound enhancements in the Enhancements tab.
How can I disable Windows Fast Startup to resolve 100% CPU issues?
Disabling Windows Fast Startup can help with system interruptions and overall performance by allowing the system to perform a full shutdown and startup process. To disable this feature, go to the Power Options in Control Panel, click “Choose what the power button does,” and uncheck the box for “Turn on fast startup.”
How do I disable sound effects if they affect my Windows system’s performance?
Suppose sound effects contribute to system interruptions or negatively impact your computer’s performance. In that case, you can disable them by right-clicking on the speaker icon in the system tray, selecting “Sounds,” and then navigating to the “Sounds” tab. Under the “Program Events” list, set the “Windows Default” sound scheme to “No Sounds” and click “Apply.”