
13 Solutions to Fix Windows ‘Can’t Connect to Printer’ Error

Windows Cannot Connect to the Printer is an error message that appears when a user attempts to connect to a printer on their Windows computer, but the connection is denied.
What Causes the ‘Windows Cannot Connect to the Printer’ Error?
- Insufficient permissions: If the user trying to connect to the printer does not have the necessary permissions, they may receive the “Windows cannot connect to the printer” error.
- Firewall blocking: The firewall on the computer or network may be blocking the connection to the printer, causing the error to occur.
- Outdated or corrupted driver: An outdated or corrupted driver for the printer can cause the “Windows cannot connect to the printer” error. This can be resolved by updating or reinstalling the driver.
How to Repair Windows Cannot Connect to the Printer
Check Cable Connections (For Local Printer)

To fix a connection issue with your printer, first, turn it off and disconnect it from the power source. Inspect all the cables connected to the printer to ensure they are securely plugged in. If any cables appear to be loose or damaged, reconnect or replace them as necessary.
Use the Windows 10/11 Printer Troubleshooter
Windows offers several troubleshooters to assist in identifying and resolving various issues. One of these troubleshooters is specifically designed to address any problems related to printers. This troubleshooter is capable of detecting and resolving most issues without the need for significant input from the user.
1. Press the Windows + I keys simultaneously to open the Settings menu.
2. Select “Update & Security” >> Troubleshoot.

3. Select “Additional troubleshooters” on the right >> on the list select Printer.
4. Click on the “Run the troubleshooter” button.

5. Wait for the troubleshooter to find and fix any printer-related issues.
6. Once the troubleshooter finishes, it will display the results. If it finds any problem it will also give the option to fix it.
7. Follow the instruction given by the troubleshooter to resolve the issue.
Once you’ve completed the process, you can check if the printer is working correctly by printing a test document.
Restart the Printer Spooler Service (Network printer)
The Windows print spooler service is responsible for holding print jobs until the network printer is ready to print them. If you are experiencing issues such as “Windows Cannot Connect to the Printer,” it may be helpful to stop and restart this service. You can start this process by:
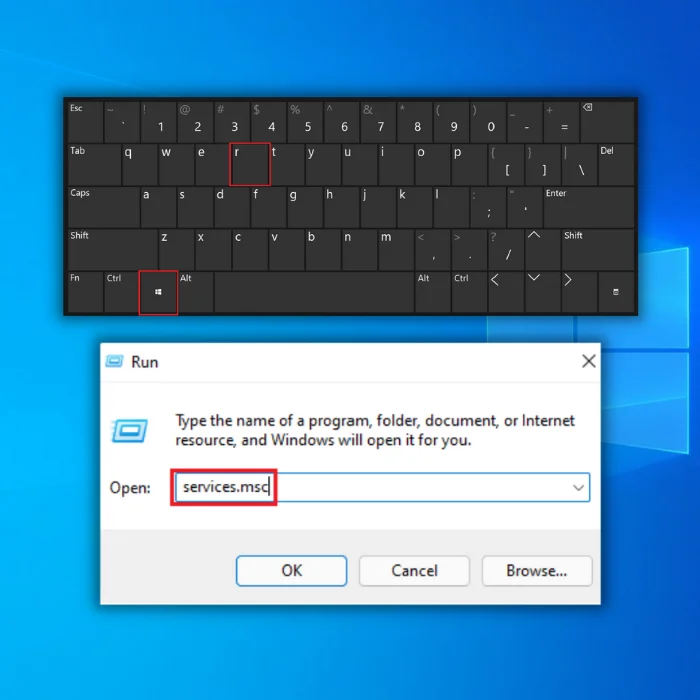
1. Press the Windows + R keys at the same time to open the Run dialog box.
2. In the box, type “services.msc” and press OK.
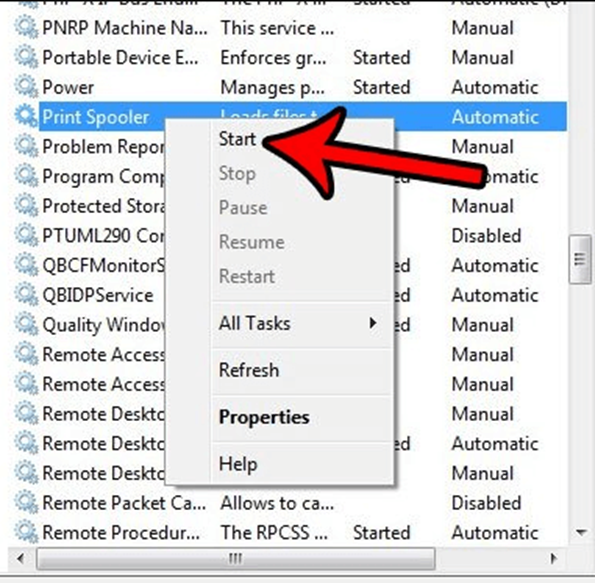
3. In the Services window, locate the “Print Spooler” service and double-click it to open the Properties menu.

4. Click on the “Stop” button to temporarily stop the spooler service.
5. Wait for about ten seconds.
6. To reactivate the service, select “Start” from the Properties menu.
7. After the service is started, try to reconnect your printer and check if the issue is resolved.
Update Your Printer’s Drivers
When you add a printer to your PC, Windows automatically installs the necessary drivers to allow communication between the printer and your machine. However, over time, a printer driver may become outdated and cause various issues with the printer. Windows’ Device Manager makes this process easy by automating the process of finding and installing the latest drivers.
1. Right-click on the Start menu icon >> select “Device Manager.”

2. In the Manager window, expand “Print queues” section >> right-click on your printer >> select “Update Driver.”

3. Select “Search automatically for drivers” to let Windows find the latest printer drivers.

4. Wait for Windows to find and install the updated drivers.
If newer drivers are not available, a message will appear saying that the best drivers for your device are already installed. Get the newer ones by selecting “Search for updated drivers on Windows Update” to force your system to check for the latest drivers.
Remove and Reinstall Your Printer
If you continue to encounter the error message “Windows Cannot Connect to the Printer,” it may be due to improper installation of the printer on your PC. This can occur if you experienced any issues during the initial installation. A solution for this issue is to remove the printer and reinstall it.
1. Press Windows + I at the same time to open Settings.

2. In the Settings window, select Devices.
3. In the sidebar on the left, choose Printers & scanners.

4. Select the name of your printer on the right pane, then choose Remove device.

5. Confirm the uninstallation by selecting Yes in the prompt.
6. Disconnect and reconnect your printer to your PC.
7. Follow the instructions of the printer driver installation wizard to reinstall the printer.
Make Your Problematic Printer the Default Printer
If you have multiple printers installed on your computer and are experiencing the “Windows Cannot Connect to the Printer” error, try making the faulty printer the default one and see if that resolves the issue. You can easily do this by following these steps:
1. Open the Settings app on your PC by pressing the Windows + I keys.
2. In the Settings menu, navigate to the Devices tab.
3. On the left sidebar, choose Printers & scanners.
4. On the right side of the screen, uncheck the option for “Let Windows manage my default printer”.

5. From the list of printers, select the one that is causing issues.
6. Click on the “Manage” button.
7. Select the option to “Set as default” to make the selected printer the default one.

Fix Windows Issues by Installing Software Updates
One potential solution to the “Windows Cannot Connect to the Printer” error is to ensure that your Windows operating system is up to date. These updates often include bug fixes that can resolve various system issues.
To check for and install any available updates, follow these steps:
1. Open the Settings app by right-clicking the Start button and selecting Settings.

2. Navigate to the Update & Security section.
3. Hover over and press “Windows Update” from the sidebar.
4. Click on the “Check for updates” button on the screen.

5. Download and install any available updates.
6. Restart your PC once the updates have been installed.

Create a New Local Port
To resolve the issue of “Windows Cannot Connect to the Printer”, you can try adding the printer again through the Control Panel.
1. Open Control Panel on your computer.
2. Change the view to Large icons and click on Devices and Printers.
3. At the top part of the open window, click “Add a printer.” (Note: You will need to be logged in as an administrator to continue.)
4. Choose to add a network, wireless, or Bluetooth printer.
5. Select the option “Create a new port” where the “Type of port” is set to Local Port. Click Next.
6. Enter the printer’s address in the provided box. This should be in the format of “\IP address or Computer Name\Printer’s Name”. Click OK.
7. On the directory, choose your printer model >> click Next.
8. Follow the remaining on-screen instructions to finish adding the printer.
Copy “Mscms.dll” Manually
If you’re still experiencing the “Windows Cannot Connect to the Printer” error, you can try copying the “mscms.dll” file from the C:\Windows\system32 folder to the appropriate directory for your operating system. Depending on whether you’re using a 64-bit or 32-bit version of Windows, the path will be different.
1. Open the C:\Windows\system32 folder on your computer.
2. Locate the file named “mscms.dll”.
3. Copy the file to the following directory:
4. For 64-bit Windows: C:\windows\system32\spool\drivers\x64\3\
5. For 32-bit Windows: C:\windows\system32\spool\drivers\w32x86\3\
6. Note: If you are unsure which version of Windows you are using, you can check by going to the Settings > System > About.
7. Attempt to connect to the printer again and check if the error still persists.
Delete a Subkey
Modifying registry keys can cause serious issues with your system, so it’s important to back up the registry key before making any changes. Here’s how you can fix the “Windows Cannot Connect to the Printer” error by modifying the registry:
1. First, stop the Print Spooler service by following the steps outlined in Solution 1.
2. Press the Windows + R buttons on your keyboard at the same time to open the Run dialog box.
3. Type “regedit” in the Run dialog box >> click OK.

4. Navigate to HKEY_LOCAL_MACHINE\SOFTWARE\Microsoft\Windows NT\CurrentVersion\Print\Providers\Client Side Rendering Print Provider. Right-click on “Client Side Rendering Print Provider” >> “Delete.”

5. Start the Print Spooler service.
6. Restart your computer and try to re-add your printer.
Temporarily Disable Your Antivirus Security Software
To temporarily turn off the virus and threat protection on your Windows PC, you can follow these steps:

1. Click on the Start button and type in “security.”
2. Select “Windows Security” from the results.
3. Under the Virus and threat protection section, scroll down and click on “Manage settings.”
4. Turn off the option for “Real-time protection.”
Please note that this will turn off the essential protection provided by Windows Defender. If you have third-party antivirus software installed, you may need to disable or temporarily uninstall it instead. To do this, look for the option to disable or uninstall the software in the main window or settings of the antivirus program.
Perform a Windows Update
Access the Windows Update feature by going to Start and searching for “update.” Click on the “Check for updates” option that appears in the results. Click the “Check for updates” button on the right-hand side. If new updates are available, they will be downloaded and installed automatically. However, be sure to restart your computer to fully implement the updates. Keeping your Windows operating system up to date with the latest system updates and drivers is essential for maintaining a stable and efficient computer. If you encounter any difficulties updating your OS, refer to a guide on troubleshooting issues with the Windows Update feature.
Review Group Policy Editor
To resolve connection issues with a printer, you can use the Group Policy Editor (GPE) to modify an option. The GPE is an advanced configuration editor for Windows that allows you to tweak many advanced settings.
1. Open the Run menu by pressing Win + R on your keyboard.
2. Type gpedit.msc and click OK.
3. Under Computer Configuration, navigate to Administrative Templates > Printers.
4. Double-click the option labeled “Limits print driver installation to Administrators” and select “Disabled.”
5. Click Apply >> Select OK to confirm changes about to be made.
6. Restart your computer to apply the changes.
Conclusion
In conclusion, the “Windows Cannot Connect to the Printer” error can be a frustrating and time-consuming problem to troubleshoot. However, by understanding the most common causes of the error and using the various solutions presented in this article, you can quickly and effectively fix the issue and get your printer up and running again.