
4 Ways to Fix NVIDIA GeForce Experience Not Opening

The NVIDIA GeForce Experience program is used by many for various reasons. It can be used to record your precious gameplay; you can stream your game over to different streaming platforms, optimize your game settings, and a lot more. However, users with an NVIDIA GTX and above graphics card can only enjoy this program.
With the rising popularity of GeForce Experience comes reports of the program malfunctioning or not opening. These reports claim that although the GeForce Experience icon is present in the system tray, they cannot double-click or right-click on the icon to open the program.

- Your machine is currently running Windows 10
- Fortect is compatible with your operating system.
Recommended: To repair Nvidia Geforce Errors, use this software package; Fortect System Repair. This repair tool has been proven to identify and fix these errors and other Windows problems with very high efficiency. Download Fortect here.

- 100% safe as confirmed by Norton.
- Only your system and hardware are evaluated.
GeForce not opening is usually nonrelated to other common GeForce issues, such as “Something went wrong. Try Restarting GeForce Experience“, Error Code 0x0003, Error Code 0x0001, or 0X0000F004.
Today, we will walk you through the top 4 methods that have helped users who have experienced the GeForce Experience not opening issue.
First Method – Reinstall a Fresh Copy of NVIDIA GeForce Experience
Reinstalling a fresh copy of GeForce Experience means installing new copies of the possibly corrupted files on your computer. To do this, you must remove the currently installed version of GeForce Experience.
- Hold down the “Windows” and “R” keys at the same time, then type “appwiz.cpl” in the command line and press “enter.” The Programs and Features window will come up.

- Look for the “NVIDIA GeForce Experience” and click “Uninstall/Change.” Follow the prompts to remove the program from your computer altogether.

- Once GeForce Experience has been successfully removed from your computer, you can download a fresh copy of their installer file to their official website.
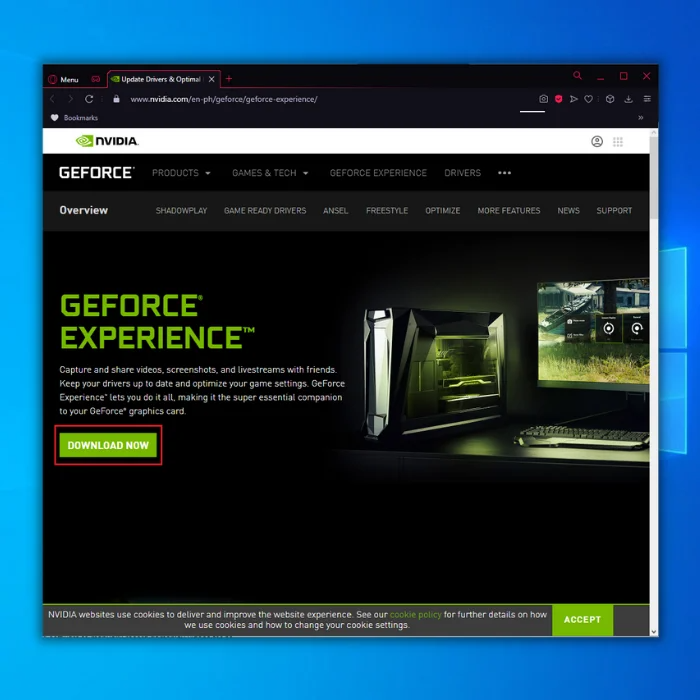
- After downloading a fresh copy of GeForce Experience, double-click the executable file to launch the installation. Follow the installation wizard as usual and confirm if the problem has been fixed.
Second Method – Confirm if All NVIDIA GeForce Services are Enabled
- Press down the “Windows” key and “R” and type in “services.msc” in the run line command and press enter to bring up Windows Services.

- Once you have the Services window open, modify the settings of your services to the same settings as listed below:
- NVIDIA Display Container LS – Automatic
- NVIDIA NetworkService Container – Manual
- NVIDIA LocalSystem Container – Automatic
- NVIDIA LocalSystem Container – Automatic
- NVIDIA GeForce Experience Service – Automatic (Delayed Start)
- NVIDIA Geforce Experience Backend Service – Automatic (Delayed Start)
- NVIDIA Telemetry Container service – Automatic
Our example is the NVIDIA Display Container LS service in the screenshot below. Right-click on it, select properties, set it to “Automatic” in the Startup type, and click “OK.”
Make sure to perform the same steps with the appropriate Startup type for the rest of the services.

Note: All services should be running. Click on “Start” the services in the upper left corner of the window if the service is stopped.

- Once all the services have been appropriately configured, restart the computer and open GeForce Experience to confirm if it has already been fixed.
Third Method – Manually Update the Drivers for Your Display Graphics
New updates come with bug fixes and features. However, getting an update automatically would not be possible if GeForce Experience is not opening or working correctly. The good news is that manually updating your display graphics drivers is possible and relatively easy. Follow these steps to perform a manual update on your graphics drivers.
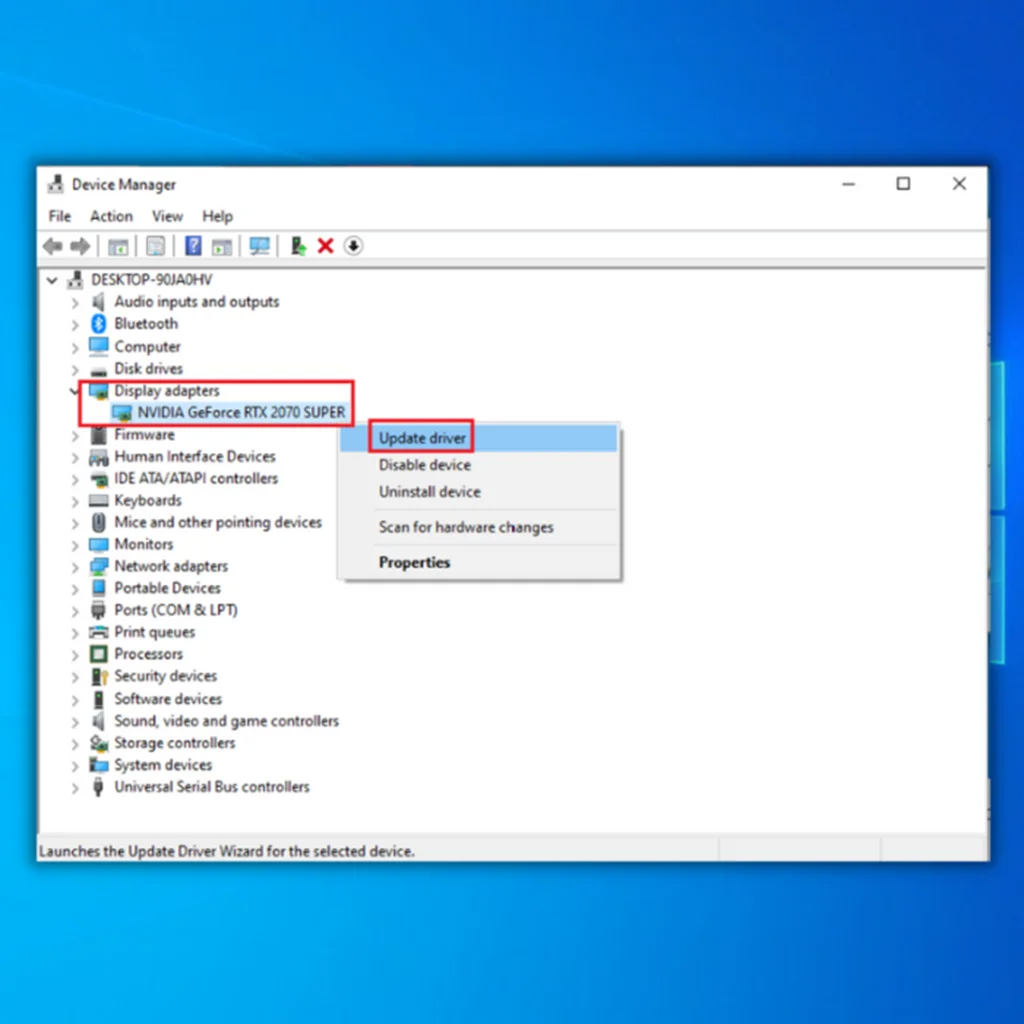
- Hold down the “Windows” and “R” keys and type in “devmgmt.msc” in the run command line, and press enter.

- In the list of devices in the Device Manager, look for “Display Adapters,” right-click on your Graphics Card and Click on “Update driver.”
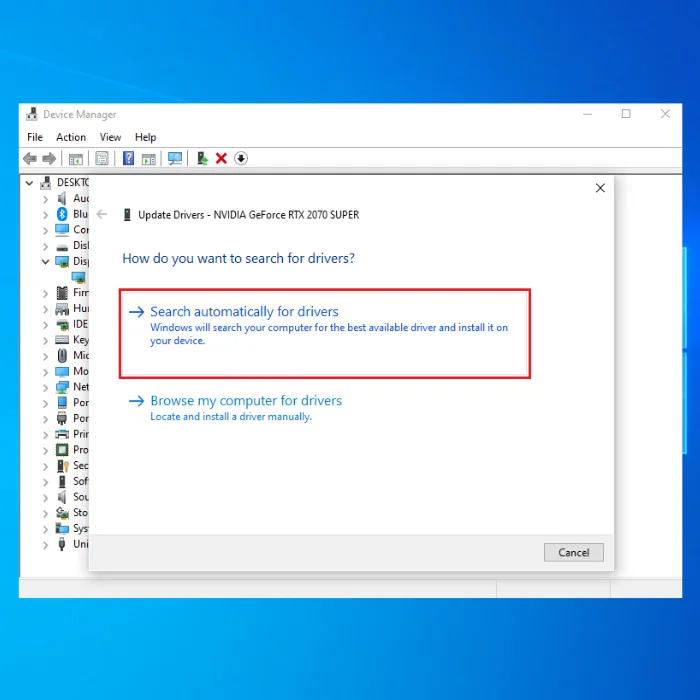
- In the next window, click “Search Automatically for Drivers” and wait for the download to complete and run the installation.
- Once the driver has been installed successfully, restart your computer and check if NVIDIA GeForce Experience is working correctly.
Fourth Method – Disable Windows Defender Temporarily
There are instances when Windows Defender would put harmless files in quarantine. These are what you call “false positive” files. If a file from GeForce Experience has been detected as a false positive, this may cause the program not to work correctly. To determine if Windows Defender is a problem, you should temporarily disable it.
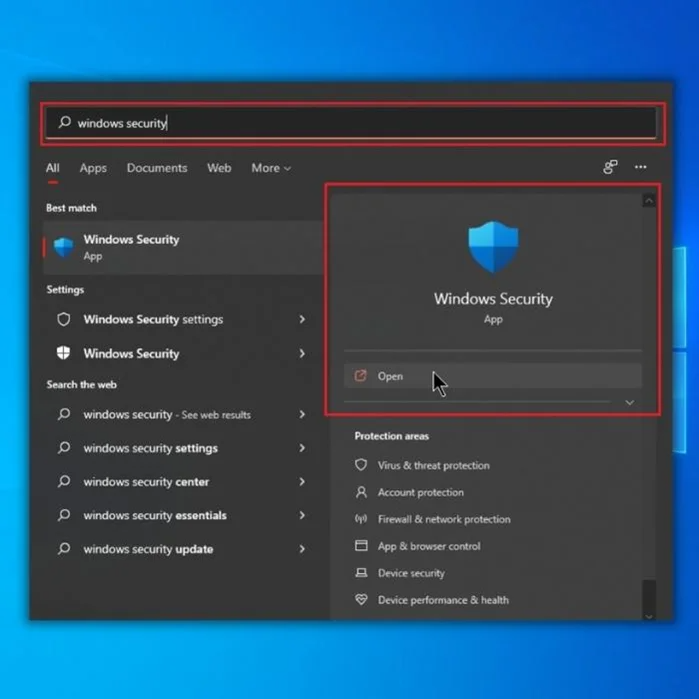
- Open Windows Defender by clicking on the “Windows button,” type “Windows Security,” and press “enter.”
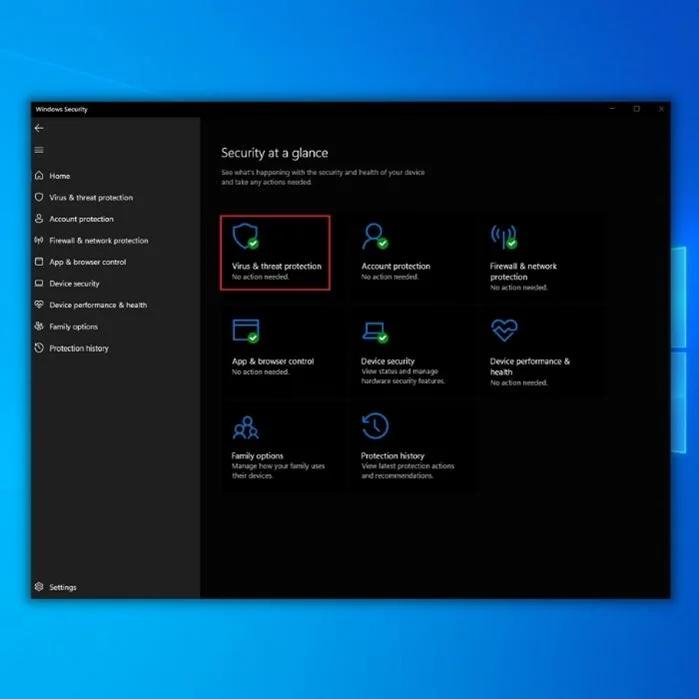
- Click on “Virus & Threat Protection” on the Windows Security homepage.
- Under Virus & Threat Protection Settings, click “Manage Settings” and disable the following options:
- Real-time Protection
- Cloud-delivered Protection
- Automatic Sample Submission
- Tamper Protection

- Once all the options have been disabled, open GeForce Experience and check if the issue has been fixed.
Note: If the issue has been fixed, you now need to put the GeForce Experience folder to the exclusions of Windows Defender
Optional Method – Exclude GeForce Experience from Windows Defender
- Open Windows Defender by clicking on the “Windows button,” type “Windows Security,” and press “enter.”
- Under the “Virus & Threat Protection Settings,” click on “Manage Settings.”
- Click on “Add or Remove Exclusions” under Exclusions

- Click on “add an exclusion” and select “Folder.” Choose the “NVIDIA Corporation” folder and click “select folder.”

- You can now enable Windows Defender and open GeForce Experience.
No matter your issues with the GeForce experience, there will always be a solution. If you are currently experiencing one, relax and follow one of our methods to enjoy the features of your graphics card.
Final Words
Frequently Asked Questions
How do I reinstall GeForce experience?
To reinstall GeForce Experience, you will need to uninstall the existing software and download and install the latest version from the NVIDIA website.