
Guide: HDMI Sound Not Working Windows 10?

There have been more than a few reported cases of HDMI audio not working, especially after upgrading the operating system to Windows 10. This article is specific to issues with HDMI sound, not more general sound not working on Windows 10 problems.
You’ve connected your HDMI monitor to a Windows 10 computer and get normal video output but no sound. Here are a few tips to try to fix your sound and enjoy it.

Common Reasons for No Sound Through HDMI Windows 10
HDMI sound issues are quite common in Windows 10, and it can be frustrating when you’re trying to enjoy your favorite media. In this section, we’ll discuss some of the most common reasons for no sound through HDMI on Windows 10 and help you understand what might be causing the problem.
- Incorrect Playback Device: One of the most common reasons for no sound through HDMI is that the wrong playback device is selected. Windows usually sets the default playback device automatically, but sometimes it might not switch to the HDMI output when you connect an HDMI cable. In this case, you need to manually set the HDMI output as the default playback device.
- Outdated or Incompatible Audio Drivers: Your computer’s audio drivers play a crucial role in transmitting sound through HDMI. If you have outdated or incompatible drivers, the sound might not work properly. Make sure to check for driver updates and install them to resolve this issue.
- Faulty HDMI Cable or Port: A damaged HDMI cable or port can also cause sound issues. Check if there are any visible damages to the cable and try using another HDMI cable or port to see if the problem persists.
- Disabled HDMI Audio: In some cases, HDMI audio might be disabled in the sound settings, leading to no sound output. To fix this, you can enable HDMI audio by adjusting the sound settings in Windows.
- Conflicting Audio Software: If you have multiple audio software programs installed on your computer, they might conflict with each other and cause issues with your HDMI audio output. Uninstall or disable any unnecessary audio software to resolve the problem.
- Incompatible Hardware: Lastly, there might be a compatibility issue between your computer and the HDMI device. Some older devices may not support HDMI audio, so make sure that both your computer and the HDMI device are compatible with each other.
In conclusion, there are various reasons why you might experience no sound through HDMI on Windows 10. The key is to identify the specific cause and follow the appropriate steps to resolve the issue. If you have tried all the solutions mentioned in this article and still can’t get the sound to work, consulting a technician or contacting the manufacturer’s support team might be necessary.
How to Repair Windows 10 HDMI Sound Problems
Fix #1: Use the Advanced System Repair Tool (Fortect)
Fortect is a robust program and one of the best System Repair solutions available for Windows PCs. It is thorough, dynamic, and intelligent and outputs detailed results in a very user-friendly way.
Follow the steps below to download and install it on your PC:
Please note that you might have to stop your anti-virus for this process to continue temporarily.
Step #1
Download and Install Fortect for free.
Step #2
Accept the license terms by checking the “I Accept the EULA and Privacy Policy” to continue.
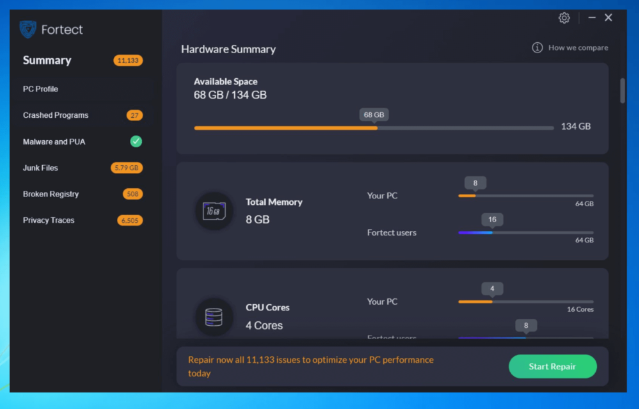
The tool checks for junk files, deep scans your PC for corrupt system files, and looks for damage caused by malware or viruses.
Step #3
You can view the details of the scan by expanding the “Details” tab.
Step #4
To set an action, expand the “Recommendation” tab to either choose “clean” or “ignore.”
Step #5
Click on “Clean Now” at the bottom of the page to begin the cleaning process.
Fix #2: Check All Hardware Devices
Before moving on to other options, check that all hardware devices work properly.
Step #1
Change the HDMI cable. Use another cable and see if the issue resolves itself.

Step #2
Change ports. If your computer has multiple HDMI output ports, try all the ports and see if any work.

Step #3
Check the monitor volume. Ensure the monitor’s speaker volume is up and not muted or turned down. Try connecting the monitor to another computer.

Fix #3: Configure the Default Audio Devices
Windows outputs sound from only one audio device at a time. It changes settings when new audio cables are connected or disconnected.
When an HDMI cable is connected, and there’s no sound, follow these steps to configure the correct audio output to make HDMI the default.
Step #1
After connecting the HDMI cable to both the computer and the output device, navigate to the taskbar.
Step #2
Right-click the volume icon and select “Playback Devices” or “Sounds.” The “Sound wizard” opens.

Step #3
Go to the “Playback” tab, select “Speakers and Headphones” or “Speaker/Headphone,” and choose “Set Default.”


Step #4
Right-click the output device connected to the HDMI cable and select “Show Disconnected Devices.” Ensure the HDMI cable is connected when configuring this.

Fix #4: Update Sound Drivers
Windows automatically updates drivers for you, but you should do it yourself once in a while. Follow these steps to update your sound drivers.
Step #1
Hold the “Windows key + X” and click “Device Manager.”
Step #2
Locate sound drivers and click it to “expand.”

Step #3
Right-click the highlighted driver and select “Update driver software” from the menu.

Step #4
Windows will search online for the necessary drivers and install them on your computer.
See Also: What to Do if Windows Search Isn’t Working in Windows 10
Step#5
Restart the computer and check if the HDMI sound works.

Fix #5: Windows Sound Troubleshooter
Windows troubleshooter is designed to diagnose computer problems quickly and automatically solve them. The troubleshooter doesn’t always fix everything, but it’s a great place to start.
Windows PC users can use the audio troubleshooter built into the Control Panel.
Step #1
Press the “Windows + R” keys to open the “Run” dialog box.
Step #2
Type “Control” and press “Enter.”

Step #3
Click “Troubleshooting.”

Step #4
On the window that opens, navigate to “Hardware and Sound” and click “Troubleshoot audio playback.”

Step #5
An administrator password is required to run this program. Type it when prompted.
Step #6
On the troubleshooter that opens, click “Next.” The troubleshooter will start checking the audio service status.
Step #7
Choose the device you want to troubleshoot and click “Next.”

Step #8
Make any changes the troubleshooter suggests, and follow the on-screen instructions to completion.
Final Thoughts
We have gone through the most common causes of HDMI sound not working in Windows 10. It is important to troubleshoot the issue and identify the specific cause before attempting a solution. If you have followed the steps outlined in this article and cannot get your HDMI sound working, you may need to consult a technician for further assistance.

- Your machine is currently running Windows 10
- Fortect is compatible with your operating system.
Recommended: To repair Windows Errors, use this software package; Fortect System Repair. This repair tool has been proven to identify and fix these errors and other Windows problems with very high efficiency.

- 100% safe as confirmed by Norton.
- Only your system and hardware are evaluated.
Frequently Asked Questions
Windows 10 how to restart HDMI audio device?
To restart the HDMI audio device on Windows 10, follow these steps:
Right-click the speaker icon in the taskbar, and select “Open Sound settings.”
In the Sound settings window, click “Manage sound devices” under Output.
Find your HDMI audio device in the list, click on it, and then click “Disable.”
Wait for a few seconds, then click “Enable” to restart the HDMI audio device.
how to update high definition audio controller?
To update the High Definition Audio Controller:
Press ‘Windows key + X’ and select ‘Device Manager.’
Locate ‘Sound, video, and game controllers’ and click to expand the category.
Right-click your ‘High Definition Audio Controller’ and select ‘Update driver.’
Choose ‘Search automatically for updated driver software.’
Follow the prompts and restart your computer if prompted.
Windows will search for the latest driver and install it.
How to fix HDMI audio output in Windows 10?
Right-click on the volume icon in the taskbar and select “Playback devices.”
In the Sound settings window, look for your HDMI device in the list and set it as the default device by right-clicking on it and selecting “Set as Default Device.”
If your HDMI device is not visible, right-click on an empty space in the list and select “Show Disabled Devices” and “Show Disconnected Devices.” Then, repeat step 2.
Click “Apply” and then “OK” to save your settings.
If the issue persists, update your graphics driver from the manufacturer’s website or through the Device Manager by right-clicking on the graphics device, selecting “Update driver,” and following the prompts.
Restart your computer and check if the HDMI audio output is now working.
How to update audio drivers Windows 10?
To update audio drivers on Windows 10:
Right-click the “Start” button and select “Device Manager.”
Expand the “Sound, video and game controllers” category.
Right-click your audio device and choose “Update driver.”
Select “Search automatically for updated driver software.”
Windows will search for and install the latest audio driver. Restart your computer after the process is complete.
How do I reset my HDMI driver Windows 10?
To reset your HDMI driver in Windows 10, follow these steps:
Right-click on the Start button and select Device Manager.
Expand the “Display adapters” category by clicking the arrow beside it.
Right-click on your HDMI driver (usually listed as your graphics card model) and select “Uninstall device.”
Check the box for “Delete the driver software for this device” if it appears and click “Uninstall.”
Restart your computer.
Windows 10 will automatically reinstall the HDMI driver upon restart, but you can also visit your graphics card manufacturer’s website to download the latest driver if needed.
Why is my HDMI audio not working on my computer?
For your HDMI audio to work on your computer, you must first ensure that the HDMI device is selected as the default playback device. To fix HDMI audio, you must go into your computer’s sound settings and select the HDMI device as the default digital output device. Once you select HDMI as the default digital output device, your HDMI audio should work on your computer.
how many audio channels can the high-definition multimedia interface (HDMI) support?
HDMI is a digital connection that supports up to 8 channels, including 5.1 surround sound, 7.1 surround sound, and Dolby Atmos. The number of channels depends on the type of HDMI cable used and the connected device.