
Fixing the Windows Update Error 0x80070424

Soon after Microsoft released a new version of Windows, the company’s forums were overwhelmed with complaints. Many consumers say they can’t install Windows updates because of numerous error codes. This error can affect any version, from Windows XP to later versions. In this post, we’ll go over the error 0x80070424 and how to solve it permanently.
Recommended: To easily install drivers automatically, use the tool below.
Causes of the Windows Update Error 0x80070424
The Windows update error 0x80070424 indicates that your machine failed to install the most recent Windows updates. These types of Windows Update errors are due to a range of reasons. For example, whenever you are missing critical windows update services system files or inactive update services.
In addition, other reasons could be an unreliable Internet connection, bandwidth difficulties, or disk errors. It’s also possible that your antivirus is blocking the Windows update files inadvertently or that the Windows Update services have unexpectedly stopped, which causes error 0x80070424.
- See Also: Enable Remote Desktop Windows 10
Windows Update Error 0x80070424 can also affect the Windows Store. You’ll likely see an error like
“Error encountered
There were some problems installing updates, but we’ll try again later. If you keep seeing this and want to search the web or contact support for information, this may help (0x80070424)“
In addition, the same error may appear when you try to install a standalone Windows Update package (.msu). The entire error message is mentioned below:
- Windows Update Standalone Installer
- The installer encountered an error: 0x80070424
- The specified service does not exist as an installed service.
Users who have experienced this error are unable to continue with their updates, and some are also unable to access the Microsoft Store or other Windows services. Restarting your PC may help, but check out the fixes below if the problem persists. As you’ll see below, we’ve listed the most effective ways to resolve the Windows update error 0x80070424.
Troubleshooting Methods to Fix the Windows update error 0x80070424
First Method – Run Windows Update Troubleshooter
Windows offers a built-in utility that checks the system and resolves any problems. This utility scans and fixes issues that be causing the error. Through Windows Update Troubleshooter, you may be able to determine the issues with Windows update Services such as 0x80070424.
- Hold down the “Windows” key and press the letter “R,” type in “control update” in the run command window, and hit “enter.”

- In the next window, click the Troubleshoot tab and click “Additional Troubleshooters.”

- In the Additional Troubleshooters, click on “Windows Update” and “Run the Troubleshooter” to start the Windows Update Troubleshooter.

- Wait for the Windows update troubleshooter to complete and for any instructions recommended to fix the issue. Once all errors have been corrected, check if you would still encounter any Windows update services issues.
Restart your PC to see if this method can fix Windows update errors.
Recommended: Fortect System Repair Tool – Fix Errors & Speed Up Windows Automatically
Second Method – Perform a Windows System File Checker (SFC) and DISM Scan
The Windows SFC is another essential tool for scanning and repairing damaged or missing Windows files which can cause error code 0x80070424. These are reliable tools that you can use when trying to fix Windows update errors.
To run a scan using Windows SFC, follow these steps:
- Hold down the “Windows” key and press “R,” and type “cmd” in the run command line. Hold the “ctrl and shift” keys together and press enter. Click “OK” on the next window to grant administrator permissions.

- Type “sfc /scannow” in the command window and press enter. Wait for the SFC to complete the scan and restart the computer. Once done, run the Windows Update tool to check if the issue has been fixed.

- Once the scan is complete, make sure to restart your computer.
If you experience the same error, you can try utilizing another tool, the DISM Scan.
Steps for Performing a Deployment Image Servicing and Management (DISM) Scan
- Hold down the “Windows” key and press “R,” and type “cmd” in the run command line. Hold the “ctrl and shift” keys together and press enter. Click “OK” on the next window to grant administrator permissions.
- The command window will open, type in “DISM.exe /Online /Cleanup-image /Restorehealth” and then hit “enter.”

- The DISM utility will start scanning and fixing any errors. However, if the DISM cannot acquire files from the internet, try to use the installation DVD or bootable USB drive. Insert the media and type the following commands: DISM.exe/Online /Cleanup-Image /RestoreHealth /Source:C:RepairSourceWindows /LimitAccess
Note: Replace “C:RepairSourceWindows” with the path of your media device.
Rerun the Windows update to check if the 0x80070424 error has been fixed.
Third Method – Reset Windows Update Components
The Microsoft Windows 10 operating system isn’t without flaws. There may be times when the Operating System’s features do not perform correctly. Simply resetting the Windows Updates Components is the most straightforward approach to solving this issue. If a Windows Update fails, you may want to try restarting the Windows Update services in charge of performing the update.
- Hold down the “Windows” key and press the letter “R,” and type in “cmd” in the command line. Press down on the “ctrl and shift” keys simultaneously and press “enter.” Select “OK” to grant administrator permission on the following prompt.

- In the command prompt window, type in the following commands individually and press enter after entering each specified service.
net stop wuauserv
net stop cryptSvc
net stop bits
net stop msiserver
ren C:\\Windows\\SoftwareDistribution SoftwareDistribution.old
ren C:\\Windows\\System32\\catroot2 Catroot2.old

Note: Both of the last two commands are only used to rename the Catroot2 and SoftwareDistribution folders
- Now that you have stopped the Windows Update services turn it back on to refresh it. Type in the following command in the command prompt window.

- After completing the steps mentioned above, restart your computer and run the Windows Update tool to determine if the 0x80070424 error has been fixed.
Fourth Method – Reset the Windows Update Services Using a Batch Script
To complete this method, you must use a new Notepad file and paste the following commands to create the script. Next, click on Save As, and name it Windows.bat.
net stop bits
net stop wuauserv
net stop appidsvc
net stop cryptsvc
Del “%ALLUSERSPROFILE%\Application Data\Microsoft\Network\Downloader\*.*”
rmdir %systemroot%\SoftwareDistribution /S /Q
rmdir %systemroot%\system32\catroot2 /S /Q
sc.exe sdset bits D:(A;;CCLCSWRPWPDTLOCRRC;;;SY)(A;;CCDCLCSWRPWPDTLOCRSDRCWDWO;;;BA)(A;;CCLCSWLOCRRC;;;AU)(A;;CCLCSWRPWPDTLOCRRC;;;PU)
sc.exe sdset wuauserv D:(A;;CCLCSWRPWPDTLOCRRC;;;SY)(A;;CCDCLCSWRPWPDTLOCRSDRCWDWO;;;BA)(A;;CCLCSWLOCRRC;;;AU)(A;;CCLCSWRPWPDTLOCRRC;;;PU)
cd /d %windir%\system32
regsvr32.exe /s atl.dll
regsvr32.exe /s urlmon.dll
regsvr32.exe /s mshtml.dll
regsvr32.exe /s shdocvw.dll
regsvr32.exe /s browseui.dll
regsvr32.exe /s jscript.dll
regsvr32.exe /s vbscript.dll
regsvr32.exe /s scrrun.dll
regsvr32.exe /s msxml.dll
regsvr32.exe /s msxml3.dll
regsvr32.exe /s msxml6.dll
regsvr32.exe /s actxprxy.dll
regsvr32.exe /s softpub.dll
regsvr32.exe /s wintrust.dll
regsvr32.exe /s dssenh.dll
regsvr32.exe /s rsaenh.dll
regsvr32.exe /s gpkcsp.dll
regsvr32.exe /s sccbase.dll
regsvr32.exe /s slbcsp.dll
regsvr32.exe /s cryptdlg.dll
regsvr32.exe /s oleaut32.dll
regsvr32.exe /s ole32.dll
regsvr32.exe /s shell32.dll
regsvr32.exe /s initpki.dll
regsvr32.exe /s wuapi.dll
regsvr32.exe /s wuaueng.dll
regsvr32.exe /s wuaueng1.dll
regsvr32.exe /s wucltui.dll
regsvr32.exe /s wups.dll
regsvr32.exe /s wups2.dll
regsvr32.exe /s wuweb.dll
regsvr32.exe /s qmgr.dll
regsvr32.exe /s qmgrprxy.dll
regsvr32.exe /s wucltux.dll
regsvr32.exe /s muweb.dll
regsvr32.exe /s wuwebv.dll
netsh winsock reset
netsh winsock reset proxy
net start bits
net start wuauserv
net start appidsvc
net start cryptsvc
Finally, right-click on the Windows.bat file and select Run as administrator. Your PC will start running the script and restart it. See if you can do the updates again.
Fifth Method – Enable/Restart the Background Intelligent Transfer services (BITS)
Background Intelligent Transfer Service (BITS) is a crucial Windows 10 feature required for any Windows Update to work. When the Windows Update Service fails, BITS permits your computer to display an error message, and no further action is taken.
A problem with BITS sometimes causes the Windows update error 0x80070424. To permanently fix the error, you should restart your BITS.
- Press the “Windows + R” key on your keyboard to open the dialog box.
- Type “services.msc” in the dialog box and press Enter.

- Locate the Background Intelligent Transfer Service and double-click on it to open its properties.

- Next, verify that the Background Intelligent Transfer Service (BITS) is operating correctly. If you find out it is not working right, click on the Start button.

- Proceed to the recovery tab and ensure that the first and second failures are set to Restart the specified service.
- Finally, confirm the selection and check if the updates are working fine.
Sixth Method – Manually Start/Enable the Windows Update Service
The next step will tell you whether or not the Windows Update Service is active. If you disable this service, Windows 10 will not begin the update.
- Hold down the “Windows” key and press the letter “R,” and type in “services.msc” in the run command window.
- In the “Services” window, look for the “Windows Update” service, right-click and click on “Start.”

- To make sure that the “Windows Update” service runs automatically, right-click on the “Windows Update” service once again and click “Properties.”

- In the next window, click on “Startup Type,” select “Automatic,” and then click “OK.” Once done, restart Windows and verify if these steps fixed the issue.

This step is crucial as it will ensure that all the required services are enabled for the Windows update to work properly.
Seventh Method – Download and Install Updates Manually
If you cannot get the Windows Update tool to download new updates automatically, you force the update process by manually downloading and installing the Windows update standalone installer. If you are trying to install more than one update, you can also use Microsoft’s Update Catalog website and manually enter the KB number of the update.
Alternatively, you can utilize the Windows Update Assistant if you need to install a feature update. Once you have the correct system file, tit the Update Now button and follow the on-screen instructions to complete the installation process.
Here are the steps on how you can do that.
- Check out the System Type your computer runs on by holding down “Windows Key + Pause Break.” This will bring up your Operating System type.

- Find out what Windows Update standalone installer you need to download and install. Open our Windows Update tool and copy the codes of the updates that show the error message. Please see the example below:

- When you have secured the code for the pending Windows Update, go to the Microsoft Update catalog here. Once you are on the website, type in the code for the standalone installer in the search bar, and download and install the update manually.

- Find the file that is appropriate for your system. Take note that x64-based systems mean it is for 64-bit OS, and x86-based systems are for 32-bit OS.
Eighth Method – Disable the Windows Security Temporarily
If the solutions above don’t work, you can try turning off Microsoft Defender/Security. This program, at times, may block incoming Windows update files. As a result, Windows Update Error 0x80070424 will appear.
- Access your Windows Defender by clicking on the Windows button and typing “Windows Security.” Press “enter” on your keyboard or click “open” below the Windows Security icon.

- On the Windows Security homepage, click “Virus & Threat Protection.”

- Once you get to the next window, click on “Manage Settings” under “Virus & Threat Protection Settings” and turn off the following options:
- Real-time Protection
- Cloud-delivered Protection
- Automatic Sample Submission
- Tamper Protection

Now that Microsoft Security has been disabled, check for new update packages and verify if the new Windows update files are available.
Ninth Method – Make Sure Your Time and Date Settings are Correct
The wrong configuration of the system’s time and date is one of the simplest and most overlooked causes of Windows Update Error 0x80070424. Make sure your computer’s date and time settings are correct by following these steps:
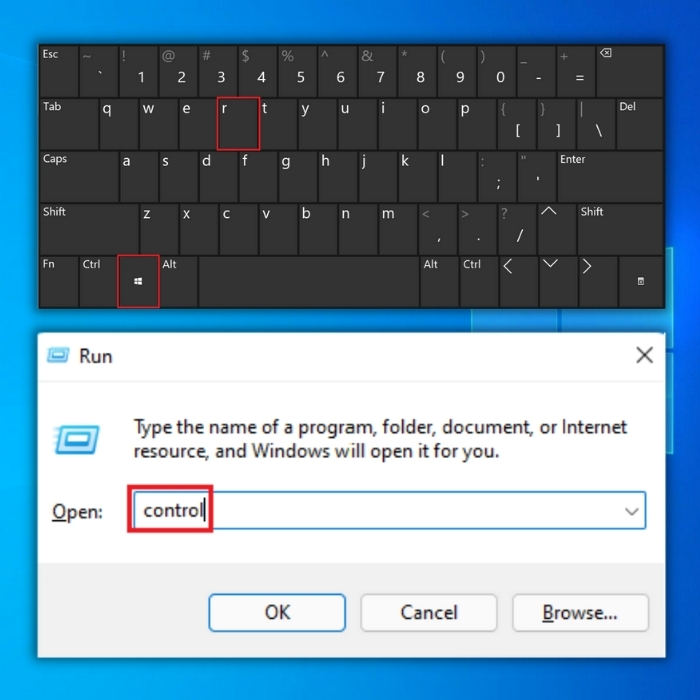
- Hold down the “Windows” key and press the letter “R,” and type in “control” in the run command window.
- In the Control Panel, click on “Date and Time.” In the Date and Time window, click “Internet Time.”

- In the next window, click on “Change Settings,” put a checkmark on “Synchronize with an Internet time server,” and type in “time.windows.com.” Click “Update Now” and “OK.” Restart your computer and run the Windows Update tool to confirm if the issue has been fixed.


- It is critical to ensure that your system is up to date to ensure that your computer functions smoothly. The above methods are the most effective for completely resolving Windows Update Error 0x80070424.
Tenth Method – Fix Error Code 0x80070424 In Windows Update And Store
If you are using Windows 10, you can try to fix the error by updating the Windows registry keys and reg file. These Windows registry keys are container files that act just like a folder. To complete this process follow the steps below:
- Download the w10-wuauserv.zip zip file, unzip it, and extract the contents to a folder
- Run the file w10-wuauserv.reg and click Yes when asked for confirmation. The registry file restores the Windows Update service registry key (wuauserv) located in the following registry branch:
HKEY_LOCAL_MACHINE\SYSTEM\CurrentControlSet\Services\wuauserv
After running the registry file, restart Windows.
When you open the Services MMC (services.msc) after restarting Windows, the Windows Update service should be listed, and the status should show running.
Wrap Up
The best thing to do if you get the Windows Update problem 0x80070424 while using the Windows Update Tool or installing a new program is to relax and not panic. This minor problem can be fixed using the above solutions we’ve offered.

- Your machine is currently running Windows 10
- Fortect is compatible with your operating system.
Recommended: To repair Windows Errors, use this software package; Fortect System Repair. This repair tool has been proven to identify and fix these errors and other Windows problems with very high efficiency.

- 100% safe as confirmed by Norton.
- Only your system and hardware are evaluated.