![[Guide] Lowering Desktop Window Manager CPU Usage](https://cdn.techloris.com/app/uploads/2023/03/How-to-Lower-Desktop-Window-Manager-High-CPU.png)
[Guide] Lowering Desktop Window Manager CPU Usage

Why Is Desktop Windows Manager Taking up So Much Gpu?
The Desktop Window Manager (DWM) handles the graphical user interface (GUI) in Windows operating systems. The DWM uses the GPU to render and display graphic elements such as windows, menus, and visual effects like transparent windows and animations.
If the DWM is taking up a lot of GPU resources, there could be several reasons why:
1. High-resolution displays: If you have a high-resolution display, such as a 4K monitor, the DWM will need to work harder to render the graphics at that resolution, which can use more GPU resources.
2. Multiple displays: If multiple displays are connected to your computer, the DWM will need to render graphics for each display, which can use more GPU resources.
3. Visual effects: The DWM can also use GPU resources like transparency and animations to display visual effects. If you have many windows open or use many visual effects, this can use more GPU resources.
4. Outdated graphics drivers: If your graphics drivers are outdated, the DWM may not be able to use the GPU resources efficiently, which can cause it to use more resources than necessary.
5. Malware: Malware on your computer may be using the DWM to run malicious processes, which can cause it to use more GPU resources than usual.
How to Fix Dwm Process High CPU Usage
Update Windows
Fortunately, updating Windows can often resolve the DWM high GPU usage problem. When you update your Windows operating system, you install the latest security patches, bug fixes, and performance improvements. These updates can include fixes for known issues, including the DWM high GPU usage issue.
Additionally, updating Windows can ensure that your system runs with the latest device drivers and software, improving overall system stability and performance. Device drivers are software that enables hardware devices to communicate with the operating system, and keeping them up to date can help ensure optimal performance.
1. Press Win + I to open the Windows Settings.
2. Click on Update & Security > Windows update.

3. Click the Check for updates button.

4. Download and install the latest Windows updates.
5. Restart your computer.
Update, Rollback, or Reinstall GPUDriver
High CPU usage is a common problem caused by several factors, including software issues, malware infections, or hardware problems. However, outdated or corrupted graphics drivers can also be a culprit.
High CPU usage caused by graphics drivers is often due to the driver using too much CPU power to carry out a task or failing to use the graphics card’s full processing power efficiently. High CPU usage can sometimes cause graphics performance issues, such as stuttering, lag, or low frame rates.
Fortunately, updating, uninstalling, or rollbacking graphics drivers can often fix high CPU usage problems caused by graphics drivers. Updating drivers to the latest version can provide bug fixes, performance improvements, and better compatibility with your system’s hardware and software. Uninstalling or rollbacking drivers to an earlier version can help resolve compatibility issues or problems caused by a recent driver update.
To Update the Driver:
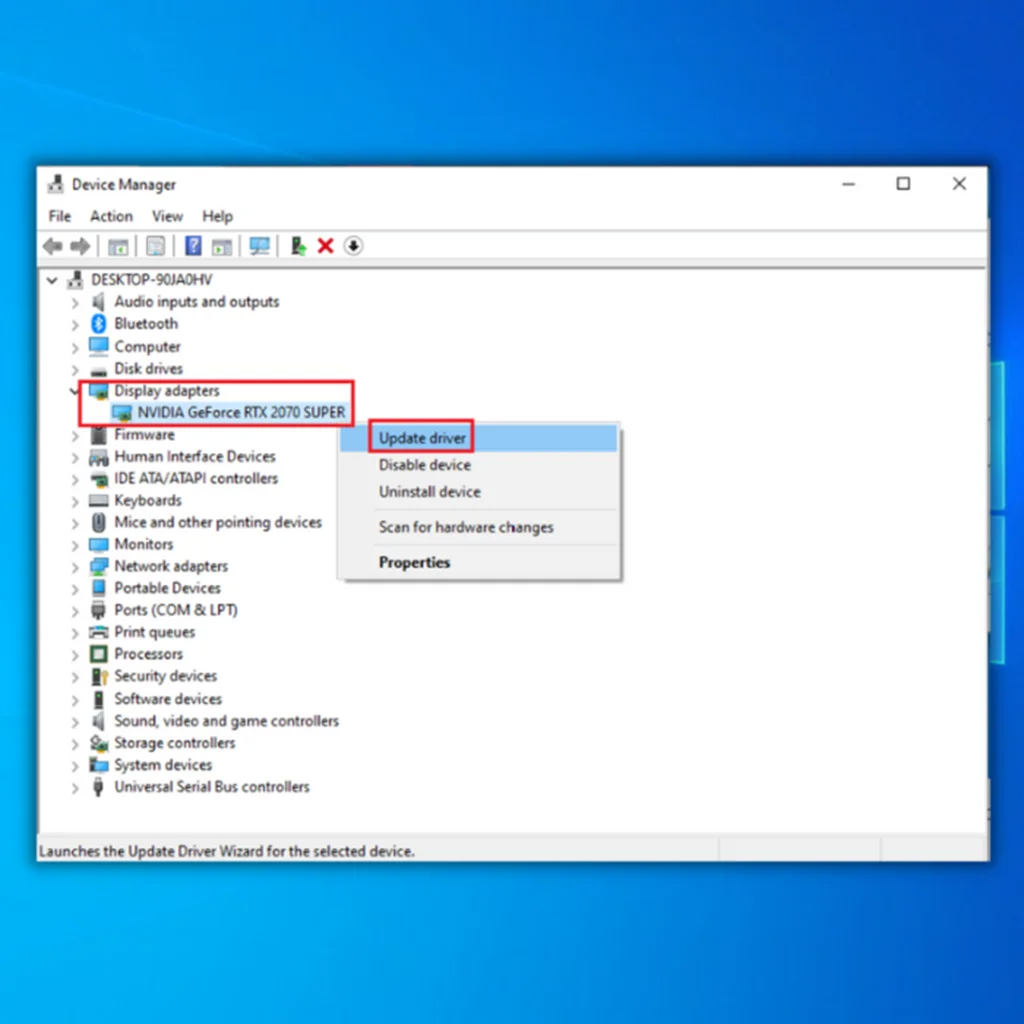
1. Press Win + X and select Device Manager.

2. Click on Display adapters to expand it, right-click on the graphics driver, and select Update driver.
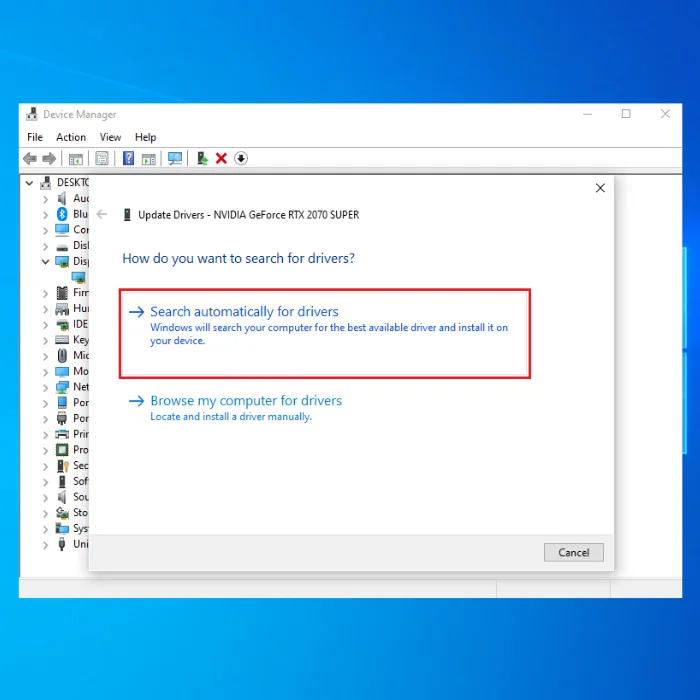
3. Select Search automatically for drivers. This will automatically search and update display drivers.
To Uninstall Display Driver:
1. Press Win + X and select Device Manager.
2. Click on Display adapters to expand it, right-click on the graphics driver, and select Uninstall device.

3. Check the Delete the driver software for this device box and click the Uninstall button.

4. Restart your computer, and Windows will automatically install the latest driver.
Rollback Driver:
1. Press Win + X and select Device Manager.
2. Click on Display adapters to expand it, right-click on the graphics driver, and select Properties.
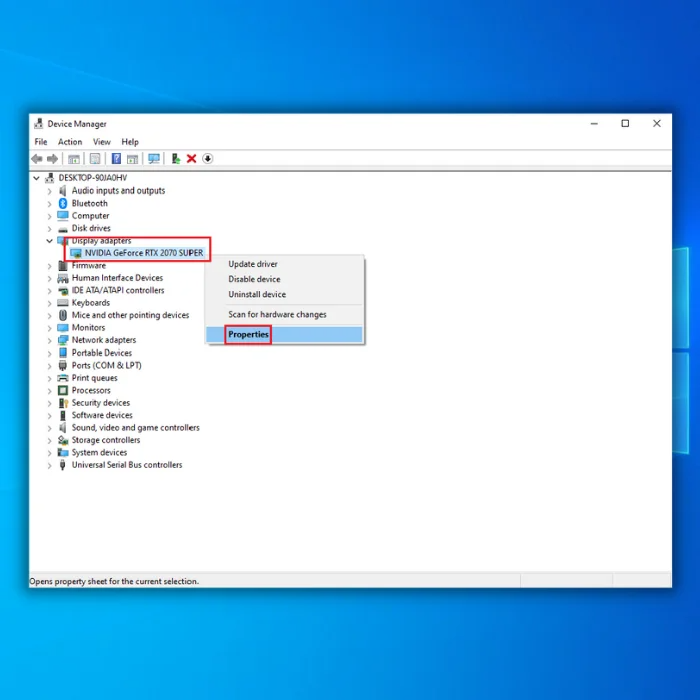
3. Go to the Driver tab in the Properties window and click on Roll Back Driver.

Run SFC, DISM, and CHKDSK
These tools can help ensure that your computer’s system files and hard drive are in good condition, which can help reduce high GPU usage and improve overall system performance. In this way, running SFC, DISM, and CHKDSK can effectively diagnose and resolve high GPU usage issues on your computer.
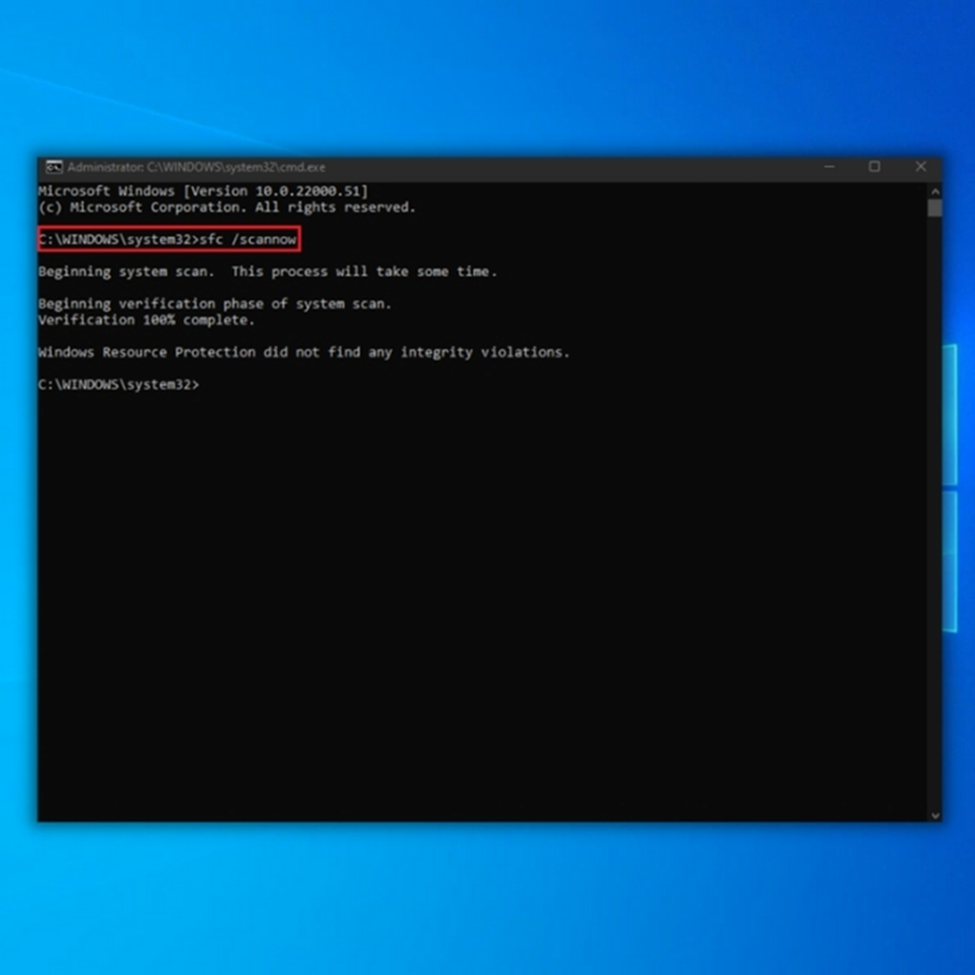
1. Press the Windows key to open the start menu, and type cmd.
2. Open the Command prompt as an administrator.

2. Type the following commands and press Enter after each command line:
SFC /scannow
DISM /Online /Cleanup-Image /RestoreHealth

chkdsk /f
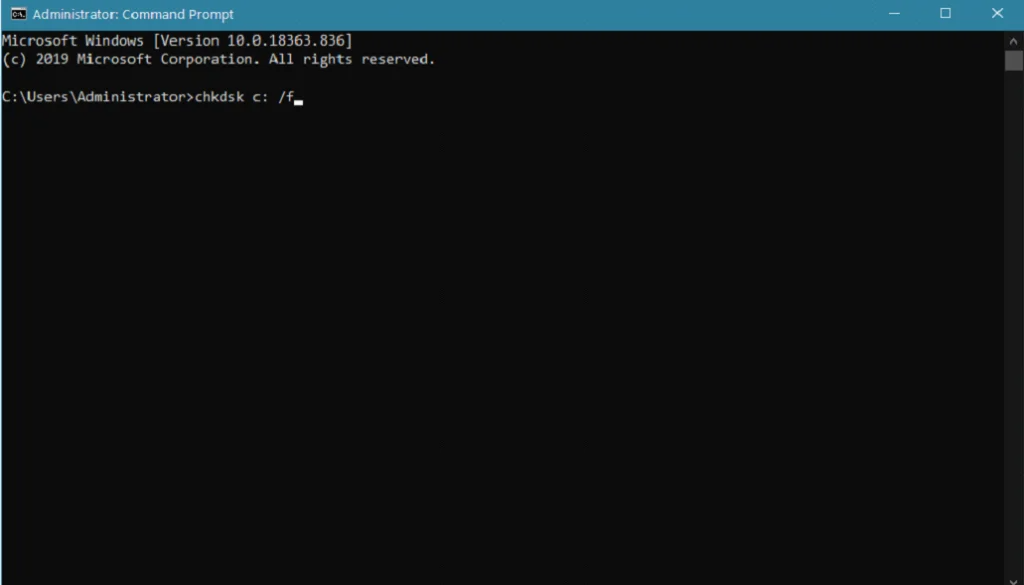
Enter Y to schedule the scan.
Change the Desktop Window Manager Process Status
If you are experiencing high GPU usage, changing the status of the DWM can help fix the high GPU usage problem and improve system performance. By default, the DWM is set to “Automatic” mode, which allows Windows to manage the DWM settings automatically.
However, changing the DWM status to Normal or Manual can reduce GPU usage and improve system performance, especially if you run resource-intensive applications or games requiring more GPU resources.
1. Press Win + X and select Task Manager.

2. In the Processes tab, locate and right-click on Desktop Window Manager or crss.exe
3. Select Efficiency Mode.

4. Restart your computer.
Run System Maintenance
Running the System Maintenance tool in Windows can help fix the Desktop Window Manager High GPU Usage problem. The System Maintenance tool is a built-in feature in Windows that automatically performs various system maintenance tasks, including disk cleanup, disk error checking, and updating drivers.
By running the System Maintenance tool, you can optimize your system’s performance and fix any issues causing the DWM to use too much GPU.
1. Open the Control Panel.

2. Click on Troubleshooting and click View All.

3. Select System Maintenance > Next button.
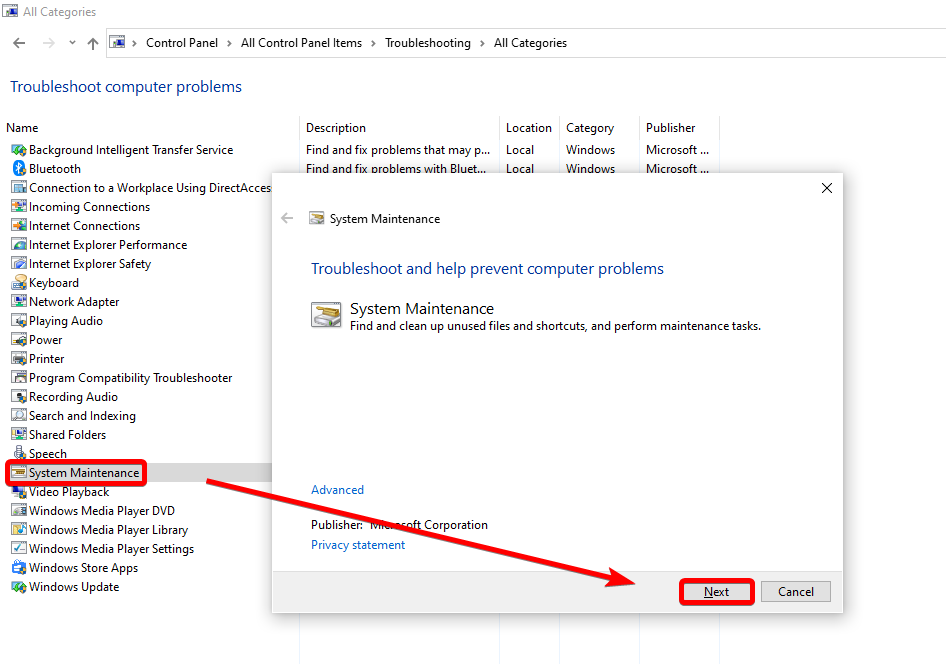
4. Click on Try troubleshooting as an administrator.

5. After troubleshooting, click the close button and restart your computer.
Change the Display Settings
1. Pres Win + I to open the Windows Settings app.
2. Click on System > Display.
3. Click on Advanced scaling settings.
4. Toggle off Let Windows try to fix apps so they’re not blurry.

Disable GPU Hardware Scheduling
Disabling GPU hardware scheduling can help fix the Desktop Window Manager’s High GPU Usage problem. GPU hardware scheduling is a feature introduced in Windows 10 version 2004 that allows the graphics card to manage its memory allocation and task scheduling, potentially improving system performance.
However, this feature can also cause high GPU usage and performance issues on some systems. By disabling GPU hardware scheduling, you can allow the operating system to manage the memory allocation and task scheduling for the graphics card, potentially reducing GPU usage and improving system performance.
1. Press Win + I to open Windows Settings.
2. Click on System > Display > Graphics.

Alternatively, Right-click on your desktop and select Display settings.

3. Click on Change default graphics settings.

4. Toggle off Hardware-accelerated GPU scheduling and restart your computer.

Change Global NVIDIA Settings (Only for NVIDIA Hardware)
1. Open the Start menu and type NVIDIA.
2. Open NVIDIA Control Panel.

3. Click on Manage 3D settings.
4. Click the Preferred graphics processor drop-down menu and select the NVIDIA Processor.

5. Under the Settings section, click on Power management mode.
6. Change the settings to Prefer maximum performance option.
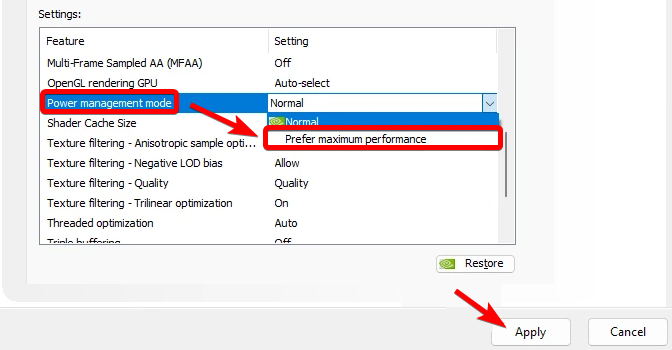
7. Click the Apply button to save changes, then restart your computer.
Change Priority for the DWM process
1. Press Win + X and select Task Manager.
2. Go to the Details tab, locate and right-click the dwm.exe
3. Click Set priority, then select Normal.

4. Click the Change priority button to confirm.
Configure the Visual Effects
1. Press Win + R to open the Run box.
2. Type sysdm.cpl and press Enter.

3. Go to the Advanced tab, under the Performance section, and click on Settings.

4. Select Adjust for the best performance option in the Performance Options window.

5. Click Apply and OK buttons to save.
Disable Hardware Acceleration
1. Press Win + R to open the Run box.
2. Type regedit and hit Enter.
3. Navigate to this path: Computer\HKEY_CURRENT_USER\Software\Microsoft\Avalon.Graphics
4. Right-click on the blank right pane and select DWORD (32-bit) Value to create a new value.
5. Name it DisableHWAcceleration.
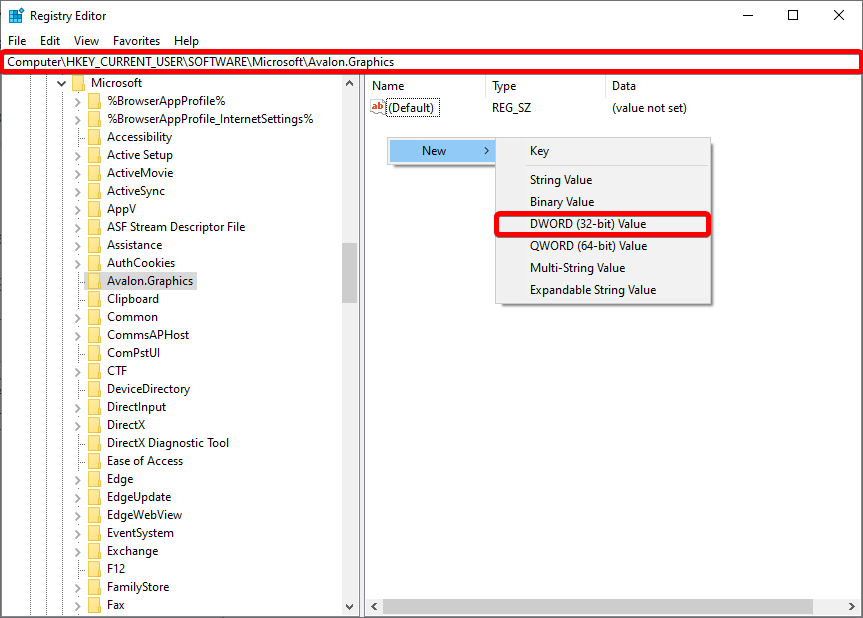
6. Double-click on DisableHWAcceleration and set the Value data to 1.
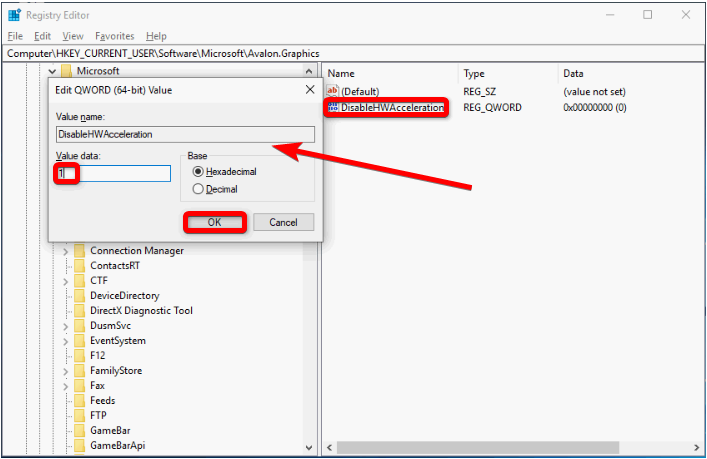
7. Click the OK button and close the Registry Editor.
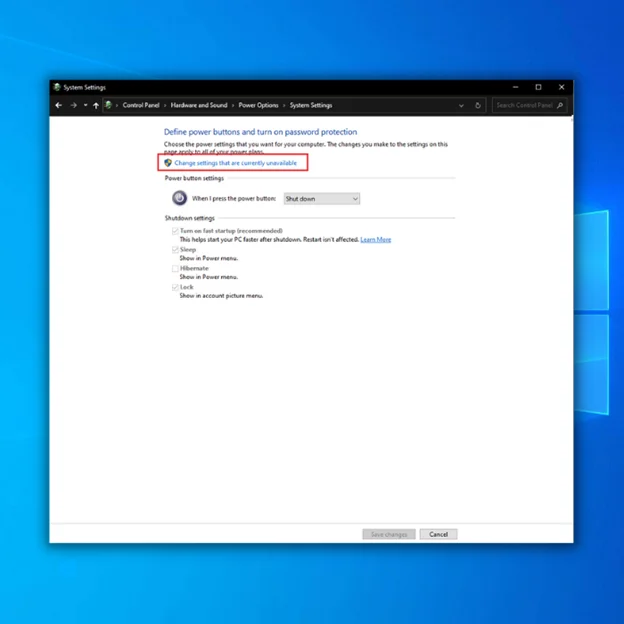
Disable Fast Startup
1. Open the Control Panel and select System and security

2. Select Change what power buttons Do option under the Power options section.

3. Click on Change settings that are currently unavailable to enable Shutdown settings.
Run the Hardware and Device Troubleshooter
1. Press Win + R, type in msdt.exe -id DeviceDiagnostic and click OK.

2. Click the Next button.
3. Click Apply this fix.
Scan For Viruses
1. Open the Start menu and type security.
2. Select and open Windows Security.
3. Go to Virus & Protection tab and click on Scan options.

4. Select the Full scan option and click the Scan now button.

Change Personalization Settings
1. Open Windows Settings.
2. Click on Personalization > Colors.
3. Toggle off the Transparency effects slider.

Roll Back to a System Restore Point
1. Open the Control Panel and select Recovery.
2. Click Open System Restore.

3. Select a different restore point, then click Next.

4. Select a system restore point from the list and click Next.

5. Click the Finish button to confirm and start the restore process.
Reset Your PC
1. Open Settings. Select Update & Security > Recovery.
2. Under Reset this PC, click the Get Started button.

Lowering Desktop Window Manager CPU Usage
In this comprehensive guide, we have explored various methods to reduce the CPU usage of the Desktop Window Manager (DWM) and enhance the performance of your system. Following the step-by-step instructions, you can optimize DWM’s resource utilization and minimize its impact on your CPU. From adjusting visual effects and disabling unnecessary features to updating graphics drivers and adjusting power settings, we have covered a range of effective techniques to lower DWM’s CPU usage.
Implementing these solutions can result in smoother multitasking, improved system responsiveness, and reduced strain on your CPU, leading to a better computing experience. Remember to tailor these methods to your specific system configuration and experiment with different settings to find the optimal balance between visual aesthetics and CPU performance. With the help of this guide, you can regain control over your system’s CPU usage and enjoy a more efficient and seamless computing experience.