![[Fixed] Windows 10 Audio Not Working While in Game](https://cdn.techloris.com/app/uploads/2023/04/Windows-10-Audio-Not-Working-While-in-Game.png)
[Fixed] Windows 10 Audio Not Working While in Game

Are you an avid gamer struggling with sound issues on your Windows 10 PC while playing your favorite games? Fear not; we’ve covered you with some simple solutions to fix this audio problem. We’ll guide you through all the steps so you can get back to playing games with full-range speakers and amazing sound effects in no time!
What Causes This Error?
- Outdated Audio or Sound Driver: If your audio drivers are outdated, they can cause sound problems while playing games. It’s important to update your audio drivers to ensure optimal performance regularly. You can update your audio driver through the device manager or automatically download and install the latest version from the manufacturer’s website.
- Incorrect Speaker Settings or Sound Enhancement Settings: Sometimes, the issue could be as simple as having incorrect speaker settings or sound enhancement settings. Ensure that your default audio device is set to the correct output device, and check that sound enhancement is turned off.
- Incompatible Hardware: Ensure you have compatible hardware with your Windows 10 operating system and that your game controllers function correctly.
- Corrupt Game Files: Corrupt game files can also cause sound problems while playing games. Verify the integrity of the game cache in the game’s properties to ensure that there are no corrupted files.
- Wrong User Accounts: If you’re not using the correct user account, it can cause sound problems while playing games. Ensure you’re logged in to the correct user account with administrator privileges.
- System File Issues: Issues with system files can also cause sound problems while playing games. Run the system file checker to check for any corrupted system files and repair them.
13 Ways to Fix No Sound in Games Windows 10
Method 1. Check Cable and Volumes
To troubleshoot sound issues with your external audio devices, such as headphones or speakers, it’s worth checking whether the cable connecting them is broken. You can also try plugging the devices into another computer to see if they work properly. If the issue persists, it may be due to a faulty cable.
It is also important to ensure the audio device isn’t muted, which can cause sound problems. Double-check that the speaker or headphone hasn’t been muted accidentally.
Method 2. Use the Audio Troubleshooter
- Open the Settings app.
2. Click Update & Security, then select Troubleshoot from the left pane.
3. Hover over to the right and click on Additional Troubleshooters.

4. Find Playing Audio, and click on it to select it.

5. Click on Run the troubleshooter > follow the on-screen instructions.
6. Restart your computer once the troubleshooter has completed its job.
Method 3. Configure Sound Control Panel
- To access the Sound dialogue box, press the Windows key and R to open the run command box. Type “mmsys.cpl” and press enter.
- In the Sound dialogue box, click on the Playback tab.
- Hover over an empty area and perform a right-click. Ensure that both “Show Disabled Devices” and “Show Connected Devices” are checked. If not, checkmark both options to display all disabled and connected devices.
- Select your audio device, right-click on it, and choose “Disable” from the menu. This will gray out the device.
- Right-click on the device again and select “Enable” from the menu. Click “OK” to save the changes and exit.
Alternatively,
- Right-click the speaker icon in the Taskbar and choose Open sound settings from the menu.
- Scroll down and select Sound Control Panel.
- Hover your mouse on space and right-click. Make sure both Show Disabled Devices and Show Disconnected Devices are checked.
- Right-click your audio device and choose Disable.
- Your audio device should become grayed out. Right-click it again and choose Enable.
- Click Apply and OK to save the changes.
Method 4. Check Audio Settings in Games
To troubleshoot sound issues in games, it’s worth checking the game’s audio settings to ensure that the sound is not muted. Search for the audio settings within the game and adjust the settings as needed. With the proper adjustments, the sound should be restored.
Method 5. Check Microphone Privacy Settings
1. Use the search function in the Windows taskbar to find the “Microphone Privacy Settings” and open it.
2. Ensure that microphone access is turned on and enabled for the game you’re having issues with.

Method 6. Change Speaker Settings
1. Right-click the sound icon at the bottom right corner of your desktop. From the list of options, choose Playback devices.

2. Once you can access the Playback tab, ensure there’s a green check beside Speakers. This indicates that they are the default playback device.

3. If otherwise, click Speakers > choose Set Default, then click OK and test whether you have sound.

4. If your Speakers are set as the default, there is still an issue with your computer sound, experiment with different sound formats. To do this, click Speakers, then Properties.

5. Go to the Advanced tab, and in the Default Format section, select a different sample rate and bit depth, then click Test.

6. Repeat this process until you find a format that works, then click OK.
Method 7. Uninstall and Re-Install Audio Driver
1. Press your keyboard’s Windows and X keys to open the context menu, then select “Device Manager.”

2. In the Device Manager window, locate the “Sound, video, and game controllers” section and expand it. Find your audio device (it may be listed as “High Definition Audio Device” or another name), right-click on it, and select “Uninstall device” from the drop-down menu.

3. After the uninstallation, restart your computer and go to the manufacturer’s website for your audio device.

4. If a new audio driver is available, download it and install it on your computer. Outdated drivers may also cause this problem.
Method 8. Enable Audio Service Using Services
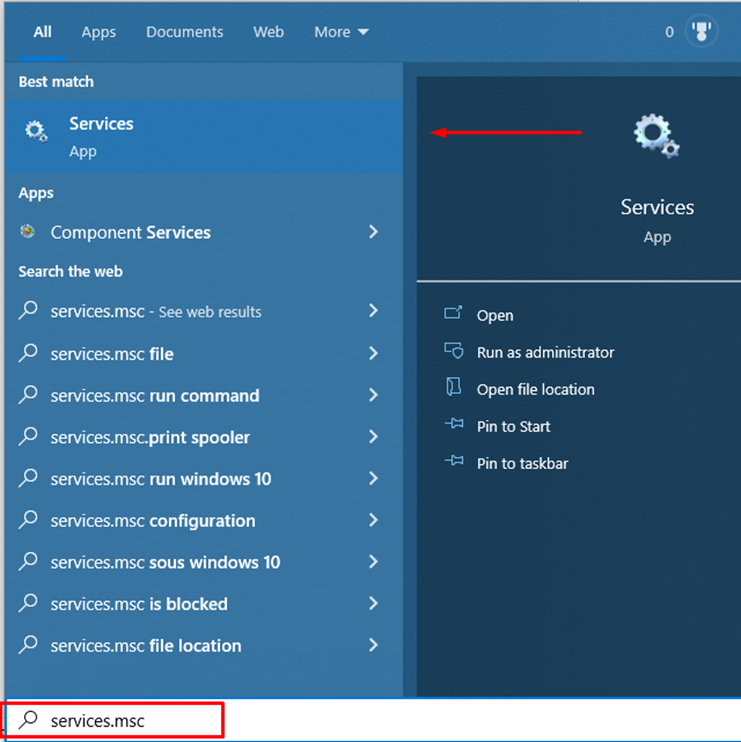
1. Go to Start, then type “Services” in the search field. Left-click on the result to access the Services window.
2. In the Services window, locate the “Windows Audio” service under the Name column on the right side of the pane. Right-click on it and select “Properties”.
3. In the “Windows Audio Properties” dialogue box, go to the General tab. Set the “Startup type” to “Automatic”. Next, go to the “Service status” section and click the “Start” button to start the service.
4. Click “Apply” and “OK” to save the changes.
5. If the “Windows Audio” service is already running, right-click on the service and select “Restart” from the context menu.
Method 9. Allow Audio Access for Games
To ensure that your game has access to your computer’s audio devices, you need to ensure the audio settings are enabled for the game. Follow the steps below:
- Press the Windows + I keys together to launch Windows Settings.
2. Click on Privacy.

3. Scroll down the left pane and click on Microphone.
4. Ensure the “Allow apps to access your microphone” option is enabled, as shown in the screenshot.
Note: To make sure that the correct input device is set as default, launch Sound Settings from the search menu.
Method 10. Set Audio Device as Default Device
- Locate the Speakers icon in the bottom right corner of the screen, then right-click on it.
- Select Sounds from the menu.
- Navigate to the Playback tab and right-click on the audio device you want to set as the default device.
- From the options that appear, select Set as Default Device.
- Finally, click on the Apply and OK buttons to save the changes.
Method 11. Disable Audio Enhancements
- Right-click on the Speakers icon in your screen’s bottom right corner.
- Select the Sounds option.
- Switch to the Playback tab and select the audio device you want to modify. Then, click on Properties.
- Move to the Advanced tab and choose the highest frequency range (24 bit, 48000 Hz) from the drop-down menu under Default Format.
- Ensure the Disable audio enhancements option is unchecked under Signal Enhancements.
- Press Apply, then OK to confirm the changes.
- If the issue continues, repeat the steps above and try different frequency ranges until you find the one that resolves the issue.
Method 12. Go Back to Generic Windows Audio Driver
Due to variations in driver compatibility based on the driver and system versions, restoring the previous driver version is a recommended initial step to address driver-related issues. Follow the steps below to switch to the generic Windows audio driver:
- Type “Device Manager” in the search box and press Enter.
- Locate the sound driver by clicking the drop-down arrow to expand one of the categories.
- Right-click on the installed driver and select Properties.
- On the display driver properties window, select the Driver tab.
- Click “Roll Back Driver.”
- Select “OK.”
Method 13. Use Compatibility Mode in Steam
If you’re into Steam games, use this method to fix the sound problem:
- Click on the Start button on your Desktop and search for Steam to initiate a Steam client. Right-click on the app and select the “Open file location” option from the menu.
- In the file location, right-click on Steam and select Properties.
- In the Steam Properties window, select the Shortcut tab and click on “Open file location” at the bottom.
- Right-click on the Steam.exe file and select Properties.
- On the pop up window, access the Compatibility tab. Under the Settings section, tick the box next to “Run this program as an administrator.”
- Launch the Steam game app and go to the Library tab. Right-click on the game that is not playing any sound and select Properties.
- In the game’s Properties window, select the Local Files tab and click on “Browse Local Files.”
- In the File Explorer location that opens, find the game file and right-click on it. Select Properties from the right-click menu.
- In the game’s Properties window, select the Compatibility tab. Check if the “Run this program as an administrator” option is already marked under the Settings section. If yes, leave it as it is.
- Go back to the game’s Properties window, select the Local Files tab, and click on the “Verify Integrity of Tool Files” option.
Resolving Windows 10 Audio Not Working While in Game
Having audio issues while gaming on Windows 10 can be frustrating, but with the right troubleshooting steps, you can get back to enjoying immersive gameplay. By following the methods outlined in this guide, you can resolve the audio problems and ensure a smooth gaming experience. From checking audio settings to updating drivers and adjusting in-game configurations, these solutions will help you fix the audio issues and get back in the game with clear and immersive sound. Remember to try these steps one by one and test the audio after each to identify the specific solution that works for you. Don’t let audio problems dampen your gaming experience; take control and enjoy your games to the fullest.