
Resolve the Your Connection Is Not Private Warning in Chrome

Sometimes when you are searching the web, you may receive a warning stating your connection is not private. If you wonder how to get rid of this warning, this article can help you fix the issue. You can see this warning for many reasons, and each of the methods provided here will help resolve the error.
This article is designed with Chrome in mind. Although the methods generally will work no matter which browser you use, the step-by-step instructions related to the browser are for Chrome.
What Causes the “Your Connection Is Not Private” Warning?
The Connection Not Private warning occurs when there is an error with the SSL. The SSL or Secure Sockets Layer is a secure method of encrypting data sent over the Internet. This means the warning appears when something is preventing Chrome from loading a website in a private and secure way.
Although the warning sounds quite foreboding, many innocent things can interfere with a webpage securely loading, including the following:
- Your antivirus program
- Google Chrome has not been updated
- Inaccurate date and time settings
In most cases, the error is quickly fixed, and you can continue browsing securely if something on your computer is causing the issue. If the website uses a bad SSL certificate, there is nothing you can do but wait to access the website—only the website owner can update or change the certificate.
- See Also: Default Gateway Error Fix
Fix #1: Update Your Date and Time Settings
When your date and time settings are off, it can create certificate errors that cause the browser to show this warning. Updating these settings is the best way to resolve the issue if this is its cause.
Step #1
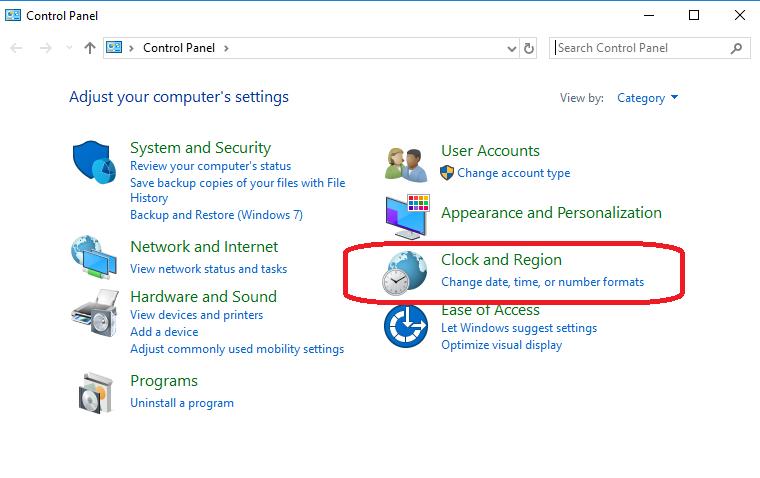
Type “Control Panel” into the Start menu without quotation marks. Click on the Control Panel option.

Step #2
Select “Clock and Region” from the menu that appears.
Step #3
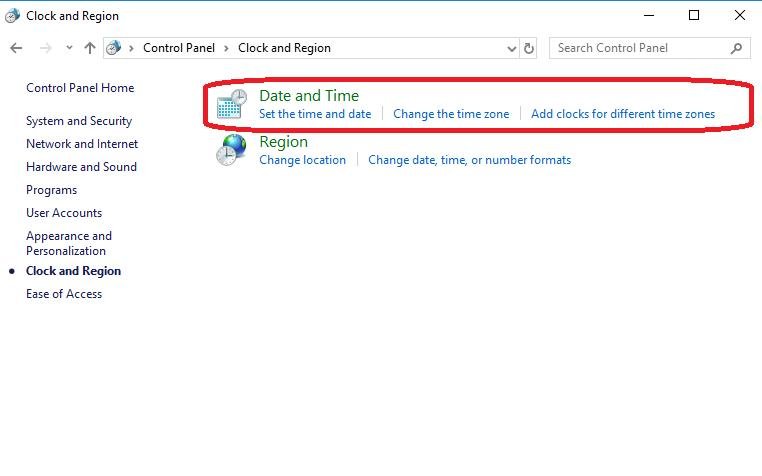
In the window that appears, choose “Date and Time.”
Step #4
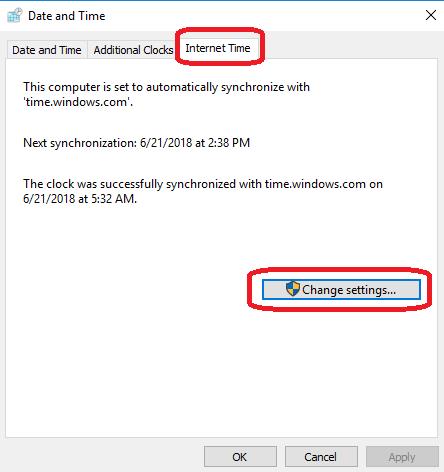
Click on the tab that says “Internet Time.” Then choose “Change settings….”
Step #5
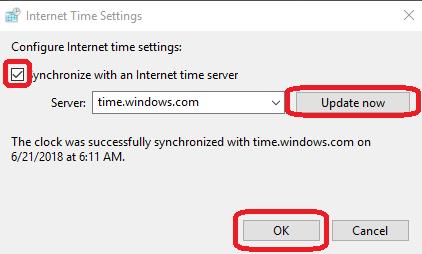
In the pop-up that appears, ensure the box next to “Synchronize with an Internet time server” has a checkmark.
Then click “Update now.” Click ” OK ” when the update is complete (which should take less than a second), and click “OK.”
Now, restart Chrome and try to reaccess the page. Hopefully, this will resolve the issue. If you still see the warning, continue to the following method.
Fix #2: Reset Your Time Zone
Even if your computer lists you in the correct time zone, you should try this method.
Step #1
Return to the “Control Panel” by typing it into the Start menu without quotation marks. Click on the Control Panel option.
Step #2
Again, select “Clock and Region.”
Step #3
As before, click on “Date and Time.”
Step #4
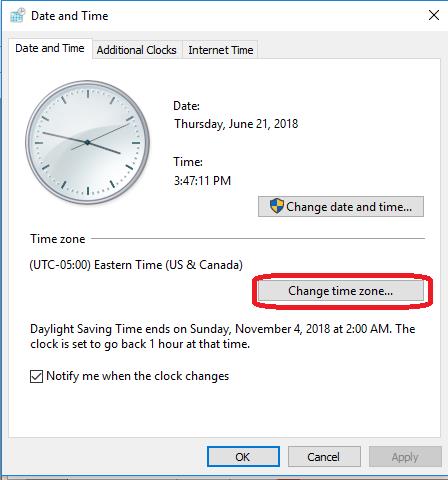
This time you need the tab that says “Date and Time.” Then choose “Change time zone…”
Step #5
Choose another time zone from the dropdown list in the pop-up that appears, and click “OK.” It does not matter which one you choose for this step so that it differs from the one you already have.

Step #6
It would help if you were back on the “Date and Time” window. Choose “Change time zone…” again.
Step #7
When the pop-up appears this time, choose the correct time zone from the dropdown list, and click “OK.”
Restart Chrome and try to reaccess the page. This method works for many users, but if not, continue reading.
Fix #3: Update Chrome
When Google Chrome is outdated, it can cause problems viewing web pages. Updating Chrome is an easy process.
Step #1
There are three dots in the right-hand corner of the Chrome browser. Click them to access the Customize and Control menu.

Step #2
Now click “Help” and then “About Google Chrome.”

Step #3
Once you finish Step #2, Google Chrome will automatically update. You should restart Chrome when you are finished updating and see if the website loads without warning.

Continue with the following method if you still see the Your Connection Is Not Private warning.
Fix #4: Get Rid of a Browser Automatic Redirect
Before you do this method, you need to check the website name in the browser search bar. If you are redirected to an unknown website when you type in a known web domain name, you may have a browser virus.
The following steps should help clear the virus and eliminate the warning if the automatic redirect is causing it. If the WWW address in the search bar is the same as what you typed in, you can skip this method.
Step #1
Type “chrome://extensions” into the Chrome search bar without quotation marks to access the Chrome Extensions page. Then click the “Remove” button below any extensions you are unfamiliar with or that you do not use.

Step #2
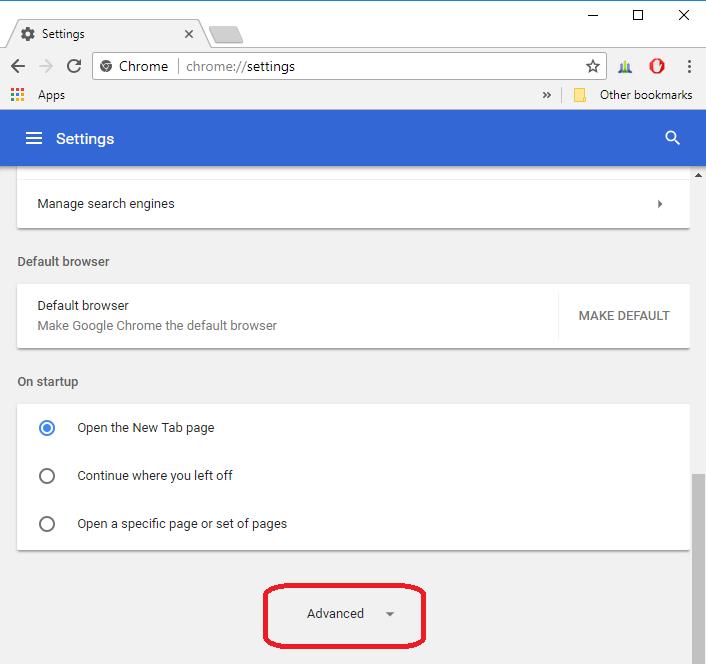
Next, click the three dots in the top corner of the Chrome browser. Select “Settings” from the list that appears, and then scroll down in the window that appears and click “Advanced.”
Step #3
Continue scrolling until you find “Clean up computer,” Click it. Close and restart Chrome.

Step #4
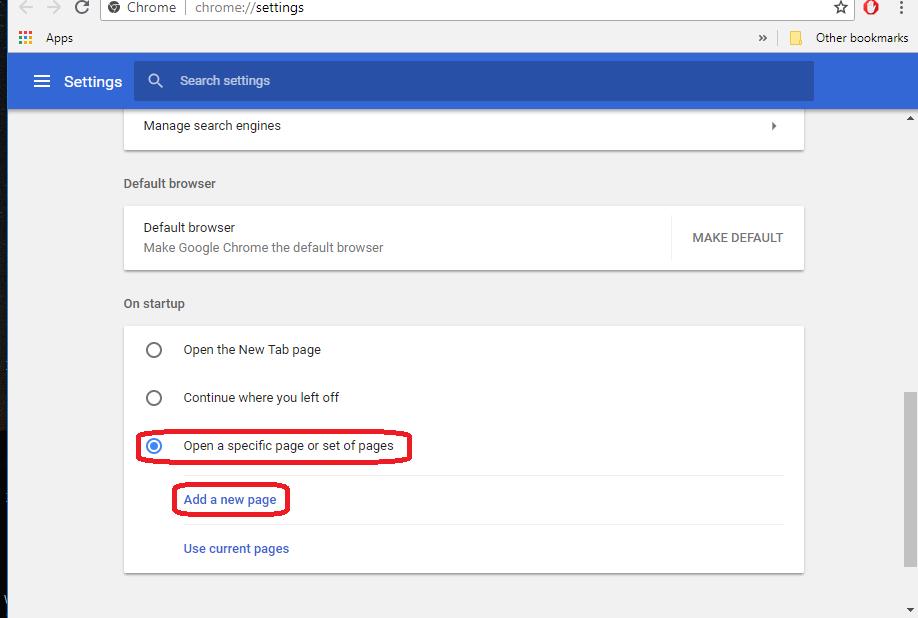
Sometimes, if a virus changes your homepage, you need to change it. Click the three buttons and open the “Settings” menu again. Under “On Startup,” make sure “Open a specific page or set of pages” is selected, and then click “Add a new page.”
Step #5
Type in the address of the homepage you want. Click the “ADD” button.

Step #6
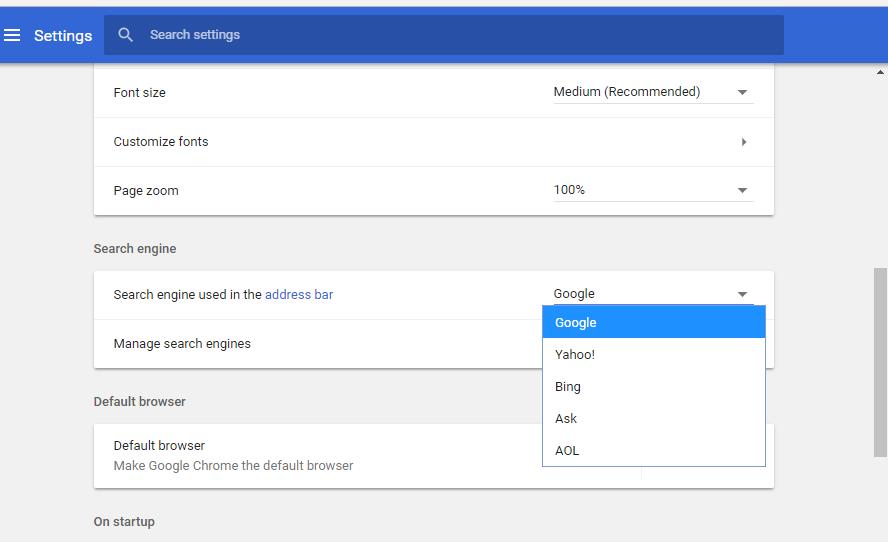
Back in the settings window, scroll to the search engine subtitle. Make sure the search engine you want to use is selected from the dropdown menu.
Step #7
Now, click on “Manage search engines” and remove any unwanted search engines by clicking the three dots to the right of it and selecting “Remove from list.”

The steps above should clear any viruses or corruption from Chrome if a website redirect is the cause of the Your Connection Is Not Private warning.
Fix #5: Clear Your Browser Cache
Another reason you may see the warning about a connection that is not private is that you need to clean your Chrome cache. Follow these steps to do this:
Step #1
As in previous methods, click on the three dots in the right-hand corner of the browser. With the menu open, hover your mouse over “More tools.” A separate menu will appear. Choose the option to “Clear browsing data” on that one.

Step #2
Now, click on the “Advanced” tab, and make sure the box next to “Cookies and other site data” is marked as well as the boxes next to “Browsing history,” “Download history,” and “Cached images and files.” Clear this data from the beginning of time if given the option.

Step #3
Once Chrome has cleaned the cache, close the browser and restart it. Now, attempt to return to the website to see if the problem is resolved.
Fix #6: Uninstall Third-Party Antivirus
Sometimes third-party antivirus programs interfere with your connection. Whenever a third-party antivirus is suspected of causing computer problems, you should check to make sure Windows Defender (Microsoft’s built-in antivirus) is deactivated.
Running two antivirus programs (such as Windows Defender and a third-party antivirus) simultaneously can cause many problems as the two can interfere with each other. To find out how to deactivate Windows Defender, click here.
Step #1
With Windows Defender disabled, check to see if you can access the webpage. If you can’t, you need to uninstall your antivirus software. Press the [X] and [Windows] keys on your keyboard together. Click on “Settings.”

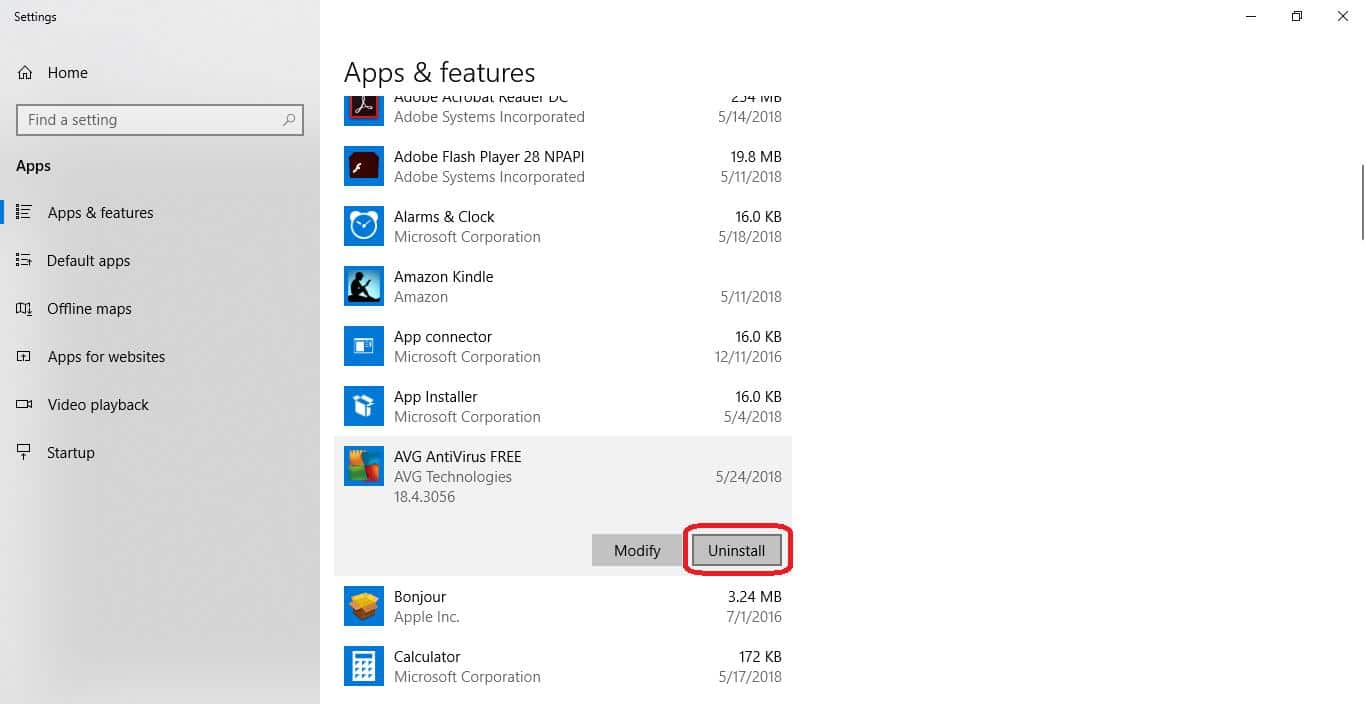
Step #2
Choose “Apps” in the Settings window. In the “Apps & Features” submenu, scroll down until you find your antivirus program. Click on it, and then click the “Uninstall” button.
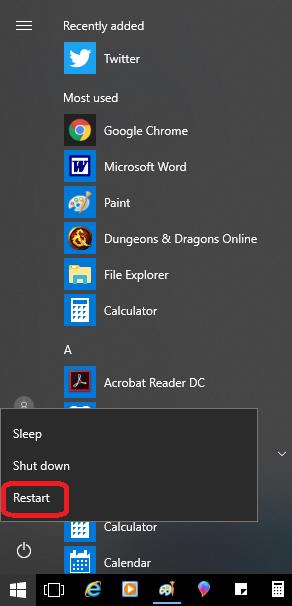
Step #3
Click on the Start menu Power icon and restart your computer when the uninstall process is complete.
Step #4
Once your computer restarts, see if you can access the webpage. If the problem is not resolved, reinstall your antivirus and move on to the following method. If the issue is resolved, you can try reinstalling the third-party antivirus if a Windows update corrupted it.
If the problem reappears after you reinstall the antivirus, you will need to uninstall it and find another third-party antivirus or turn on Windows Defender and use that. You should never use the Internet without antivirus protection on your computer.
Fix #7: Password Protect Your Wi-fi or Change Its Password
If you are using your home connection, you need to make sure you have password protection on it. If you already have a password, you need to change the password. It is possible someone has hacked into your network and is watching your activity, and changing the password should fix the error if this is the case.
You may also see this error on a public network. It is best not to proceed to the webpage if this is the case and return to your password-protected home network. In general, anything you access on a public network is not private.
- See Also: [Solved] WiFi Doesn’t Have a Valid IP Configuration
Fix #8: Reset Google Chrome Browser
Before doing a complete Chrome reinstall, you can try resetting the browser. These are the steps to do it:
Step #1
Click the three dots in the top corner of the Chrome browser again. Select “Settings.” Once you open the Settings options, scroll to the bottom and click “Advanced.”
Step #2
Continue scrolling until you find “Restore settings to their original defaults,” and click it.

Step #3
In the pop-up that appears, click “RESET SETTINGS.”

Step #4
Close Chrome and open it again. See if you can access the website.
If this works, you must return to the extensions page you accessed in Step #1 of Method 4. All the extensions will be disabled, and you should enable the extensions you use one at a time to see if one of them is interfering with the page loading.
Fix #9: Reinstall Google Chrome Browser
To do this, you must have another browser downloaded to your computer. Most Windows 10 machines have Microsoft Edge, but if you did the extensive steps required to remove Edge, you would need to download Firefox, Opera, or whatever your preferred backup is, or you need to reinstall Edge before continuing.
Step #1
After making sure you have at least one other browser available on your computer and that the alternate browser can access the Google website to download Chrome without warning, open the Control Panel by typing into the Start menu and clicking on its mention in the previous methods. Choose “Uninstall program” when the control panel menu populates.

Step #2
A list of programs you have installed will appear in the Uninstall window. Scroll down and click on “Chrome.” Then, click the “Uninstall” button.

Step #3
Access the Google website to download Chrome from your alternate browser, and follow the onscreen instructions to download and install it.
Hopefully, one of these options has resolved the warning on the website you want to access.
What If None of the Above Methods Work?
If none of the previous methods work, the problem stems from the website. Even websites you are familiar with neglect to update certificates.
Usually, waiting 24 hours resolves the issue if the website is genuinely reputable and the warning is their fault. As mentioned at the beginning of this article, ignoring this warning is never a good idea without first determining what is causing it.
However, you can bypass the error if you access the website immediately. Remember that following these instructions may put you and your data at risk.
Even using Incognito Mode will not prevent hackers from seeing the information you are sending when you ignore this warning and proceed.
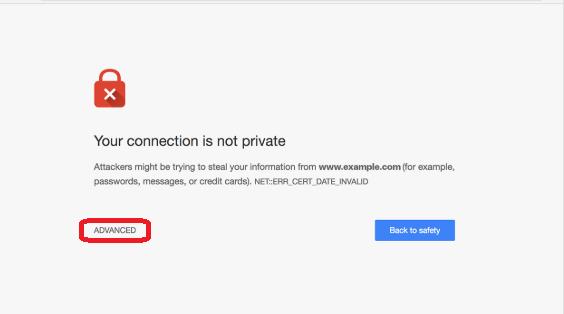
Step #1
When the “Your Connection Is Not Private” screen appears on your browser while accessing the website, click “Advanced.”
Step #2
Now, choose the option to “Proceed” to the website you were trying to access.