![[Repair Guide] How to Fix the Windows 10 Won’t Boot Issue](https://cdn.techloris.com/app/uploads/2023/05/windows-wont-boot.png)
[Repair Guide] How to Fix the Windows 10 Won’t Boot Issue

Boot Windows 10 in Safe Mode
Safe Mode is the simplest solution to resolve boot problems in Windows 10. This boot option lets your computer start with only essential software, bypassing software, and driver issues. Interestingly, starting the computer in Safe Mode can often resolve boot problems.
Though it’s not always transparent which processes run in Safe Mode, it’s a proven and straightforward fix based on experience. However, accessing Safe Mode can be tricky if your computer is not booting. There are two easy methods to enter Safe Mode.
Enter Safe Mode From Windows Recovery
Occasionally, certain non-bootable computers might get stuck on the Windows splash screen. Nonetheless, you can overcome this issue by interrupting the boot process three times in a row. By doing so, you can activate Windows Recovery mode automatically. Once you access the Windows Recovery menu, follow the below steps:
Select Troubleshoot from the recovery window, Advanced Options, and Startup Settings.
You can reboot the computer in Safe Mode with or without an internet connection in the Startup Settings menu. Both options should effectively resolve the issue.

Safe Mode With a Windows 10 Recovery Drive
If you can’t access Safe Mode, it’s necessary to make a Windows 10 USB recovery drive. This drive includes the Windows 10 recovery environment, which was once accessible by pressing F8 while booting, and unfortunately, Microsoft eliminated this feature.
To create a recovery drive, you’ll need another Windows 10 computer and a USB drive with a minimum storage capacity of 512MB. However, if you want to create a system backup (by selecting the option to back up system files to the recovery drive), you’ll require 16GB of storage.
To initiate the process, open Control Panel and click Create a recovery drive. Then, follow the instructions provided.

After successfully creating the recovery drive, you can only boot your computer from it by enabling USB drives as bootable in the UEFI or BIOS environment, also known as the POST environment.
After enabling USB drives as bootable, insert the recovery drive into your computer and restart it (this may necessitate pressing the reset button or holding the power button down for a few seconds).
Check Your Battery
Boot problems may arise due to battery issues when working with a laptop. In such cases, it’s recommended to test an alternative power cable to determine whether it resolves the problem. You can confirm the cable’s functionality using it on another laptop and make sure it is properly connected. Afterward, remove the battery from your system and connect it to a power source.
Removing the battery can help you diagnose whether the problem is hardware-related. Testing only one element at a time is essential to identify the root cause of any power-related startup issues. Doing so lets you determine whether the battery, charging cable, or another component needs replacement.
Unplug All Your USB Devices
One of the significant problems with Windows 10 updates is that sometimes a conflict with a USB device may prevent the computer from booting. To resolve this issue, you can disconnect all USB devices (and any other peripherals that are not necessary) and restart the computer.
Removing all USB devices should resolve the issue if the computer is stuck on the same loading screen. However, in some cases, you may need to restart the computer to resolve the problem.
Turn Off Fast Boot
The BIOS or UEFI of your computer includes a setting called Fast Boot that speeds up the booting process of Windows 10 by preloading drivers. Unfortunately, Windows Update may cause Fast Boot compatibility issues. The good news is that you can enable or disable Fast Boot from your computer’s BIOS rather than within Windows 10.
Accessing the BIOS or UEFI screen may vary depending on your computer. For instructions on how to access your computer’s BIOS or UEFI screen, please refer to our guide on how to enter a computer’s UEFI/BIOS. In most cases, pressing the Delete key while booting should initiate the POST environment. F2 and Escape are two other keys that may work.
The Fast Boot option is typically found in the Advanced Options section of the BIOS or UEFI, although its location may vary. If you can’t locate the Fast Boot option, it’s possible that your computer was manufactured before 2013 when Fast Boot wasn’t available.
Check Your Other BIOS/UEFI Settings
Incorrectly configured BIOS/UEFI settings can prevent your desktop computer from booting properly. The BIOS/UEFI is a pre-boot environment that stores the hardware configuration settings for your computer.
It can be a helpful tool for recovery because it remains functional even when Windows doesn’t. You’ll need to boot your computer into BIOS mode to access these settings. Once you’re in BIOS mode, verify the following settings:
Secure Boot

Incorrectly configured Secure Boot settings can prevent your computer from starting up. While you can disable Secure Boot through the BIOS, doing so may require resetting your BIOS or restoring Windows 10 to its factory settings. Disabling Secure Boot may prevent you from upgrading to Windows 11.
Secure Boot safeguards your computer against malware by verifying the drivers and hardware loaded by Windows during startup. If the system doesn’t recognize a driver or hardware component, Secure Boot will generate an error at boot.
You can access Secure Boot settings under the Boot options menu, where you can turn it on or off. It’s important to ensure it’s set to Windows UEFI mode instead of the Other Operating systems.
Compatibility Support Module (CSM)

To function properly, the type of partition table on the boot drive must match the system format. Specifically, a boot drive formatted using a BIOS system requires a Master Boot Record (MBR) partition table, while a disk formatted using a UEFI system requires a GUID Partition Table (GPT). However, the Compatibility Support Module (CSM) can enable a UEFI system to function as an older MBR system.
Reset Your BIOS Configuration
Resetting the BIOS configuration to default can fix Windows 10 boot problems caused by incorrect or corrupted BIOS settings that affect the hardware and firmware. This process clears any errors or changes made in the BIOS configuration, allowing the system to boot correctly. However, it can also cause issues such as loss of custom settings or the need to reconfigure certain hardware components.
Run the DISM and SFC Scan
1. To access Command Prompt in Windows 10 Recovery Mode, select it from the list of options. Then, enter the following commands one by one, pressing Enter after each one:
DISM /Online /Cleanup-Image /ScanHealth
DISM /Online /Cleanup-Image /RestoreHealth
2. Execute the following command to run the SFC scan.
sfc /scannow
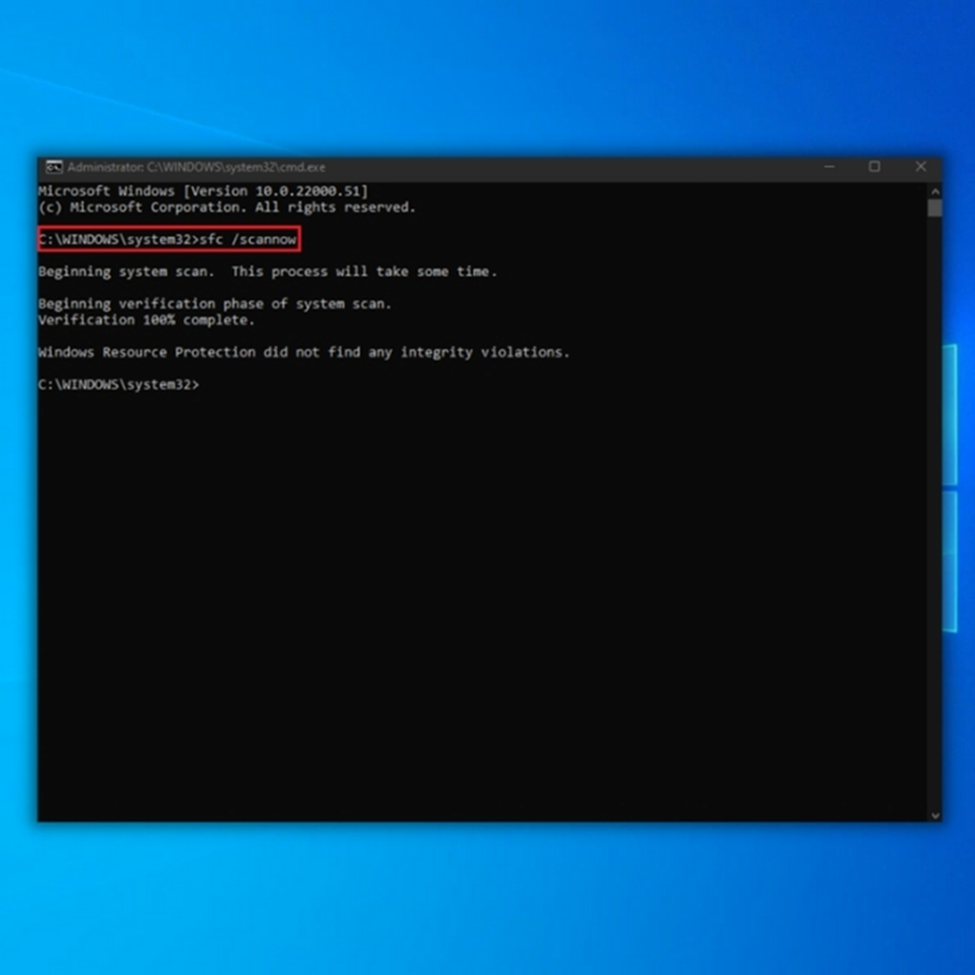
Utilizing the DISM tool and SFC scan can assist in resolving issues with corrupt system files, which may be a cause for Windows 10 being unable to boot on your computer. After completing the process, verify if Windows boots correctly.
Repair the Master Boot Record (MBR)
1. Select Command Prompt in the Windows RE (Recovery Environment).
2. Execute the following commands individually:
bootrec /FixMbr
bootrec /FixBoot
bootrec /ScanOs
bootrec /RebuildBcd

The MBR, or Master Boot Record, is primarily responsible for loading Windows, and when it experiences problems, you may encounter boot issues. In such cases, it’s advisable to repair and rebuild the MBR to restore proper functionality.
Try a Malware Scan
Malware can infect a computer through various means, such as visiting a malicious website, downloading a compromised file, or opening an infected email attachment. Once the malware is installed on the system, it can interfere with the normal operation of the computer, including the boot process.
Malware can cause a Windows 10 system to not boot by corrupting or modifying critical system files, interfering with system services, or causing conflicts with the installed software. This can lead to various boot-related issues, such as system crashes, BSOD (Blue Screen of Death), or an endless boot loop.
Reset Your CMOS
Restoring your CMOS to its default settings through a reset will not harm your PC and may even help Windows 10 start up successfully again. This process involves accessing your BIOS, typically by pressing keys like F2, F8, and Delete before the Windows logo appears or as your computer is booting.
If you cannot locate the CMOS reset option in your BIOS, you can try holding down the physical reset button on your PC for about five seconds after turning off and unplugging it from the mains. Then, check if Windows starts up properly.
Check External Flash Drives and Disks
Your computer’s boot order may be set to prioritize an external drive, which means that if you have an OS or recovery drive on a USB stick connected to your PC, the computer will try to boot from that instead.
If an external storage device is attached, Windows may attempt to boot from it but fail because it does not have the correct device containing the necessary recovery files. To see if this helps, remove all external storage devices before starting Windows.
Boot to Command Prompt Interface

To troubleshoot Windows 10 boot problems, accessing the Command Prompt interface may be possible if the computer can still boot. This requires a bootable Windows installation media or USB drive. First, access the BIOS and set the bootable device to the USB or DVD drive where the Windows 10 copy is located.
Insert the disk/drive, save the configuration, and restart the computer. Boot using the disk/drive to enter Windows Recovery Environment and select Command Prompt from the Troubleshoot > Advanced Options menu to access a window to enter commands.
Use System Restore or Startup Repair

When booting Windows 10 from a disk or drive, some useful utilities can help you fix your PC. Following the process described above, you can access options to get your computer working again. Watch for links to System Restore and Startup Repair on the Advanced Options screen. These options can be very helpful in resolving boot-related issues.
To fix boot problems in Windows 10, two utilities are available – System Restore and Startup Repair. System Restore lets you revert to a previous Restore Point when your computer is working fine, which can be helpful if the issue was caused by a change you made. On the other hand, Startup Repair is a general-purpose troubleshooter that can fix problems preventing Windows from starting up.
Uninstall Windows Updates
The reason behind Windows 10 boot issues might be some software programs installed on your computer recently. For instance, if you have two anti-malware applications installed, their real-time engines might conflict and lead to system instability.
To fix this issue, you can uninstall the conflicting applications. Similarly, if you have started facing boot problems following a recent system update, you should consider removing it from your PC.
1. Open the Windows Settings app by pressing the Windows key + I on your keyboard.

2. Click on Update & Security.
3. Click on Windows Update in the left sidebar.
4. Click on View update history.
5. Click on Uninstall updates at the top of the page.
6. Select the update you want to uninstall and click the Uninstall button.
7. Follow the prompts to complete the uninstallation process.
Reassign Your Drive Letter
If a Windows 10 user has more than one drive installed on their system, it can lead to boot issues if the drive letter of their operating system volume is accidentally unassigned. But, this problem can be resolved easily by accessing the command prompt interface and running the disk partition utility:
diskpart

After accessing the command prompt window, as previously explained, you can print the details of all the volumes connected to your system by entering the list volume command. If the drive letter for your boot volume is missing, you must assign it one.

You can assign a letter to a drive using the select and give letter commands. For example, to assign the letter C to the Windows volume, select volume 0 and then enter assign letter=C. It’s important to be cautious when making changes in the command prompt, as errors can lead to additional issues with your computer.
Use the BCD Command
Using Boot Configuration Data (BCD), you can attempt to resolve boot issues with Windows 10 by entering a few lines of code in the Command Prompt.
1. Access Advanced Startup mode
2. Go to Troubleshoot > Advanced options
3. Select Command Prompt.
4. Select your user account and set the correct password
5. Write these commands and press Enter after each one:
bcdedit/deletevalue {default} numproc
bcdedit/deletevalue {default} truncatememory
6. Restart your PC and check the results
Dodge the Windows 10 Bootloader
There is a simple solution to fix the issue with the new version of the bootloader utility interfering with booting an existing copy of Windows during reinstallation. You can boot into the command prompt and enter the following:
bcdedit /set {default} bootmenupolicy legacy
After restarting your computer, the bootloader interface of Windows 10 will be replaced by the legacy version. This will allow you to easily access your existing operating system installation and enter Safe Mode without further issues.
Factory Reset Your PC
Beyond basic troubleshooting, there are more complicated and potentially damaging options for repairing your computer. These include restoring and refreshing your system and performing a factory reset. Each option has its benefits and drawbacks.
A factory reset will erase some applications and data, but you can choose to keep certain files. This process will return your Windows 10 system to its original state.
Repair Update (“In-Place Upgrade”)
The repair installation process is akin to a factory reset but with one significant difference: it involves completely reinstalling the operating system. However, downloading the entire Windows OS and a functional Windows computer with an internet connection requires downloading.
You will need a functional computer, a USB or DVD drive, and an internet connection to use this method. You will have to download the Windows USB/DVD Download Tool and use it to create a bootable installer. Although this method can be somewhat complicated, you can follow a video tutorial to guide you.
Why Is My PC Not Booting to Windows?
There are several reasons why a PC may not be booting to Windows. Some common causes include:
- Corrupted or missing system files
- Issues with hardware components, such as the hard drive or RAM
- Problems with the Master Boot Record (MBR) or Boot Configuration Data (BCD)
- Incorrect BIOS or UEFI settings
- Malware or virus infections
- Conflicting software applications or recent updates
To determine the specific cause of the issue, it may be necessary to troubleshoot and perform diagnostic tests on the PC.
Resolving Windows 10 Boot Issues: Comprehensive Solutions to Fix the “Won’t Boot” Problem
Fixing the Windows 10 “Won’t Boot” issue requires a systematic approach and exploring various solutions. From booting in Safe Mode to repairing the Master Boot Record and performing malware scans, this comprehensive guide equips you with the necessary steps to regain system functionality and overcome booting challenges on your Windows 10 device. Remember to prioritize data backup and choose the most suitable solution based on your specific circumstances for a successful resolution.