![[Troubleshooting Guide] Steam Game Keeps on Crashing](https://cdn.techloris.com/app/uploads/2023/05/steam-game-keeps-crashing.png)
[Troubleshooting Guide] Steam Game Keeps on Crashing

Verify the Integrity of Your Game Cache
If this problem arises while you’re playing the game, you can resolve it by verifying the game files on your Steam client. The following steps outline how you can do it:
1. Open the Steam client.
2. Click on the Library tab at the top of the Steam window.
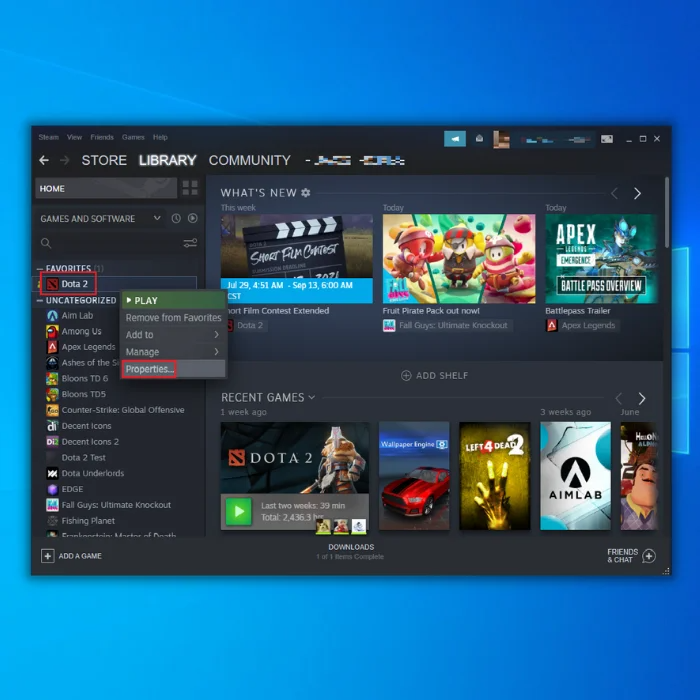
3. Right-click on the game title you want to verify the files for and select Properties from the drop-down menu.
4. In the Properties window, click on the Local Files tab.
5. Click on the Verify integrity of game files button.

6. Steam will begin to verify the game files for the selected game. This process may take several minutes, depending on the size of the game and your computer’s hardware specifications.
Once the verification is complete, Steam will display a message indicating if any files were missing or corrupted. If any files are found to be missing or corrupted, Steam will automatically download and replace them. If no issues are found, you can launch the game as usual.
Add Your Steam Client as an Exception to Your Third-Party Antivirus Application
Your third-party antivirus software could be responsible for this bothersome problem. Due to its deep integration with your system, it may disrupt the functionality of your Steam client.
As playing games on Steam involves significant memory and CPU usage, some third-party antivirus programs may identify the Steam client as a possible threat and interfere with its operations. To address this, adding your Steam client as an exception to your antivirus application may be helpful. This solution has worked for many Steam users facing similar issues.
Run the Program Compatibility Troubleshooter
You can utilize the Program Compatibility Troubleshooter to determine whether a program is compatible with your current Windows operating system. Follow the instructions provided below to execute this tool:
1. Right-click on the Steam client shortcut on your desktop and select Properties.
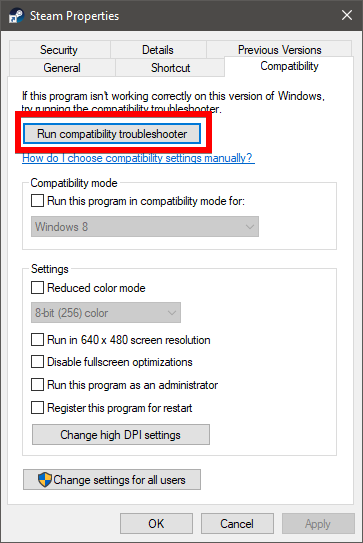
2. Click on the Compatibility tab and select Run compatibility troubleshooter.
3. Click on Try recommended settings to test-run the program using recommended compatibility settings. Follow the on-screen instructions to see if this troubleshooting option works.
4. If the program still doesn’t work, run the compatibility troubleshooter again and select the second option to choose compatibility settings based on the problems you notice.
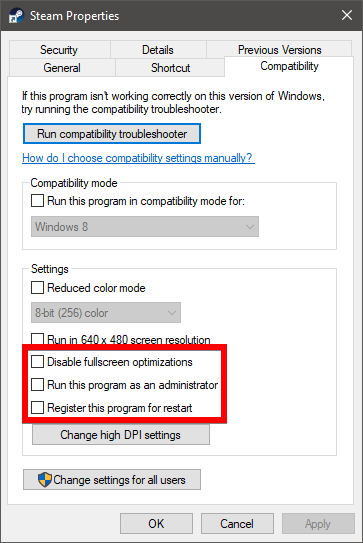
5. If the problem persists, adjust the following settings manually and select OK when you’re done:
- Compatibility mode: Select a previous version of the Windows system from the drop-down list to test-run the Steam client.
- Disable fullscreen optimizations: Disable this option if the low FPS issue or crashes occur while playing games on Steam.
- Run this program as an administrator: Give the program administrator privileges if it’s not running properly or crashes.
6. If this fix works, the Steam client should stop crashing. If not, there are more fixes to try.
Update Your Graphics Driver to the Latest Version
Installing the latest version of your graphics driver can enhance your game’s performance, minimize the likelihood of encountering issues or errors, and result in a smoother gameplay experience.
1. Press the Windows key + X and select Device Manager from the list of options.
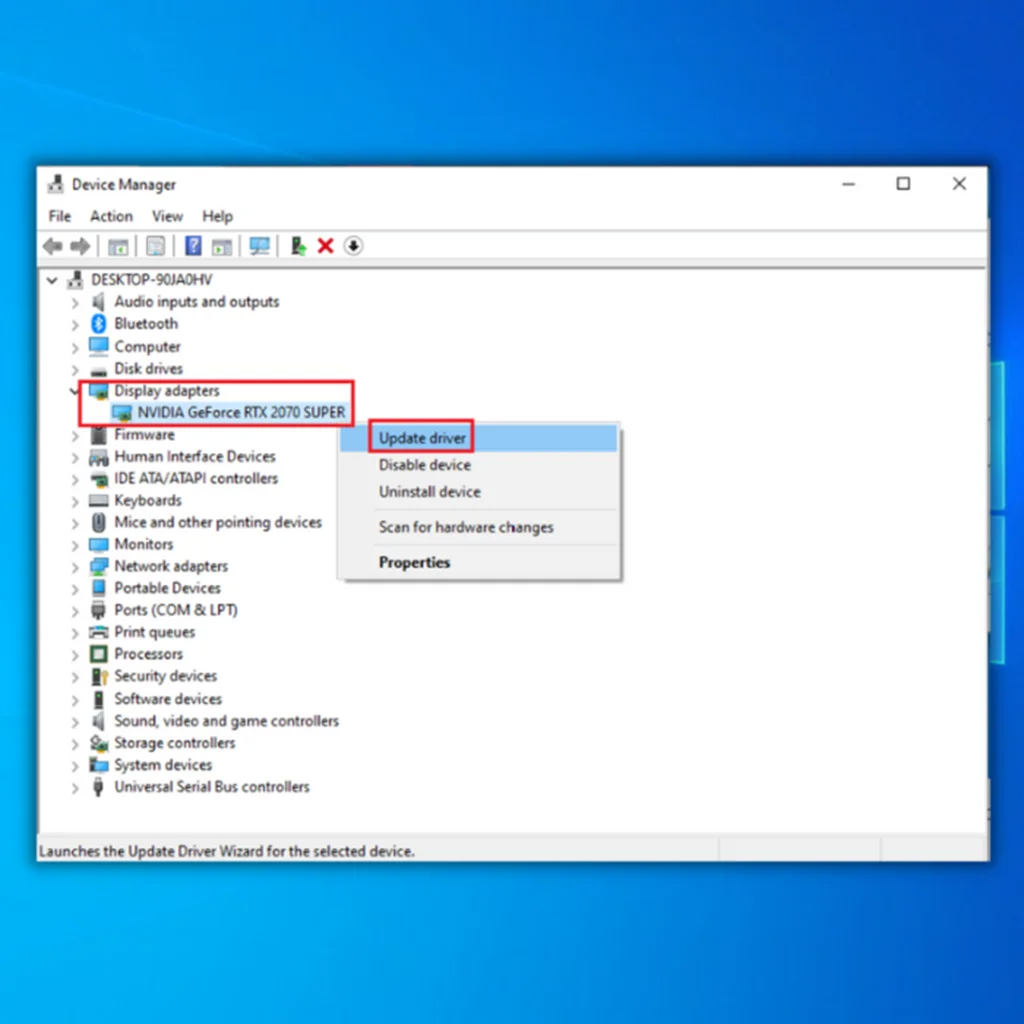
2. Expand the Display adapters category to see the graphics card installed on your system.
3. Right-click on the graphics card and select Update driver.
4. Choose the option to Search automatically for updated driver software.
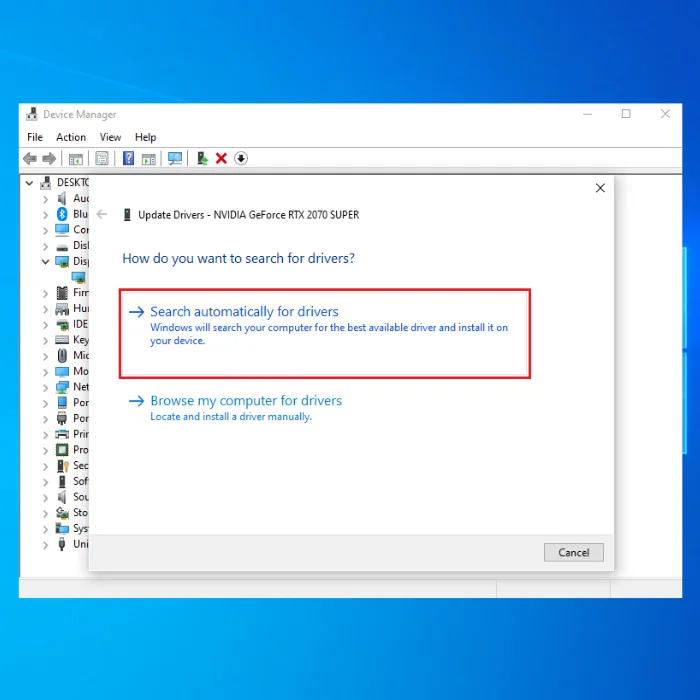
5. Windows will search for the latest driver version for your graphics card and install it.
6. Restart your computer to complete the installation.
Alternatively, you can visit the website of your graphics card manufacturer (e.g., NVIDIA, AMD, Intel) and download the latest driver version for your graphics card. Then, follow the instructions provided by the installation wizard to update your drivers.
Perform a Clean Boot
If the issue continues, you may need to perform a clean boot. This troubleshooting method involves manually disabling startups and services to identify problematic software. Once you identify the problematic software, uninstall it to resolve the issue. Here are the steps to perform a clean boot:
1. Open the Start menu and search for msconfig. Click on System Configuration in the results.

2. In the System Configuration window, click the Services tab and tick the Hide all Microsoft Services box.

3. Uncheck all services except the one related to the crashing app, then click Disable All and hit OK.
4. Open Task Manager and go to the Startup tab. Disable all startup services by individually selecting and clicking on Disable.
Update Your Windows System to the Latest Version
Updating your Windows system to the latest version may resolve the crashing issue. Follow the steps below to update your Windows system:
Occasionally, the crash issue may occur if your Windows system is outdated. Try updating your Windows system to the latest version to resolve the issue. Here’s how to do it:
1. On the Start menu, type Windows Update and click Open.
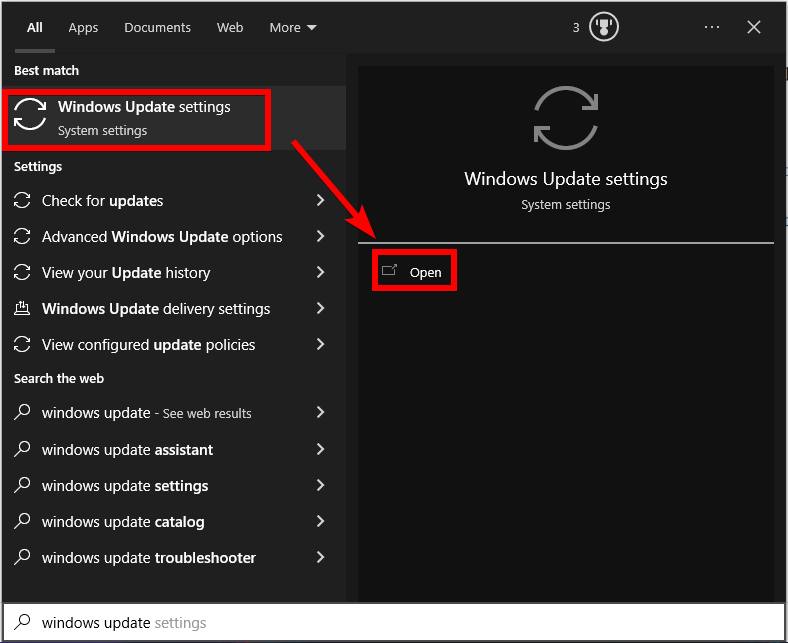
2. Click on Check for Updates.

3. If any new updates are detected, they should install automatically.
Delete ClientRegistry.blob
The ClientRegistry.blob file contains your registration data for the installed games in Steam. If this file gets corrupted, deleting it will prompt the system to restore it on your next login, preserving all default settings for each game you have installed, such as your name and skins. This solution has proven effective in resolving approximately 30% of Steam-related issues.
It’s important to note that when you delete the ClientRegistry.blob file and launch Steam again, you’ll be prompted to enter your username and password. If you don’t have your credentials, do not attempt this solution. Additionally, your saved progress and in-game items won’t be affected as they’re stored in Steam’s cloud storage. It’s safe to assume that deleting the ClientRegistry.blob won’t cause any issues for you or Steam.
Follow the steps below to perform this solution:
1. Open Windows Task Manager by pressing Ctrl + Shift + Esc.
2. Disable any Steam processes by selecting them and clicking End task.

3. Open your Steam folder, which is likely located in a Program Files directory.
4. Right-click the clientregistry.blob file, select Delete, or click the trash can icon to delete it.

Boot the System in Safe mode with Networking and Then Launch Steam

Safe mode is a Windows OS startup mode that provides limited access and disables most unwanted processes and software for troubleshooting. Its primary purpose is to identify or resolve problems.
If you can launch Steam successfully in safe mode, it suggests a conflict between Steam and a third-party application or software. To resolve the conflict, you can try disabling or removing these applications.
Safe mode is commonly used worldwide to fix various problems, and it is safe to use as it does not pose any threats or risks.
Delete the Appcache Folder of Steam
AppCache is a file cache that stores files and doesn’t contain any of the Steam system files, so deleting it won’t affect your client. It’s worth trying this solution to see if it resolves the problem, though the chances are low. You can move on to more technical solutions if it doesn’t work.
1. Browse to the directory where Steam is installed. The default location is C:\Program Files (x86)\Steam. If installed somewhere else, browse to that location.
2. Search for a folder named AppCache. Delete it or cut and paste it to a different location.
3. Delete the AppCache folder in the Steam installation directory.

4. Restart your computer.
5. Launch Steam using the Run as administrator option when you right-click it.
Reset the Network Adapter
Sometimes, the network adapter in your computer can encounter errors or have a corrupt configuration set. This component communicates with the computer and the operating system, and while it typically works automatically with other drivers, issues can arise. In such cases, resetting your network protocol might help to resolve the problem.
1. Exit Steam and close all running processes of Steam through Task Manager.
2. Press the Windows key and type Command Prompt. Then in the resulting list, right-click on Command Prompt and select Run as Administrator.
3. In the Command Prompt, type the following command: netsh winsock reset

4. Restart your system.
5. launch Steam and check if the problem is solved after starting the system.
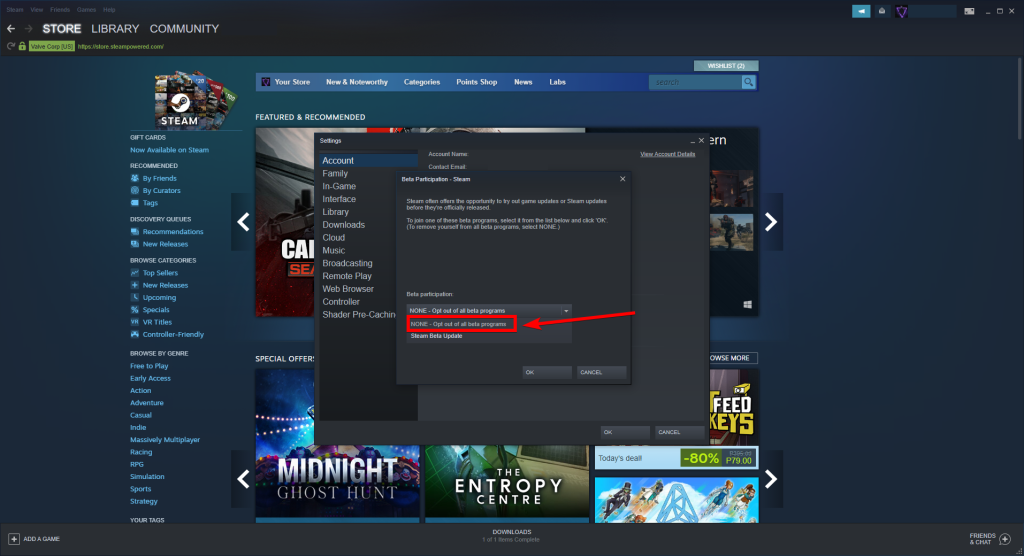
Opting Out of Beta
You may have enrolled in Steam’s beta program, which can create stability problems for certain users if the beta version has any issues. As a result, your Steam may be crashing. Follow these steps to remove yourself from Steam’s beta program.
1. Open Steam.
2. Go to Steam Settings.
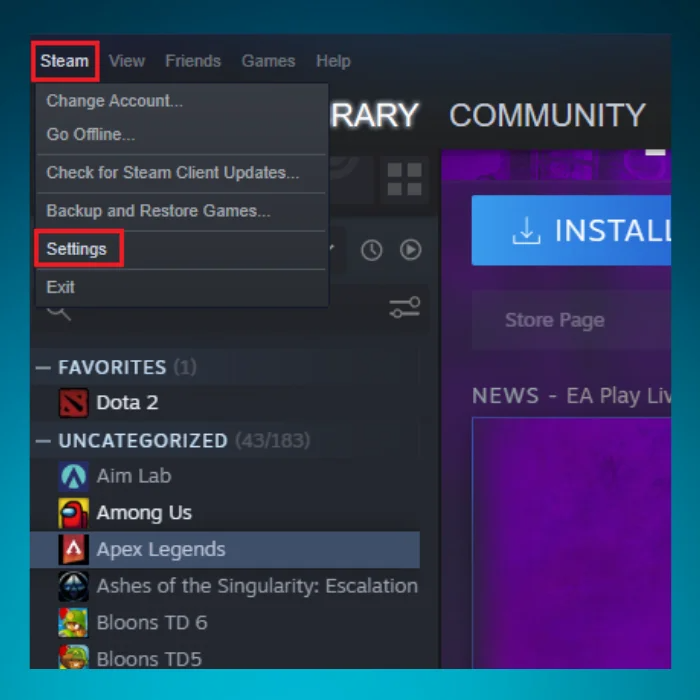
3. Click on the Account section.
4. Click on the Change option.
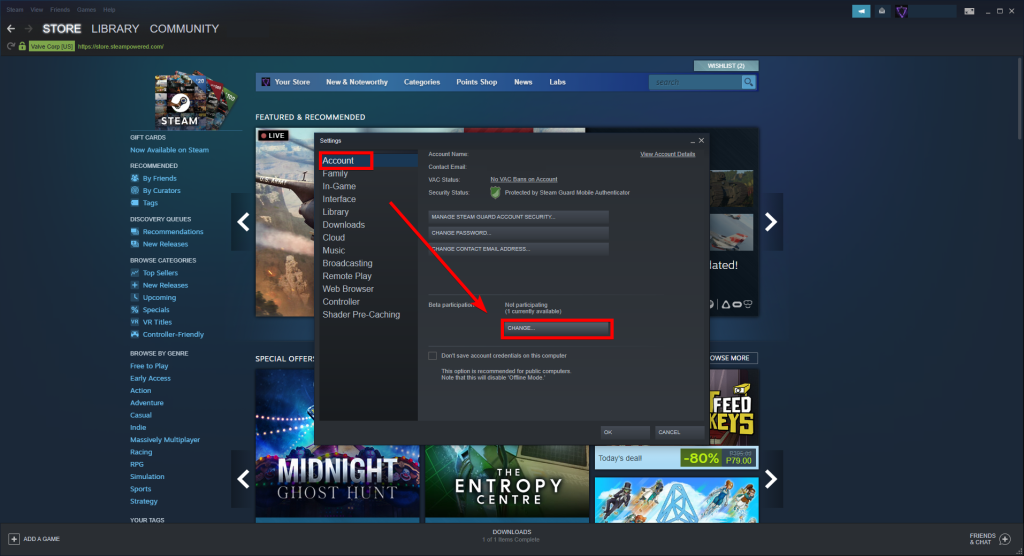
5. Select None to disable the beta program.
Check Internet Connectivity
If Steam keeps crashing, there may be a problem with your internet connection. Steam is an online platform and requires a stable internet connection to function properly. If your internet connection is slow or unstable, it can cause Steam to crash or not work at all.
Reinstall Your Steam Client
To avoid losing your game files during the uninstallation of Steam, it is important first to copy the “SteamApps” folder containing all of your games’ data. We can only proceed with the uninstallation process after backing up this folder.
1. Press the Windows logo key and R simultaneously on your keyboard to open the Run dialog. Then type control and press Enter to open the Control Panel.

2. In the Control Panel, view the options by Category, and click Uninstall a program.

3. Double-click on Steam to uninstall your Steam client.
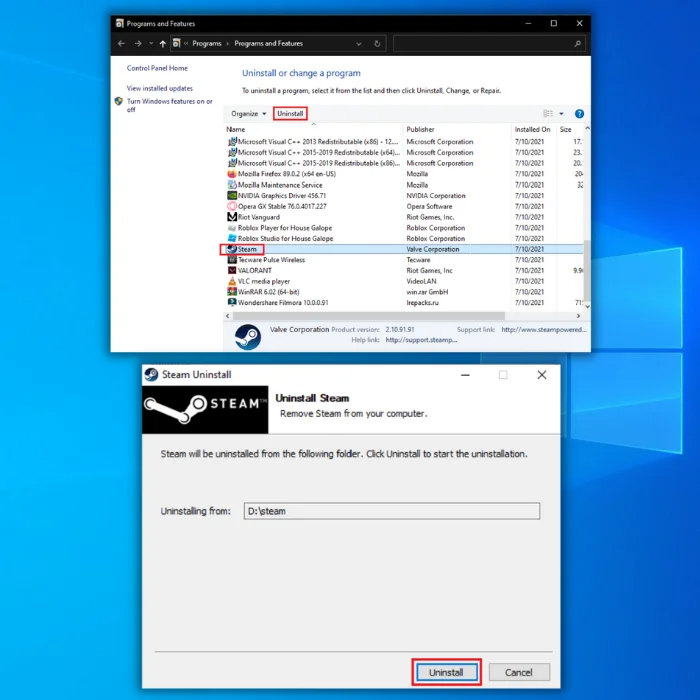
4. Once the uninstallation is complete, restart your Windows system.
5. Download the latest version of the Steam client from the official website.
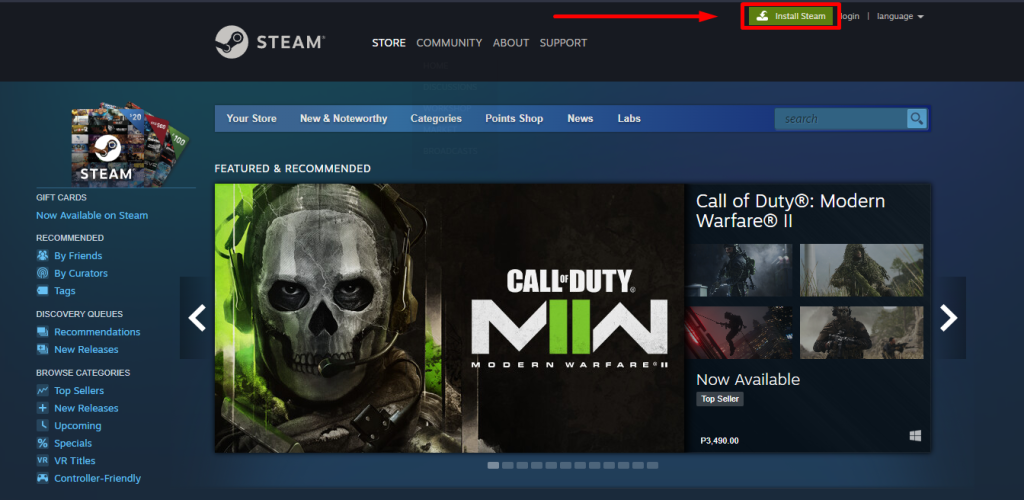
6. Double-click on the downloaded file to begin the installation process.
7. Follow the on-screen instructions to complete the installation.
Once the installation is complete, launch the Steam client and check if the issue has been resolved.
Resolve Steam Game Crashes with Ease
In this comprehensive repair guide, we’ve explored various effective solutions to tackle the persistent issue of Steam game crashes. By following the step-by-step instructions and implementing the troubleshooting techniques provided, you can overcome these crashes and enjoy a stable gaming experience on Steam. Say goodbye to frustrating game interruptions and get back to playing your favorite titles without any worries.
Frequently Asked Questions About Your Steam Game Crashing
Why Are My Steam Games Frequently Crashing?
Here are a few common reasons why your Steam games could be crashing: Outdated graphics drivers: Graphics card drivers need to stay up to date for games to run smoothly, and any outdated drivers will lead to frequent crashes. Incompatible hardware: Certain components may not be compatible with a game, usually due to the system requirements being too high.
Will It Help Prevent Games From Crashing if I Reinstall Steam?
The answer to this question is not always straightforward. Reinstalling Steam may help resolve crashing issues with certain games, but it depends on the underlying cause of the issue. If a corrupted or outdated game file causes the problem, reinstalling Steam will likely fix it.
Why Can I Not Restart Steam?
Sometimes launching Steam can be challenging, and some users report issues restarting the program. Generally, this is due to an issue caused by an update or installation of a new game. If your Steam client didn’t restart, one possible solution would be to close any other programs you have running at the same time as Steam – especially games or other Steam services.