
Repair Windows 10 System Files Using SFC Scannow

If you have been using your computer for quite some time, you may begin to notice random system errors. Application icons are not showing on your desktop, or your computer isn’t as fast as it should be.
Even though Windows 10 tries its best to protect system files that are essential for your PC, some drivers, applications, or Windows updates can cause an error on system files.
Recommended: To easily install drivers automatically, use the tool below.
Windows has a system repair tool called System File Checker (SFC). SFC’s primary purpose is to repair missing and corrupted windows system files.
See Also: How to Fix Windows Could Not Automatically Detect this Network’s Proxy Settings
How to Use the SFC Repair tool
The following command will scan your computer’s system files and try to fix and recover lost system files. You run the System File Checker tool in an elevated command prompt window.
Step 1: Press the Windows key + X on your keyboard and select Command Prompt (Admin).

Step 2: When Command Prompt opens, type “sfc /scannow” and press Enter.
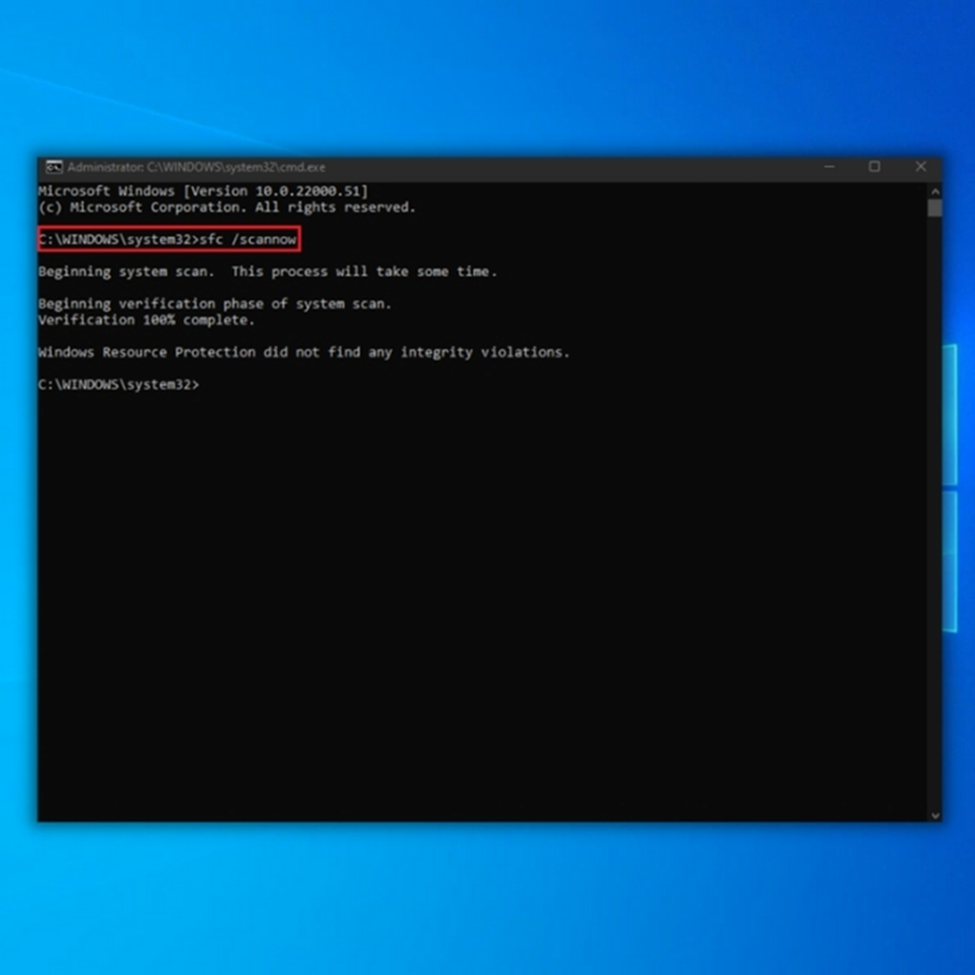
Step 3: After the scan is finished, a system message will appear. See the list below to guide you on what it means.
- Windows Resource Protection did not find any integrity violations – This means your operating system doesn’t have any corrupted or missing files.
- Windows Resource Protection could not perform the requested operation – The repair tool detected a problem during the scan, and an offline scan is needed.
- Windows Resource Protection found corrupt files and successfully repaired them – This message will appear when the SFC can fix the problem it detected.
- Windows Resource Protection found corrupt files but could not fix some of them. – If this error occurs, you must repair the corrupted files manually. See the guide below.
**Try to run the SFC scan two to three times to fix all the errors**
How to view SFC scan detailed logs
You will need to create a readable copy on your computer to see the detailed log of the system file checker scan. Follow the steps below to do it in the command prompt window:
Step 1: Press the Windows key + X on your keyboard and select Command Prompt (Admin)
Step 2: Type the following on Command Prompt and press Enter.
findstr /c:” [SR]” %windir%LogsCBSCBS.log >” %userprofile%Desktopsfclogs.txt”

Step 3: Go to your desktop and find a text file named sfclogs.txt. Open it.
Step 4: The file will contain the information about the scan and the files that couldn’t be repaired.

How to scan and repair Windows 10 System files (OFFLINE)
Some system files are being used while Windows is running. In this case, you should run SFC offline to repair these files.
To do this, follow the steps below:
Step 1: Press the Windows key + I to open Windows Settings.
Step 2: Click on Update & Security.

Step 3: Click on Recovery, and under advanced startup, select Restart now.

Step 4: Wait for Windows to Restart. A page will appear, and select Troubleshoot.
Step 5: Select Advanced Options.
Step 6: Click on Command Prompt to boot Windows with Command Prompt function.

Step 7: When running SFC offline, you need to tell the repair tool exactly where the installation files are. To do this, type the following command below:
wmic logicaldisk get deviceid, volumename, description
For our computer, Windows is installed on Drive C:

Step 8: Now that you know where Windows is installed, Type the following command and press Enter.
sfc /scannow /offbootdir=C: /offwindr=C:Windows
**NOTE: offbootdir=C: (this is where your installation files are)
offwindr=C:(this is where Windows is installed)
**In our case, installation files and Windows are installed on one drive**
Step 9: Once the scan is finished, close Command Prompt and Click Continue to boot Windows 10.
Step 10: Use your computer and Observe if the system has improved. If not, run the scan one to two more times.
The System File Checker is advisable for users with minor issues with their windows system files. For Windows 10 users with a lot of corrupted system files, a fresh Windows 10 installation is needed.

- Your machine is currently running Windows 10
- Fortect is compatible with your operating system.
Recommended: To repair Windows Errors, use this software package; Fortect System Repair. This repair tool has been proven to identify and fix these errors and other Windows problems with very high efficiency.

- 100% safe as confirmed by Norton.
- Only your system and hardware are evaluated.
Frequently Asked Questions
Where is the system file checker Scannow log file stored?
The SFC Scannow log file is stored on the computer’s hard drive. The exact location depends on the Windows version installed on the computer. The log file is generally stored in the “C:\Windows\Logs\CBS” folder.
What does the System File Checker do?
The System File Checker is a tool that scans your system files and replaces corrupt or missing files. This can be useful if you are having problems with your system or want to ensure that your system runs as smoothly as possible.
Should I run DISM or SFC first?
There are a few things to consider when trying to determine whether to run DISM or SFC first. One is the severity of the problem. If the problem is severe, then SFC is likely to be more effective. Another consideration is how much time you dedicate to fixing the problem. If you only have a limited amount of time, running SFC first may be the best option.
What does SFC Scannow fix?
The SFC Scannow tool is a Microsoft utility that scans and repairs missing or corrupted system files. This tool is used as a last resort when other troubleshooting methods fail. When run, the SFC Scannow tool will scan all of the Windows system files on your computer and replace any that are corrupt or missing. This can often fix many types of problems with your computer, including crashes, blue screens, and performance issues.
How do I fix Windows Resource Protection?
First, you need to understand what Windows Resource Protection is. Windows Resource Protection is a feature in Microsoft Windows that helps protect your computer from tampering with malicious programs. When Windows Resource Protection detects a change to a protected file, it will restore the file from a cached copy stored in a safe location. This helps ensure that your computer can always use the original, unmodified version of the file.
Does SFC Scannow improve performance?
System File Checker, or SFC Scannow, is a Microsoft Windows utility that can scan for and repair corrupt system files. While it will not improve performance in and of itself, it can help fix issues causing your computer to run slowly.
Which is better system file checker or chkdsk?
A few key differences between system file checker and chkdsk can help you decide which one is best for you. System file checker is a utility that scans for and replaces corrupted system files. Chkdsk, on the other hand, is a utility that checks for errors on your hard drive and attempts to repair them.
So, which one is better? It depends on what you need.
What does Windows Resource Protection could not perform the requested operation?
When Windows Resource Protection cannot complete the requested operation, this typically means that the file in question is either corrupt or missing. This can occur for several reasons, such as if the file was accidentally deleted or damaged during a system crash. In any case, it is advisable to run a scan with a reliable antivirus program to check for corruption and then attempt to restore the file from a backup if possible.