![[Repair Guide] Repairing the File Explorer in Windows 10](https://cdn.techloris.com/app/uploads/2023/05/How-to-Repair-File-Explorer.png)
[Repair Guide] Repairing the File Explorer in Windows 10

Update Windows
If you come across an error while using Windows 10, it’s recommended that you check for any available updates. The error is likely related to a bug affecting the proper functioning of ‘File Explorer,’ which may have already been resolved in the latest Windows updates.
1. Press WIN + I to launch system Settings.
2. Select Update & Security from the list of options.

3. In the Update & Security settings, the Windows Update tab will open by default.
4. Click on the Check for updates option on the right.

5. If there are any available updates, they will be downloaded and installed on your computer.
6. After the installation, check if the File Explorer is not responding error persists.
Modify Display Settings
Many users change the display settings to make texts and icons appear bigger. However, this can significantly affect the system’s performance and, in rare cases, cause app crashes, which may be the cause of the ‘File Explorer’ error. Therefore, checking and adjusting the scaling to acceptable limits is important if you’ve previously changed it.
1. Press WIN + I to open Settings.
2. Click on the System option.

3. Locate the Scale and layout heading.
4. Set Change the size of text, apps, and other items to 100%, which is the recommended setting.

5. Wait for the new settings to apply.
6. Check if you can launch and work on File Explorer without encountering any errors.
Restart File Explorer
Restarting an app or process is often a simple and effective way to resolve issues. Many users have found that restarting File Explorer can fix errors, so it’s worth trying. There are three ways to restart File Explorer: Task Manager, Command Prompt, or a BAT File.
Restart File Explorer with Task Manager
1. Press CTRL + SHIFT + ESC to open the Task Manager.
2. In the Processes tab, locate the Windows Explorer process.
3. Select the Windows Explorer process and then click on Restart at the bottom of the screen.

4. Wait for a few seconds for File Explorer to restart.
5. You may notice the taskbar disappearing for a few seconds.
Restart File Explorer with Command Prompt
Including the method of restarting File Explorer using Command Prompt is essential as many tech-savvy users prefer using it for various functions.
1. Open the Start menu and type cmd.
2. Open the Command prompt and run as an administrator.

3. In the command prompt window, type the following command and press Enter:
taskkill /f /im explorer.exe
As soon as you end the File Explorer process, you’ll notice certain changes to the display that will confirm the action.
4. Next, type start explorer.exe and press Enter to restart Windows Explorer.

Restart File Explorer with BAT File
BAT files are a useful tool for automating tasks and can be very effective. If restarting File Explorer using the previous methods has fixed the error, it’s worth considering a simpler solution. A BAT file can automate the restart process, making it possible with just one click.
To use a BAT file to restart File Explorer, search for Notepad in the Start Menu and then launch the app from the search results.

Next, type the following command in the Notepad.
taskkill /f /IM explorer.exe start explorer.exe exit

You will notice that the commands in the BAT file are the same as the ones you entered in Command Prompt earlier. The command you enter in the BAT file will be executed through Command Prompt, but the process will be faster, taking only three clicks.
Once you have entered the commands, you can save the file by clicking on the File menu in the top-right corner and selecting Save from the drop-down menu.
In the Save As window, navigate to the desktop and enter the filename as Restart Explorer.bat. Ensure you have selected All Files as the Save as type option. Lastly, click on Save.

To run the BAT file, find it on the desktop and right-click. Select Run as administrator from the context menu and click Yes on the pop-up that appears. The command prompt window may appear for a brief moment, and the screen and taskbar may be affected for a slightly longer period. The File Explorer will restart soon after.
Modify File Explorer Settings
Modifying certain settings in File Explorer can sometimes cause conflicts with the operating system, resulting in errors such as app crashes or frequent freezing. One such setting has been identified in File Explorer, and changing it is a useful solution.
1. Search for Control Panel in the Start Menu and launch the app.
2. Select File Explorer Options.

3. Go to the General tab and select This PC from the drop-down menu next to Open File Explorer to.
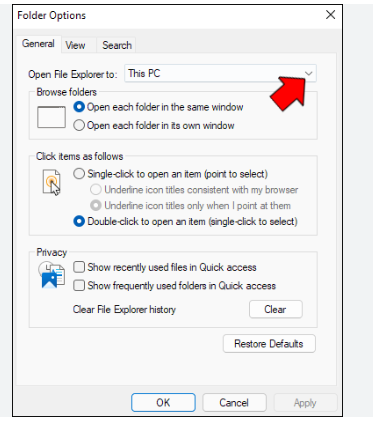
4. Under the Privacy section, untick the checkboxes for Show recently used files in Quick Access and Show frequently used folders in Quick Access.

5. Navigate to the View tab and untick the option for Show preview handlers in the preview pane.

6. Click OK at the bottom to apply the changes and close the window.
Perform a Clean Boot
A clean boot can help you identify the startup application causing File Explorer issues. Sometimes, certain applications can interfere with your PC and cause problems.
1. Search and open System Configuration in the Start menu.
2. Go to the Services tab, tick the box Hide all Microsoft Services and click Disable all.

3. Go to the Startup tab and click the Open Task Manager link.

4. Disable all Startup services, return to System Configuration, and click OK to save changes.
Clear History and Create a Shortcut for File Explorer
If the previous methods did not resolve the File Explorer error, consider clearing its history and creating a new path. This can help eliminate any data causing the problem and fix any issues preventing File Explorer from working correctly.
1. Open File Explorer Options and go to the General tab.
2. Under the Privacy section, click the Clear button.
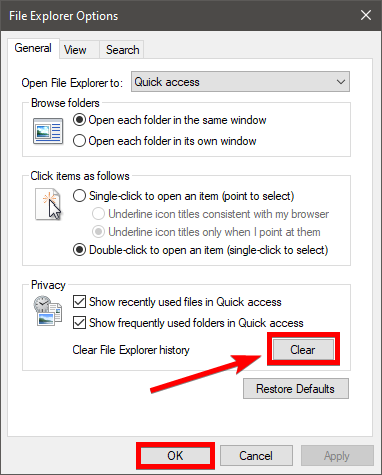
3. After you clear file explorer history, click the OK button to save.
4. Go to your Desktop and right-click on the blank area, then select New > Shortcut.

5. Type C:\Windows\explorer.exe and click Next.

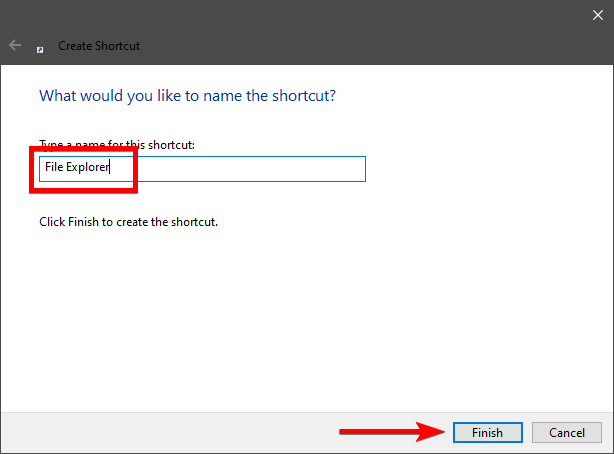
6. Name the Shortcut as File Explorer and click the Finish button.
The shortcut will be available on the desktop after creating the shortcut using the above steps. To add the shortcut to the taskbar, you can right-click on it and choose Pin to taskbar. Once the shortcut is available, try accessing File Explorer using the new path and see if the error persists.
Hide Hidden Files and Folders
Revealing hidden files and folders can sometimes cause issues with File Explorer, such as crashes. Therefore, if you encounter such problems, it’s recommended to revert the settings back to default. By doing so, you fix the issue.
1. Open File Explorer Options and go to the View tab.
2. Select Don’t show hidden files, folders, or drives.
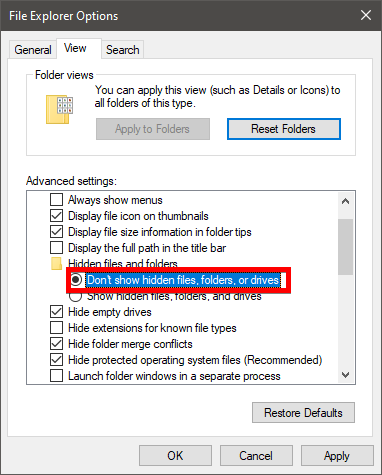
5. Click on Apply and OK to save changes.
Update Display Driver
If you encounter File Explorer errors, it may be due to an outdated driver. To fix this, you need to find the latest version of the driver on the manufacturer’s official website and download it to your computer. Before proceeding, ensure you have downloaded the most recent driver file.
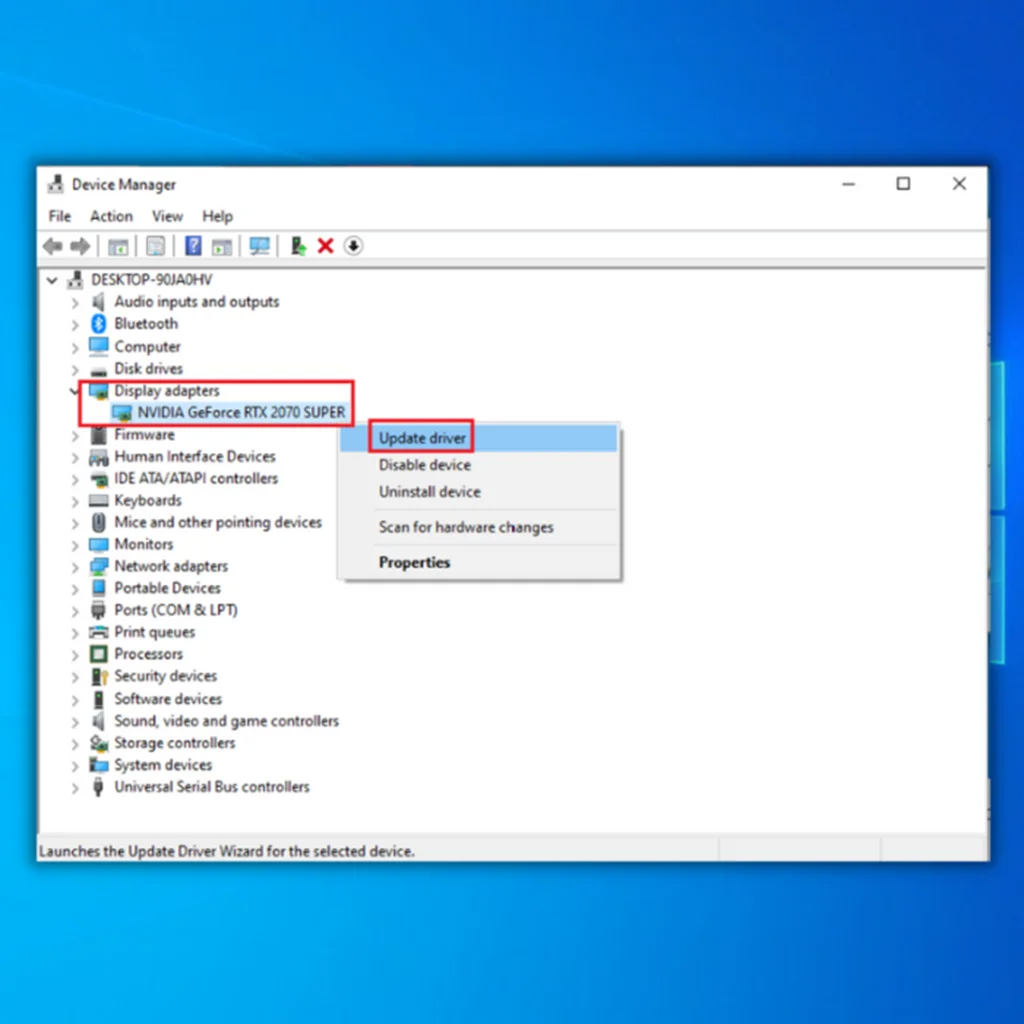
1. Press Win + X and select Device Manager.
2. Expand Display adapters, right-click on the Display Driver, and select Update driver.
3. Select Search automatically for drivers.
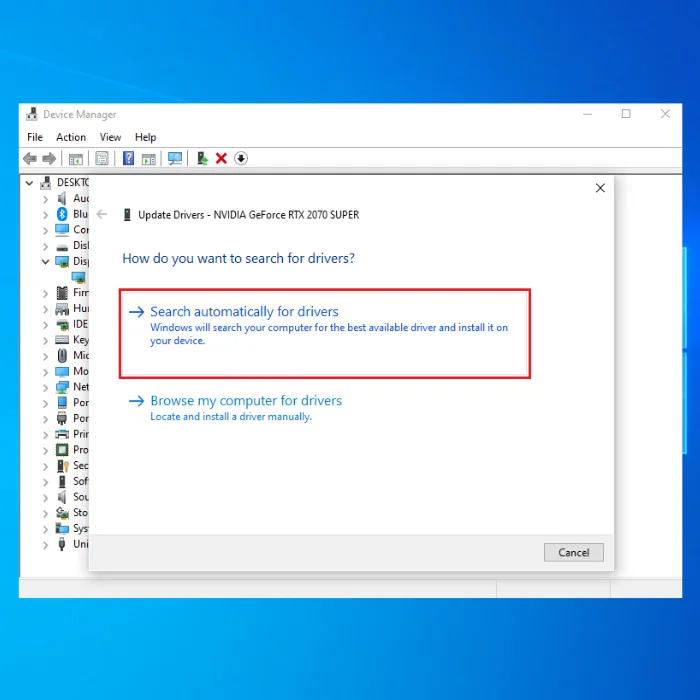
4. After updating the driver, check if the File Explorer runs without errors or lagging.
Reinstall Display Drivers
If the display driver is corrupt, it can cause errors when launching and using File Explorer. To resolve this issue, reinstall the driver.
1. Open Device Manager and expand Display adapters.
2. Right-click the display driver and select Uninstall device.

3. Click Uninstall and restart your PC.
4. Windows will automatically reinstall the driver after the reboot.
Disable the Windows Search Service
If the previous solutions did not solve the issue, disabling the Windows Search service may be necessary, as it is the cause of errors for some users.
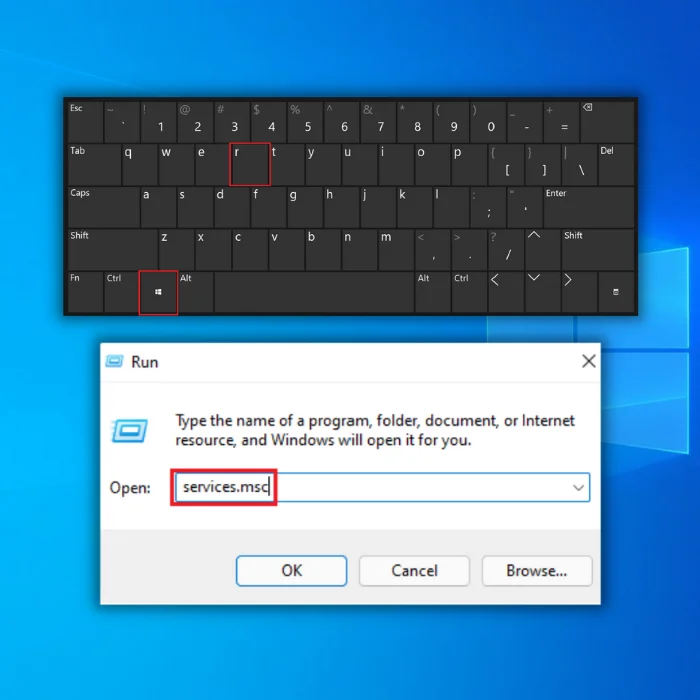
1. Press the Windows key + R to open the Run dialog box.
2. Type services.msc in the box and press Enter.
3. In the Services window that opens, scroll down and locate the Windows Search service.
4. Right-click on it and select Properties from the context menu.

5. Locate the Startup type option and select Disabled from the drop-down menu.

6. Click on Apply and then OK to save the changes.
7. Restart your computer for the changes to take effect.
Run the System Maintenance Troubleshooter
The System Maintenance Troubleshooter can identify and fix issues related to desktop shortcuts, disk volume, file paths, and more. Windows typically runs this troubleshooter regularly to ensure optimal performance, but you can manually initiate it if you’re experiencing issues as the one described earlier.
1. Press Win + R to open the Run dialog box.
2. Type control and press Enter.
3. Go to Troubleshooting.

5. Select the System and Security option.
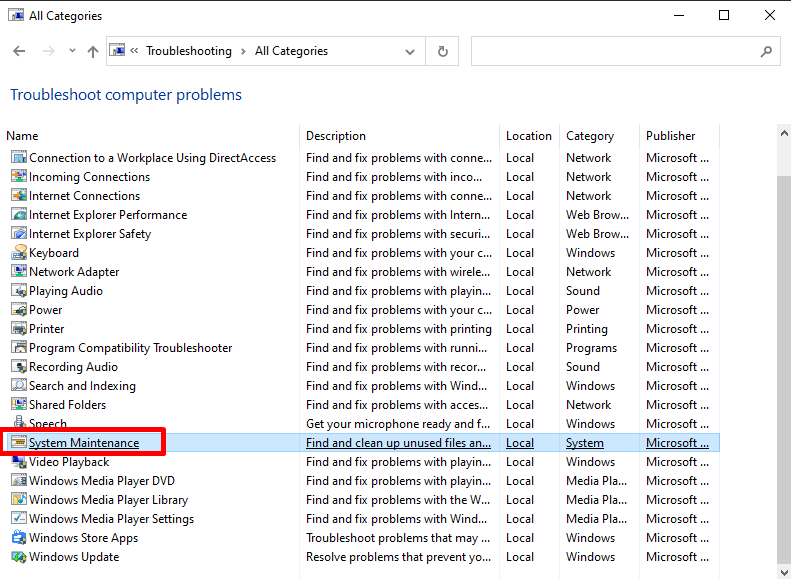
6. Click on System Maintenance and follow the on-screen instructions to run the troubleshooter.
Run System File Checker Scan
The SFC scan can repair damaged files by replacing corrupted system files with cached copies. If the cause of the File Explorer error is corrupt files, running an SFC scan can resolve the issue.
1. Run the Command prompt as an administrator.
2. Type the following command and press Enter:
sfc/ scannow

After initiating the SFC scan, wait for it to finish, as it may take some time to complete. The scan is designed to repair corrupted system files with a cached copy, which may fix the ‘File Explorer’ error if corrupted files cause it. Once the scan is complete, restart your computer and verify if the issue has been resolved.
Check for Memory Issues
Issues with the RAM can cause malfunctioning of applications on a system. Windows 10 has an in-built diagnostics tool to identify and resolve RAM-related issues. It’s advisable to run this tool and see if it can fix any errors related to File Explorer.
1. Open the Start menu and search Windows Memory Diagnostic.

2. Open the app and select Restart Now and check for problems.

To prevent any data loss, save all your ongoing work before you proceed with the diagnostic tool, as the computer will restart during the process.
Run Full System Scan
If the File Explorer error is caused by a malware infection, running a Full Scan can help detect and remove any malicious files. A Full Scan may be useful if none of the previous solutions have resolved the issue.
1. Open Windows Security by clicking the shield icon in the taskbar or searching for it in the Start menu.
2. Click on the Virus & threat protection option.
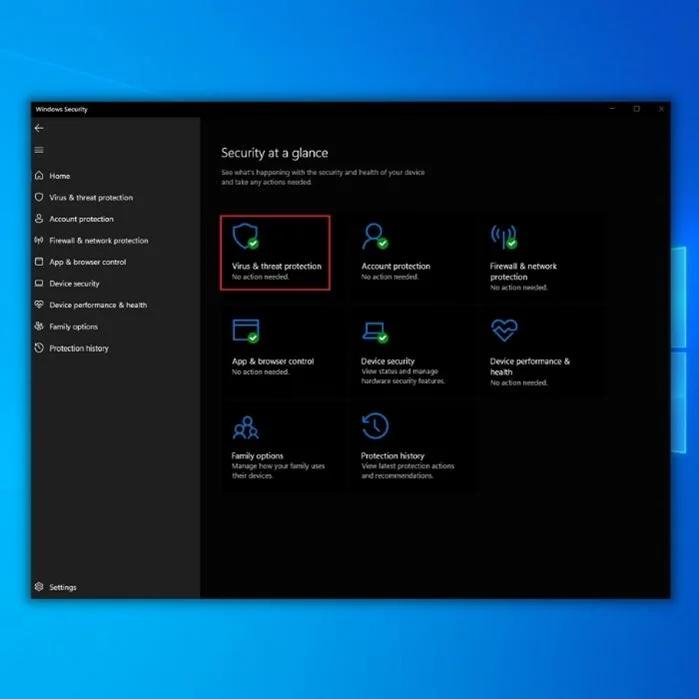
3. Click on the Scan options link under the Quick Scan button.
4. Select Full Scan and click on the Scan Now button.

5. The scan may take some time to complete depending on the size of your hard drive and the number of files on it.
6. Windows Security will show you the results and any threats detected after the scan.
7. Follow the prompts to remove any threats found during the scan.
Uninstall the Malfunctioning Application
If a third-party application has caused the File Explorer error, uninstalling it can improve Windows’ performance and resolve the issue. To identify which app may be causing the error, try to recall when the error first occurred and create a list of the installed applications during that period. Then, uninstall the suspected apps until the issue is resolved. This solution may require some experimentation.
1. Press Win + R, type appwiz.cpl, and click OK.

2. Locate and select the problematic application.
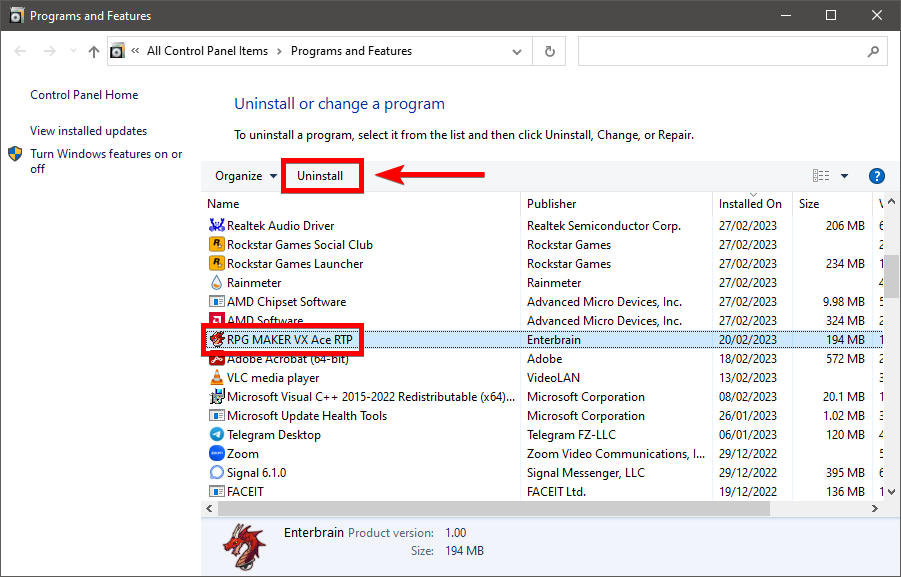
3. Click the Uninstall button.
Run Automatic Repair
Automatic Repair is a built-in tool in Windows 10 that helps to diagnose and repair problems that prevent Windows from starting properly. It can be used to repair File Explorer errors in Windows 10.
1. Press Win + I to open the Settings app.
2. Click on Update & Security > Recovery.
3. Under the Advanced Startup section, click on Restart Now button.

4. Wait for the computer to restart and boot into recovery mode.
5. Click on Troubleshoot > Advanced Options > Startup Repair

6. Select your account and enter your password in the Startup Repair screen.
Once initiated, Windows 10 will automatically start the repair process; you must wait for it to complete. Automatic repair may involve multiple restarts of the computer.
Restore Windows to an Earlier Point

You can try using System Restore. This feature allows you to revert Windows to an earlier state where the error did not exist. You should choose a restore point created before the error first appeared. Please note that using System Restore might affect the settings and remove some recently installed programs, but it does not affect your stored files.
If you use System Restore and it is successful, the File Explorer problem will be resolved. However, this should be your last option because you might lose programs. After trying the different fixes mentioned above, at least one should have fixed the issue. You can now use Windows without any disruptions, as it should be.
Reset Your PC
Resetting your PC is another option that can be used to repair File Explorer in Windows 10. This process will remove your computer’s files, programs, and settings and reinstall Windows to its original state.
This method is useful when all other options have failed to resolve the issue. Resetting your PC will give your system a fresh start and remove any corrupted files or programs that might be causing the File Explorer error.
1. Open Settings and click on Update & Security > Recovery.
2. Under Reset this PC, click on Get Started.

3. Choose whether to keep your files or remove everything, and follow the on-screen instructions.

4. Click on Reset to start the process.
What Causes Windows Explorer Not to Respond to Errors?
Several possible causes can prevent Windows Explorer from responding or cause it to display errors, including:
- Corrupted system files: If system files that Windows Explorer relies on are damaged or corrupted, they may not be able to function properly.
- Malware or virus infections: Malware or viruses can infect and damage system files, causing Windows Explorer to crash or become unresponsive.
- Outdated or conflicting drivers: Drivers that are outdated or incompatible with your system can cause errors and issues with Windows Explorer.
- Third-party software conflicts: Certain software programs or applications can conflict with Windows Explorer, causing it to become unresponsive or crash.
- Hardware issues: Faulty hardware, such as a failing hard drive or RAM, can cause Windows Explorer to stop responding.
Can I Uninstall and Reinstall File Explorer?
No, it is impossible to uninstall and reinstall File Explorer in Windows 10. File Explorer is an integral part of the operating system and cannot be uninstalled or reinstalled separately. However, you can try repairing or resetting File Explorer to fix any issues you are experiencing.
Restore Your File Explorer in Windows 10: A Comprehensive Repair Guide
In conclusion, this comprehensive repair guide has provided various methods to fix issues with File Explorer in Windows 10. By following the steps outlined in this guide, you can resolve common problems and restore the functionality of your File Explorer. Whether it’s fixing crashes, resolving slow performance, or resolving other errors, you now have the tools and knowledge to tackle these issues effectively. Remember to follow the instructions carefully and use the troubleshooting techniques discussed to ensure a smooth and seamless File Explorer experience on your Windows 10 system.