![[Repair Guide] Sound Control Panel Won’t Open in Windows 10](https://cdn.techloris.com/app/uploads/2023/05/cant-open-control-panel.png)
[Repair Guide] Sound Control Panel Won’t Open in Windows 10

At times, you might be unable to open the volume mixer on Windows 10, which can be frustrating, especially when you need to adjust an app’s volume for a better working environment. This issue can leave you without control over your audio levels and stuck with the default settings before the volume mixer disappears.
It can be challenging to pinpoint the exact cause, and you might have to try various solutions to fix it. Fortunately, you don’t need to be tech-savvy to resolve the issue, as you can use several straightforward methods.
Update Windows on Your Operating System
Before attempting any fixes below, install the latest Windows 10. To do so, navigate to Settings > System > About and verify if there are any available updates. Restarting your computer might also resolve the issue, so it’s worth a shot.

Through Windows Settings App
1. Press Windows + I keys to open Settings.
2. Click on the System setting.
3. Click the Sound menu in the left pane.

4. Click Sound Control Panel under Related settings.
Through Taskbar
1. Right-click on the system tray’s Sound or Speaker icons.
2. Select the Open Sound settings option.
3. Click Sound Control Panel under the Related Settings section.

Sound Settings Dialog
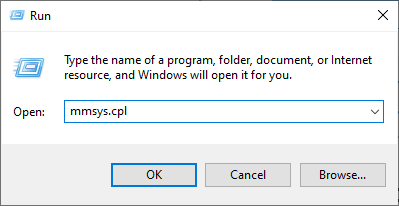
You can also open Sound Control Panel window using the Run dialog box.
1. Press Win + R to open the Run dialog box.
2. Type mmsys.cpl and press Enter.
3. This will open Windows sound settings.
Access Sound Control Through File Explorer
You can access Sound Control Panel on Windows 10 or 7 by navigating to the Sound Control Panel location in File Explorer.
1. Press Win + E to open File Explorer.
2. Navigate to the following path:
Control Panel\Hardware and Sound
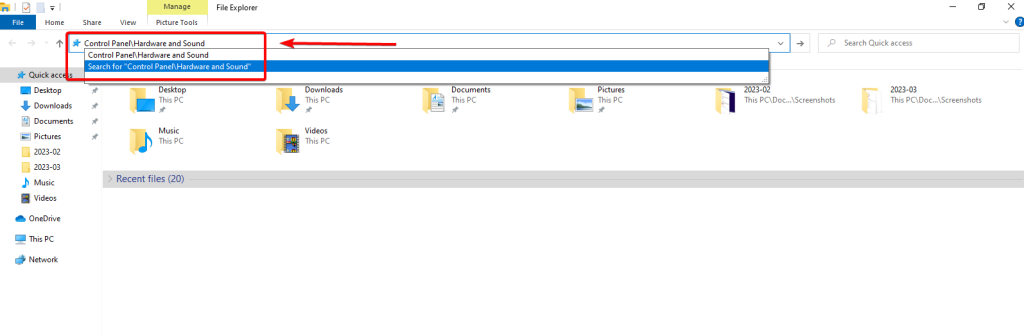
3. Click Sound to open sound settings.

Access Sound Settings in Control Panel
1. Open the start menu and type the control panel.

2. Open the Control panel app and click Hardware and Sound.

3. Click on Change system sound to open sound settings.

Access Sound Settings by Searching
1. Press Win + S to type the sound.
2. Select Sound settings to open sound settings.

3. Click on Sound Control Panel.
Open Sound Settings Using Command Prompt
1. Open the command prompt as an administrator.
2. Type the following command and press Enter:
mmsys.cpl sounds or mmsys.cpl

Desktop Shortcut
1. Open Control Panel, then click on Hardware and Sound.
2. Right-click Sound and select Create Shortcut.

3. A shortcut will be created on the desktop.
4. Use the shortcut to open the Sound settings window.
Note that the shortcut can’t be pinned to the Start Menu, and the shortcut can only be run from the desktop. You can’t customize the shortcut much compared to a normal shortcut.
Using Themes
1. Press the Windows key + I to open Settings and click on Personalization.

2. Click on Themes and click the Advanced Sound settings link in the right panel to open the sound tab.
Device Settings
Click on the Recording tab to access the Sound settings for input devices and select the desired device. Next, navigate to the Advanced tab and make the necessary changes.

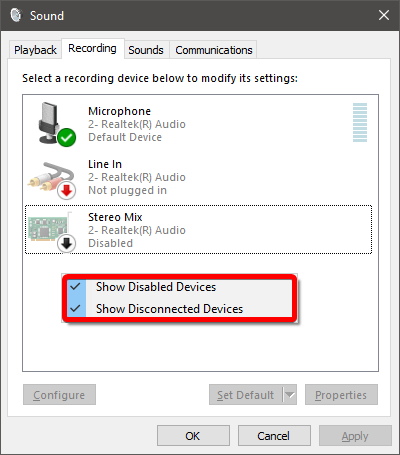
Recording Settings
1. Right-click anywhere inside the empty, white space of the Recording tab and choose Show disabled devices, then right-click again and check Show Disconnected Devices.
2. Connect the required cable for the physical input device and make sure it fits tightly.
3. Right-click over the playback devices you want to record with and choose Enable if visible.
4. Right-click over the same input device and choose Set as Default Device if it’s the only input device.
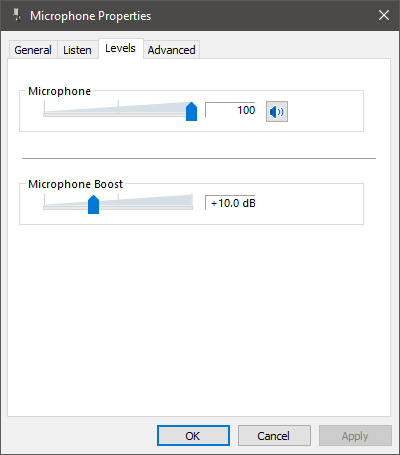
5. Right-click over the input device and select Properties, then click the Levels tab and ensure the volume slider is turned up.
6. Right-click over the input device again, select Properties, then click the Advanced tab and set the required format using the dropdown menu for Default Format.
7. Set the Default Format to mono or stereo to match the number of recording channels in Audacity’s Device Toolbar or the Devices tab of Audacity Preferences.
8. Set the sample rate in the Default Format to match the project rate in Audacity. Click the OK button.
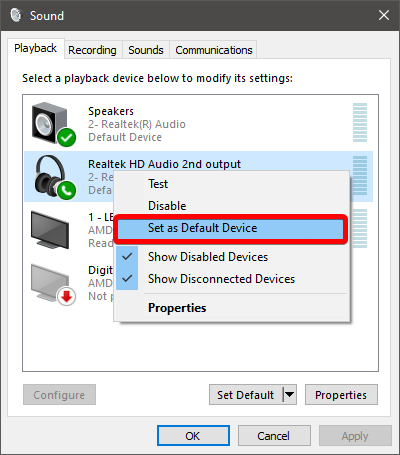
Playback Settings
1. Right-click over the desired Speakers or Headphones sound device and select Set as Default Device if visible.
2. If Set as Default Communication Device is also available, choose that to set it as the default for all applications.
3. Right-click over the same device and choose Properties, then navigate to the Advanced tab and set the Default Format to a stereo choice.
4. To avoid unwanted playback or recording sound effects, look for Levels, Custom, or Effects tabs, and turn off all effects that are not required.
5. Click the OK button to close the Windows Sound window.
Communications Settings Adjustment (Even if You Do Not Make Internet Calls)
The sound settings in Windows are usually optimized for VoIP applications like Skype for internet calls or video conferencing. Still, these settings may cause issues when recording high-quality music using a microphone.
1. Right-click over Microphone and select Properties, then look for an Effects or Enhancements tab and turn off all sound effects unless needed.
2. Click the Communications tab and select Do Nothing under When Windows detects communications activity to prevent unwanted volume changes during recording.

3. To use a specific microphone for internet calls, right-click over that device and choose Set as Default Communication Device.
4. To use headphones as the playback device for calls and speakers for music, choose the Playback tab, right-click over the machine for rings, and choose Set as Default Communication Device.
5. If you want to use a headset for calls, select Set as Default Communication Device for the headset on both the Recording and Playback tabs.
Keep Your PC Updated
Keeping your PC updated can help prevent issues with opening the sound control panel. This is because regularly patching your computer ensures all its software and hardware run optimally. Outdated drivers can cause problems, such as compatibility issues or unexpected errors.
When a program is outdated, it can be more prone to malicious attacks. When security updates become available, they should be installed immediately to protect your computer from external threats. Therefore, constantly installing the latest updates will ensure your sound control panel opens without issues.
Resolve Sound Control Panel Won’t Open in Windows 10 With These Easy Steps
In this comprehensive guide, we have provided effective solutions to fix the issue of the Sound Control Panel not opening in Windows 10. Following these steps, you can regain control over your sound settings and troubleshoot any related problems. Whether it’s a driver issue or a system glitch, our step-by-step instructions will help you navigate the troubleshooting process and ensure that your Sound Control Panel functions properly. Don’t let sound issues hinder your computing experience any longer—get started with our repair guide and enjoy hassle-free sound control on your Windows 10 system.