![[Repair Guide] Windows 10 Apps Crashes Upon Launch](https://cdn.techloris.com/app/uploads/2023/05/Windows-Apps-Crash-on-Launch.png)
[Repair Guide] Windows 10 Apps Crashes Upon Launch

Windows apps can crash for a variety of reasons. Some common causes of crashing apps include outdated software, corrupted files, incompatible hardware, drivers, or insufficient memory. Outdated software can cause programs to become unstable, as newer versions may have better compatibility with certain components.
Corrupted files can also cause the “Windows 10 apps crash on launch” error, as they can prevent the app from launching properly. Incompatible hardware and drivers can cause conflict with the software, leading to crashes. Lastly, insufficient memory can be an issue if the program requires more than what is available on the machine.
Common Fixes for App Crashes
To start troubleshooting, there are a few basic things that users should check:
1. Verify that the application was installed properly by doing a re-installation.
2. If you’re using antivirus software, try installing the application with the antivirus disabled. Ensure that the application is downloaded from a trusted source.
3. Consider downloading an older version of the application to see if the error persists. If not, contact the application publisher with your problem report.
System File Checker (SFC)
Similar to other useful functions in Windows 10, SFC is a tool designed to detect and fix damaged or corrupted system files in Windows. Its usage is relatively straightforward and only requires the Command Prompt to be opened with administrator privileges to execute.
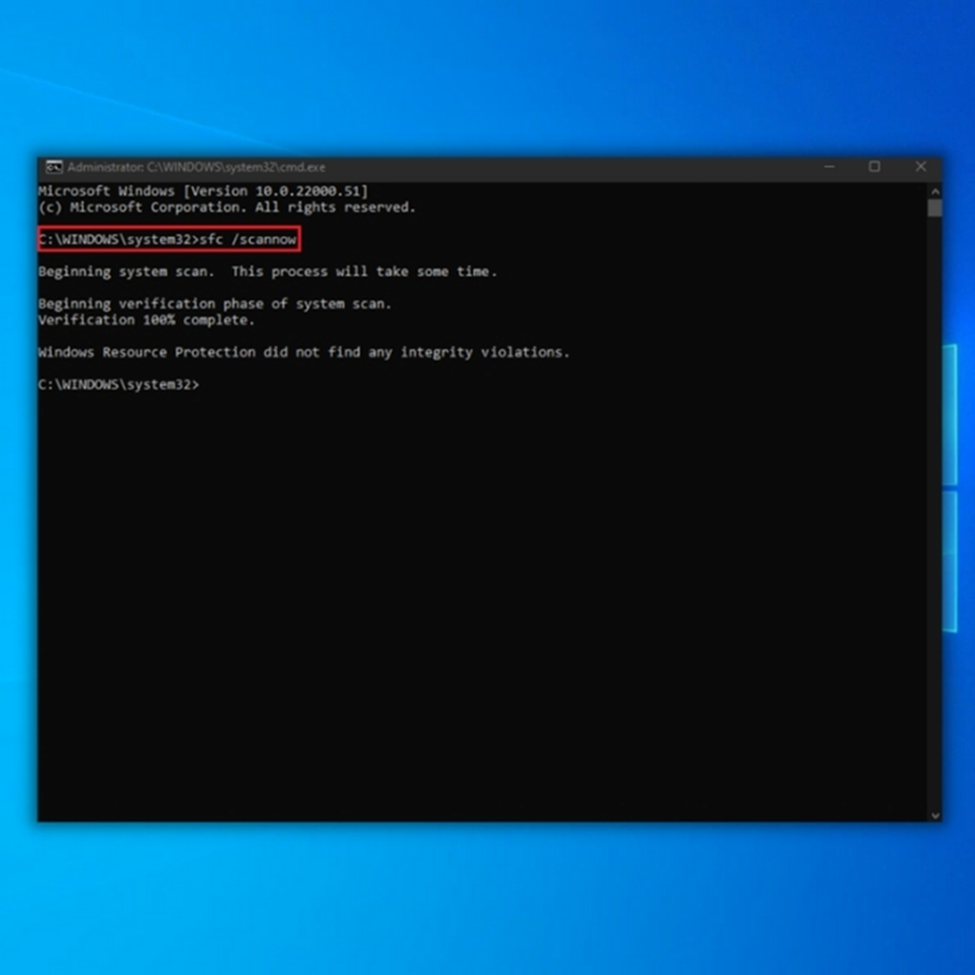
1. Type cmd in the search bar and run it as an administrator.
2. In the Command Prompt, type sfc /scannow and press Enter.
Run DISM
When SFC fails to repair the corrupted files, DISM can be used as another system utility to fix the Windows system images and other files. However, users should only resort to DISM after trying all other options. Here are the steps to run DISM:
1. Open Command Prompt as an administrator.
2. Type the command DISM.exe /ONLINE /cleanup-image /Scanhealth in the console.
3. Type the command DISM.exe /ONLINE /cleanup-image /Restorehealth in the console.

4. Close Command Prompt.
5. Restart your PC.
Using SFC and DISM commands can often help fix many errors in Windows 10. However, users must exercise caution when using these commands as they can significantly change the system. It’s recommended to back up important data before proceeding with these fixes.
Windows Store App Fixes
The following tips are recommended to fix issues where Windows store applications stop working and crash:
Resetting Microsoft Store Process
1. Open Command Prompt as an administrator.
2. Enter the command WSReset.exe in the console.

3. Wait for Windows to finish executing the command.
4. Restart your computer.
Clearing Microsoft Store Cache
1. Open File Explorer and navigate to
C: \Users \your-username \Local \Packages \Microsoft.StorePurchaseApp_8wekyb3d8bbwe \LocalCache.
2. Press Ctrl + A and delete all the files.
3. Restart the PC.
Re-Registering the Windows Store Ownership
1. Open File Explorer and go to C:\Program Files
2. Look for a folder named WindowsApps and right-click on it. Make sure the Hidden Items checkbox is ticked. Users can find it under the View tab in File Explorer.

3. Navigate to the Security tab and click on Advanced.

4. Click on Change under Owner – Trusted Installer. Enter your username and confirm.

5. Right-click on the WindowsApps folder again. Under the Security tab, click on Add.
6. Click on Select a principal and enter your username. Make sure to set the permissions to Full Control.
7. Go to the search bar and type Powershell. Open Windows PowerShell as administrator.
8. In the PowerShell console, type in
Get-AppXPackage | Foreach {Add-AppXPackage -DisableDevelopmentMode -Register “$($_.InstallLocation) \AppXManifest.xml”}.

9. Press Enter and Restart the computer.
Try a Clean Boot
To check for possible causes of an app crashing, a Clean Boot of the PC can be performed with a slight variation. The crashing app will be enabled, but all other third-party apps will be disabled. Follow the steps below to do this:
1. Open the Start menu and search for msconfig. Click on System Configuration in the results.

2. In the System Configuration window, click the Services tab and tick the Hide all Microsoft Services box.

3. Uncheck all services except the one related to the crashing app, then click Disable All and hit OK.
4. Open Task Manager and go to the Startup tab. Disable all startup services except the app in question by individually selecting and clicking Disable.

Scan for Malware
Frequent app crashes could be caused by malware, which can be prevented by following some common-sense tips. However, running a complete system scan with third-party antivirus software or the in-built Windows Defender is recommended if the computer is already infected. To scan your computer using Windows Defender, follow these steps:
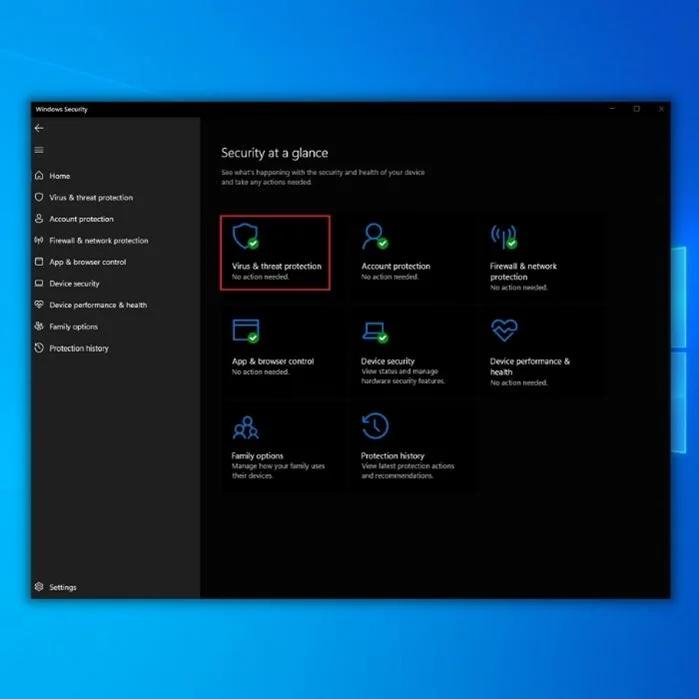
1. Open the Windows Security app by clicking the shield icon in the taskbar.
2. Click on Virus & threat protection.
3. Click on the Scan options under the Quick Scan button.

4. Select Full Scan and click on Scan Now.

5. Windows Defender will scan your system for malware and other threats.
Reset the App Settings
To reset an app that won’t start in Windows 10, you can follow these steps:
1. Open the Settings app and go to Apps.

2. Click on Apps & Features.
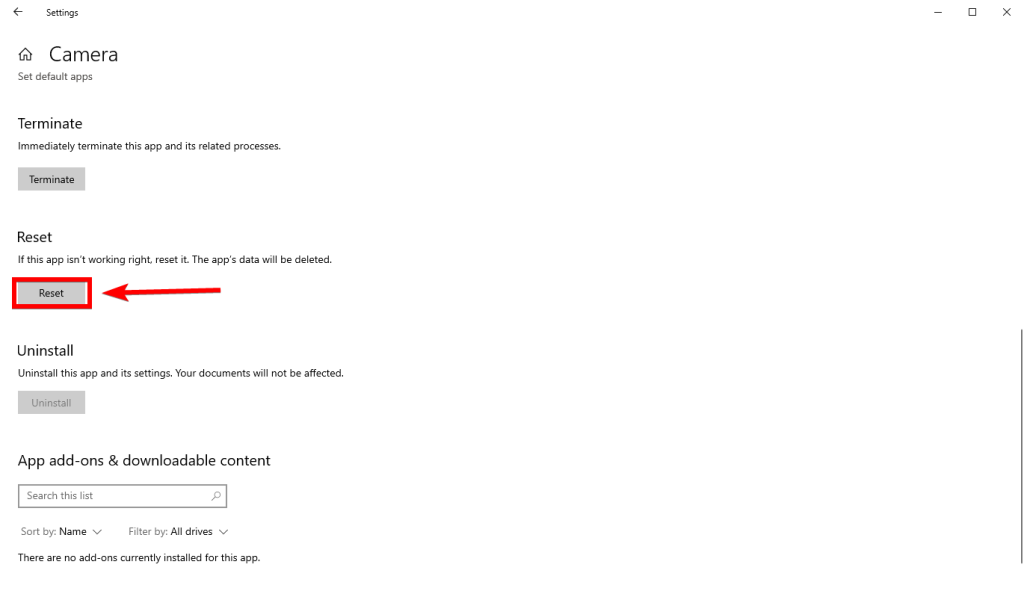
3. Find the app that’s causing the problem and select it.
4. Click on Advanced options, then click on the Reset button.
Update Windows
If clearing or resetting the Windows Store cache didn’t resolve the issue, checking for updates to Windows 10 should be the next step. This will likely resolve any persistent bugs or issues associated with the app.
1. On the Start menu, type Windows Update and click Open.
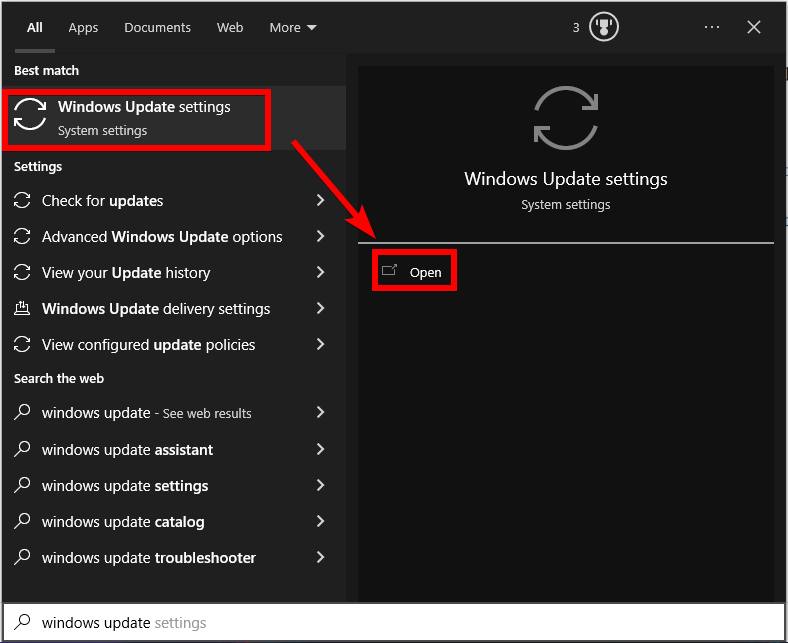
2. Click on Check for Updates.

3. If any new updates are detected, they should install automatically.
If you run into issues with installing any updates, refer to our troubleshooting guide to figure out how to solve them. Once you have completed the update process, verify whether the Store app functions correctly without crashing. If the issue persists, proceed to the following solution.
Set the Correct Time
If your system time is not synchronized with the Microsoft servers, it can lead to various unexpected issues, including crashing the Windows Store app. Since the app requires internet connectivity, ensuring that your PC’s time is accurate is crucial. To fix such issues, it’s necessary to set the time correctly.
1. Right-click the clock on the system tray, then click Adjust Date/Time.

2. Select the correct time zone, and then turn on the switch next to Set Time Automatically. You should enable that option if you are unsure about your correct time zone.
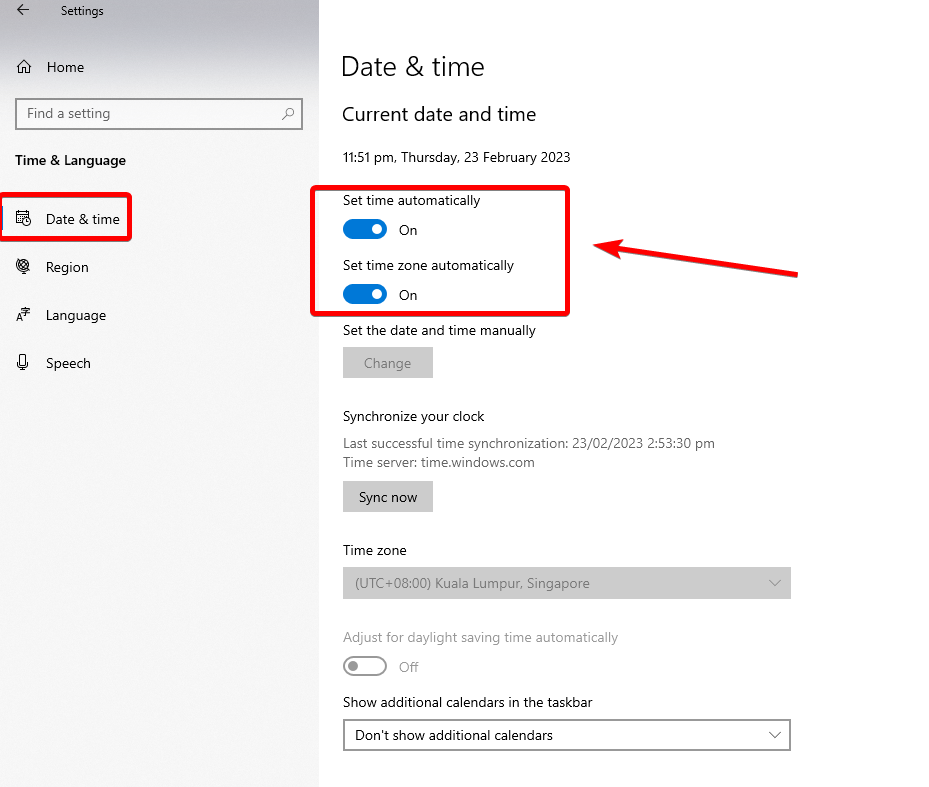
3. Alternatively, you can always set the time yourself (click Change under Change Date and Time). However, automatically letting the operating system do that for you is recommended and not prone to errors.
Run Windows Store Troubleshooter
1. Click the Start menu and type Troubleshoot settings in the search bar.
2. Click on the Troubleshoot settings option and click on Additional Troubleshooters.
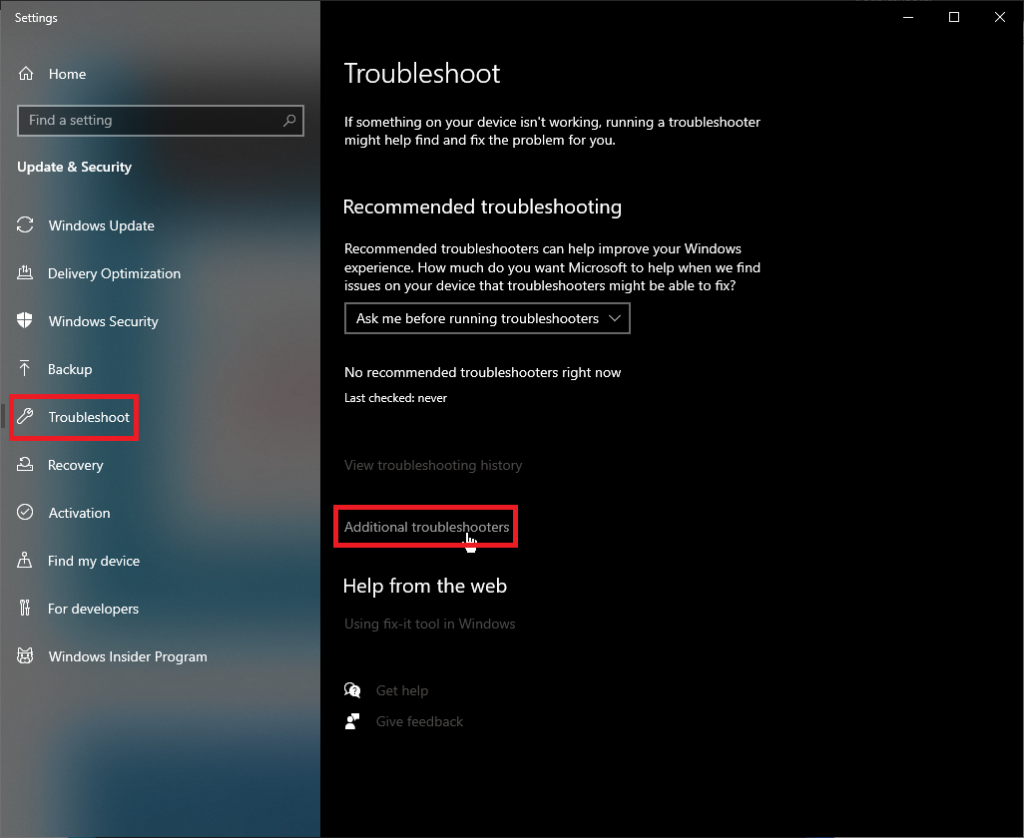
3. Scroll down to the Find and fix other problems section and click on the Windows Store Apps option.
4. Click on the Run the troubleshooter button.

5. Wait for the troubleshooter to detect and fix any issues with the Windows Store Apps.
6. Once the troubleshooter completes its scan, try relaunching the Store app to see if the issue has been resolved.
Uninstall the Latest Update
Uninstalling the most recent Windows update can eliminate the bugs and errors it may have caused. After that, it’s recommended to wait a few days for a new update to become available and install it by following the steps outlined below.
1. Open the Settings app by pressing Windows + I, then select Update & Security.
2. Click on View update history.

3. Select Uninstall updates.

4. Select the top Windows update from the new window and click Uninstall to remove it from your computer. Once done, the Applications keep closing error in Windows 10 will be resolved.

Resolve Windows 10 App Crashes: Conclusion and Final Tips
This comprehensive guide explored various solutions to tackle the frustrating issue of Windows 10 apps crashing upon launch. Following the step-by-step instructions and implementing the recommended troubleshooting methods, you can regain stability and enjoy a seamless app experience on your computer. Remember to update your drivers, reset app caches, and perform system scans regularly to prevent future crashes. With these techniques at your disposal, you can now confidently resolve app crashes and unlock the full potential of your Windows 10 system.