
BlueStacks Guide: How to Use Android Apps on Your PC

There are a lot of amazing android apps out there, and it’s a shame that they’re mostly available only on our smartphones.
If you’ve ever wondered how to use android apps or play android games on your PC, this guide is here to help you.
There is a simple way to use these apps on your PC; all it takes to start is one quick software installation. After that, you can enjoy your favorite games and apps, such as Viber, Instagram, and Badoo, while comfortably operating on your PC. Since these app files come in a .apk format (Android application package), you need to install an Android Emulator on your PC to run them.
Android Emulators
Android emulators run applications (.apk) files on Windows, iOS, etc.
There are many popular Android emulators to choose from, such as:
- BlueStacks
- NoxPlayer
- MEmu
- Ko Player
- Remix OS
They each have their own features, but all of them are designed to do one thing — run Android apps on your PC.
You have to choose and install one of them, and you can enjoy your favorite apps. This guide will cover using the BlueStacks android emulator since it’s one of the most popular. You will learn how to download, install, and use BlueStacks to run your favorite Android apps on your PC.
Where Do I Download Bluestack for Windows?
Head over to the official BlueStacks website to begin.
Step #1
On the BlueStacks website, click on the green “Download” button.

Go through the onboarding tutorial (or skip it), and wait for the download to finish.
Step #2
Once finished, open the download folder and run the installation file.

Step #3
Proceed to installation!
Installing BlueStacks
Step #1
When the installation window pops up, select “Install now” to begin the installation process.
Additionally, you can click on “Customize installation” in the bottom right to select a different installation folder.

Step #2
Once the installation is finished, click “Complete” to complete it.

Step #3
The installation is almost complete, and you just have to wait until the software loads up, as shown below.

Step #4
Setup your Google account by entering your login info to start using BlueStacks.

Step #5
Your BlueStacks is now ready to go. Feel free to start downloading some apps!

Downloading apps with BlueStacks is simple, and we’ll show you the whole process below.
Using Android Apps with BlueStacks on PC
Android emulators are usually simple to use, and the process is pretty straightforward.
The “home” screen looks similar to mobile phones, and in the top right, you can find a “Search” bar to browse and download apps.
For example, let’s install and use the Instagram app with the Bluestacks app player.
Step #1
In the search bar, type in the name of the android app you want to download, in this case: Instagram.
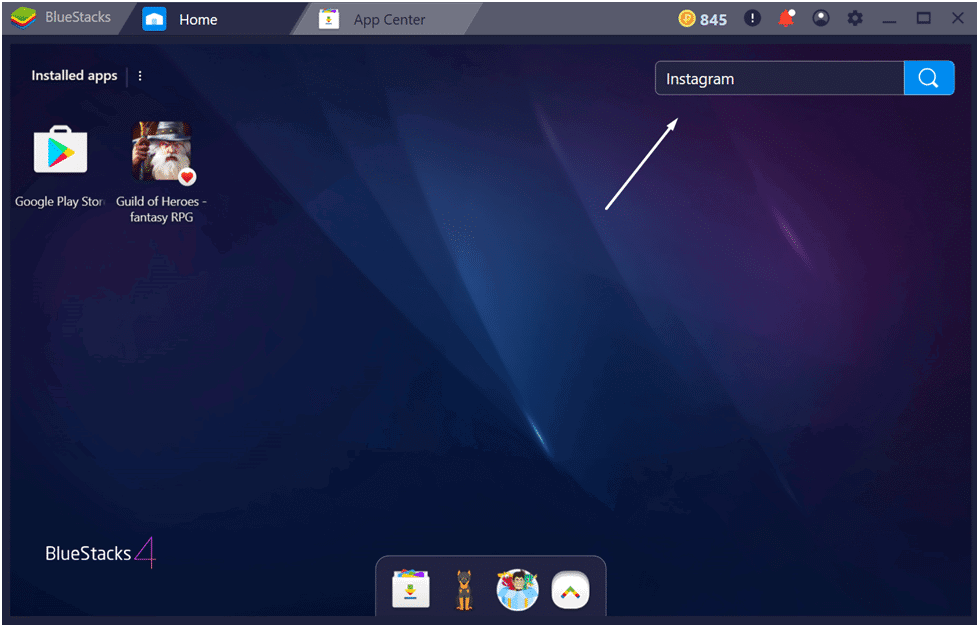
Find the correct app and click on it.
Step #2
Click “Install” to begin the installation process.

Be patient and wait for the download to finish (40MB).
Step #3
Once finished, click “Open” to start using the app.
You will also have to enter your login information to sign up.

As you can see, the UI is now smartphone-shaped, but you can enlarge the screen to your liking.
Step #4
Have fun using your app!
Use these steps to download any app you want; it’s always this simple.
Conclusion: Bluestacks Android Emulator for PC
Using apps on your PC is easy, and android emulators are always there to help you. There are many emulators you can choose from, and BlueStacks is one of the oldest and most popular software in this field, so you shouldn’t have any problems with it.
Be sure to check out our other useful guides including how to download Facebook videos, how to use the VidMate app on your PC, transfer files with SHAREit, and how to take screenshots in Windows.