![[Guide] How to Install Windows 11 on Unsupported Hardware](https://cdn.techloris.com/app/uploads/2023/05/How-to-Install-Windows-11-on-Unsupported-Hardware.png)
[Guide] How to Install Windows 11 on Unsupported Hardware

You cannot rely on the Windows Update feature to upgrade to Microsoft Windows 11 on a computer with unsupported hardware. Rather, you will need to manually install a bootable USB flash drive or ISO file to perform a clean install or an in-place upgrade.
The option to upgrade to Windows 11 on unsupported hardware has been left open by Microsoft, but it is not documented or supported. The company states this option is intended for organizations, but individuals can upgrade at risk without ensuring system stability or driver compatibility.
To put it differently, if you opt to install Windows 11 on hardware that is not compatible, you can proceed with the setup manually. Nonetheless, you must acknowledge that the upgrade will result in an unsupported state. Microsoft’s definition of an unsupported state is a device that doesn’t meet the minimum system requirements, which means it won’t be eligible to receive updates from Windows Update.
Despite possible updates, the company isn’t obliged to supply security and driver updates or technical assistance for such devices. Instructing you on installing Windows 11 (version 21H2 or 22H2) on a computer with incompatible hardware is the purpose of this guide.
It’s important to note that since the device is not officially compatible with the new version of Windows, it is not advisable to use this workaround unless you are aware of the potential risks and comprehend that stability, compatibility, and updates are not assured.
Steps to Take Before You Install Windows 11 on Unsupported Hardware
Download Windows 11 ISO File

You will require a Windows 11 ISO file to utilize the upcoming methods. In case you haven’t attempted to install Windows 11 or have created a bootable drive through the Windows 11 media creation tool instead of using the ISO, a direct download of Windows 11, ISO is necessary to execute the following methods.
To obtain the ISO, visit the Microsoft website and click the Download button under the Download Windows 11 Disk Image (ISO) section. After that, you must choose your preferred Windows language, and the link to download it will be provided.
Enable TPM 2.0 and Secure Boot

If you’re trying to install Windows 11 on a device showing an “unsupported” error, it’s important to confirm that your PC is indeed unsupported. In many cases, the error is caused by the absence of TPM 2.0 and Secure Boot support, which are required for Windows 11.
The good news is that these features are usually available on newer devices but are often disabled by default. Enabling them should allow you to proceed with the Windows 11 installation. However, the process for enabling TPM 2.0 and Secure Boot varies depending on the manufacturer and the BIOS of your device.
Although it’s impossible to provide precise instructions that will work for every device, there are some general steps you can take to enable these features. By following these steps, you may be able to install Windows 11 on your device, even if it was originally deemed unsupported.
How to Install Windows 11 on Unsupported Hardware
If you have hardware that isn’t supported by Windows 11, you can still upgrade to the new operating system, but you won’t be able to do it through Windows Update. Instead, you’ll need to manually perform a clean install or in-place upgrade using a bootable USB flash drive or ISO file and bypass certain security restrictions by running a script.
While Microsoft advises against installing Windows 11 on unsupported hardware and does not offer support, a loophole allows organizations to test the new OS on non-compliant devices. However, this option is not mentioned in Microsoft’s official documentation, and users who choose to upgrade to Windows 11 at their own risk will not receive any guarantee of system stability or driver compatibility.
Here are the steps to install Windows 11 on a computer with incompatible hardware.
Install Windows 11 on Unsupported Hardware From USB
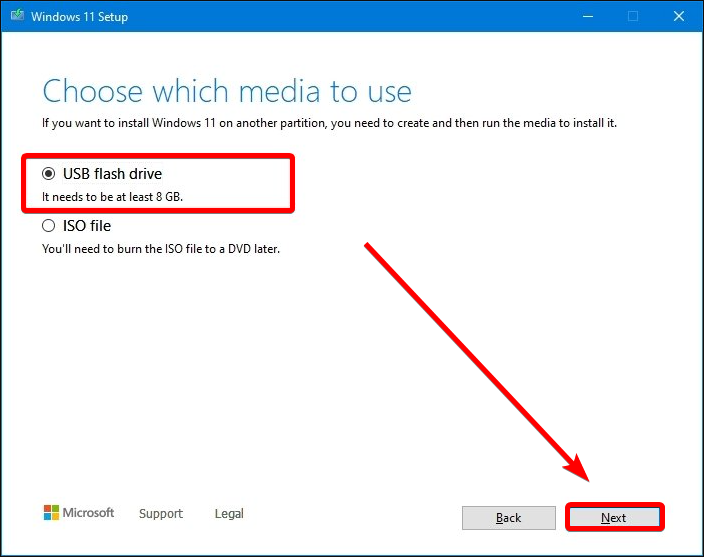
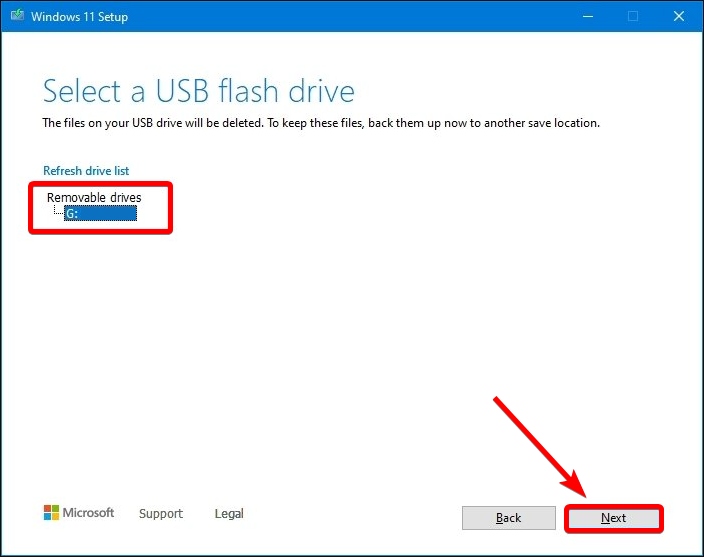
To perform a clean installation using the ISO file, creating a bootable media with a third-party tool like Rufus or Command Prompt is necessary, using a USB flash drive to commence the setup process.
Moreover, you must ensure the device can boot from USB, which entails adjusting the UEFI settings. The settings may vary for different computers, so refer to your manufacturer’s support website for more detailed information.
To install Windows 11 on a computer that is not supported, follow these steps:
1. Start the unsupported PC with the Windows 11 USB flash drive and press any key to continue.
2. Press Shift + F10 keyboard shortcut to open Command Prompt.
3. Type the following command and press Enter: regedit

4. Navigate the following path: HKEY_LOCAL_MACHINE\SYSTEM\Setup
5. Right-click the Setup (folder) key, select New, and then the Key option.
6. Name the key TechConfig and press Enter.
7. Right-click the TechConfig folder key, select New, and then the DWORD (32-bit) Value option.

8. Name the key BypassTPMCheck and press Enter.

9. Double-click the newly created key, set its value from 0 to 1, and click OK.
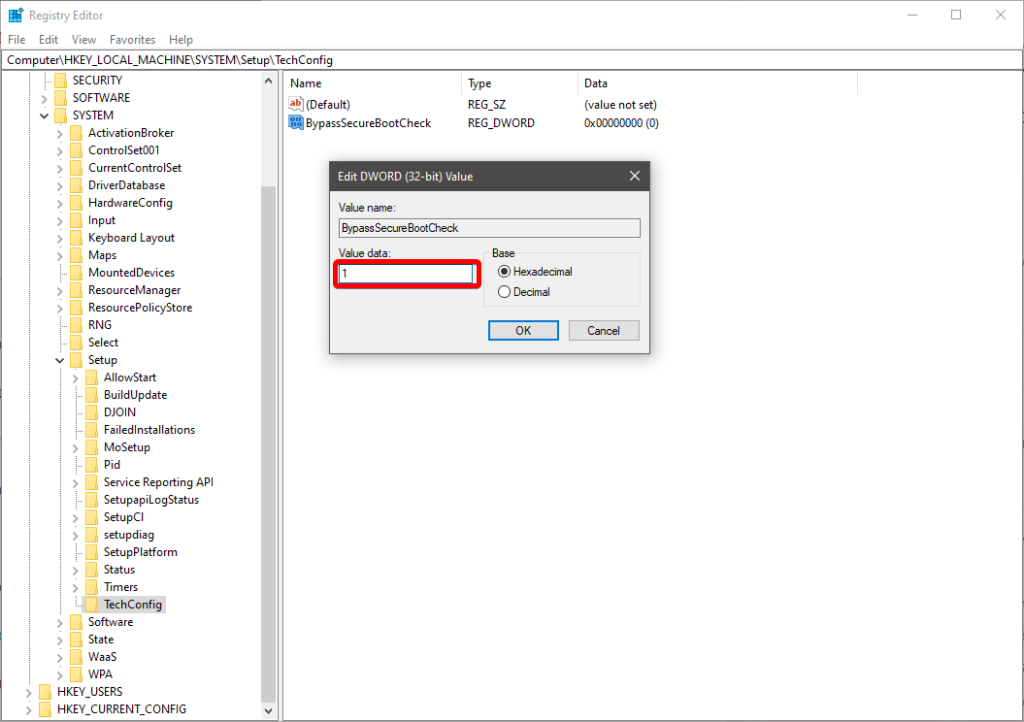
10. Right-click the TechConfig (folder) key, select New, and then the DWORD (32-bit) Value option.
11. Name the DWORD BypassSecureBootCheck and press Enter.
12. Double-click the newly created key and set its value from 0 to 1.
13. Click the OK > Next button.
14. Click the Install Now button.

15. If you reinstall, click the I don’t have a product key option. When Windows 11 has been activated previously after the installation, the reactivation process will take place automatically.

16. Select the edition of Windows 11 that your license key activates (if applicable).
17. Check the I accept the license terms option.
18. Click the Next button.
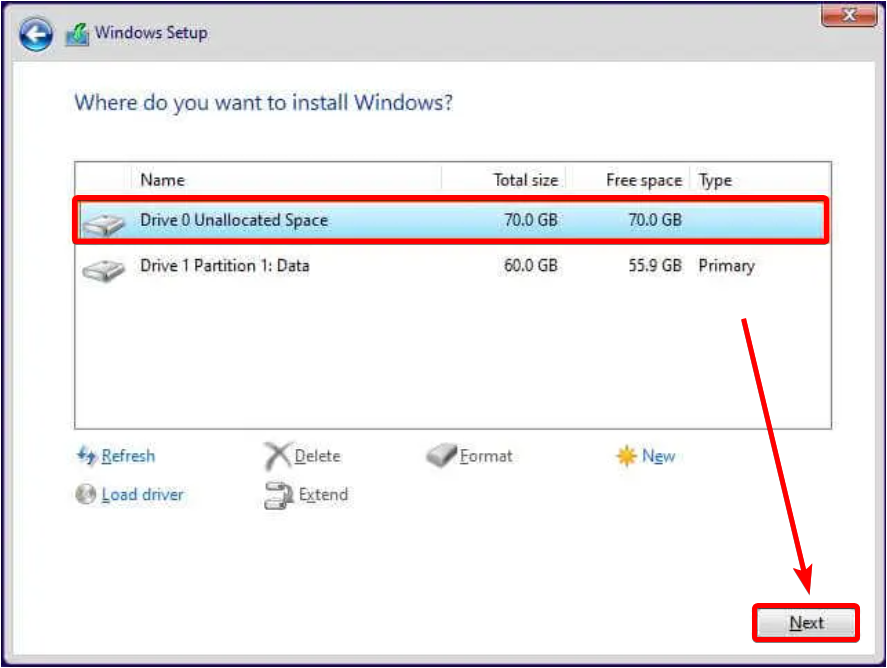
19. Select the Custom: Install Windows only (advanced) option.

20. Select each partition in the hard drive you want to install Windows 11 and click the Delete button.

21. Select the hard drive (Drive 0 Unallocated Space) to install Windows 11 on an unsupported device.
22. Click the Next button.
23. Select your region on the first page of the out-of-the-box experience (OOBE) after the installation.
24. Click the Yes button.

25. Select your keyboard layout setting, then click the Yes button.

26. Click the Skip button if you don’t require configuring a second layout.
27. Set up the network connection manually (if required).
28. (Optional) Confirm a name for the computer.
29. Click the Next button, and the device will start automatically.

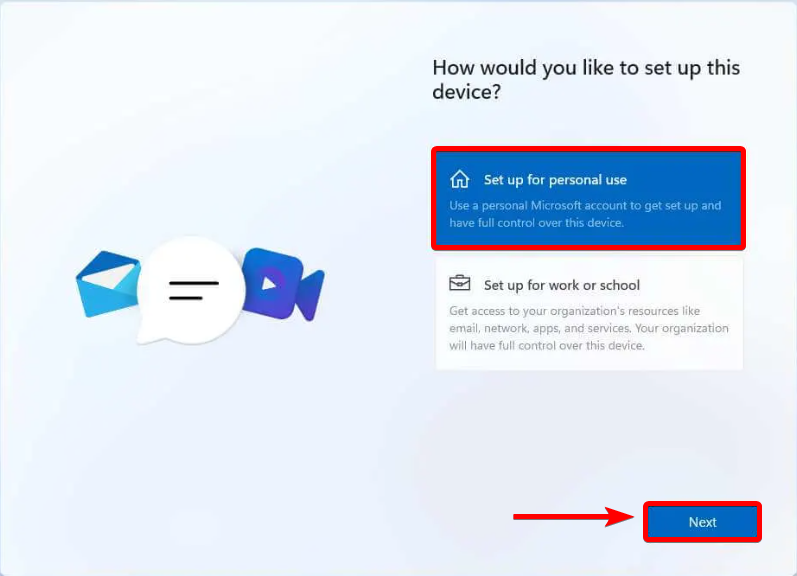
30. Select the Set up for personal use option for Windows 11 Pro and click the Next button.
31. Confirm your Microsoft account email to create an account, then click Next.
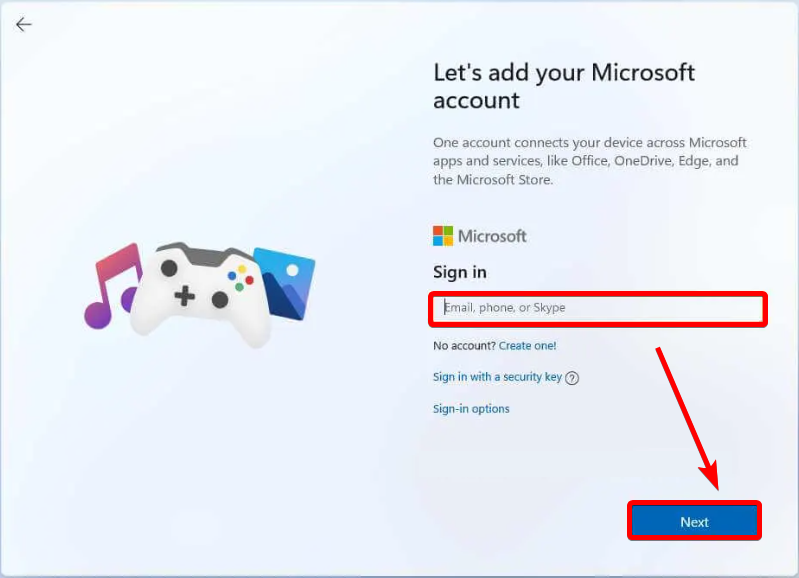
32. Confirm your Microsoft account password, then click the Next button.
33. Click the Create PIN button.

34. Create a new four-digit PIN and click the OK button.
35. Choose the Set up as new device option.

36. Adjust the toggle switch for each item based on your specific privacy preferences.
37. Click the Next > Next > Accept button.

38. Select the Back up My files with OneDrive to automatically upload your Desktop, Pictures, and Documents folders
Bypassing Requirements With the Registry Editor
To bypass the system requirements for Windows 11, modifying registry values using the Registry Editor is an option, although it is not recommended for inexperienced users. This method is suitable for those with an older TPM or unsupported CPU. However, it won’t work for those without TPM or other requirements. After downloading a Windows 11 ISO, follow the steps below.
1. Press Win + R to open the Run dialog, type regedit, then press Enter.

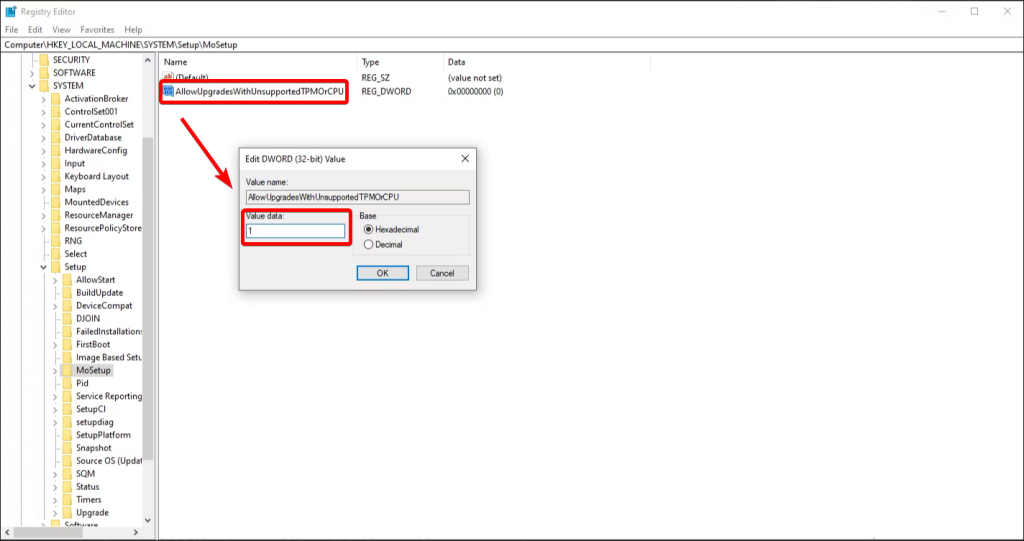
2. Navigate to HKEY_LOCAL_MACHINE\SYSTEM\Setup\MoSetup in the Registry Editor.
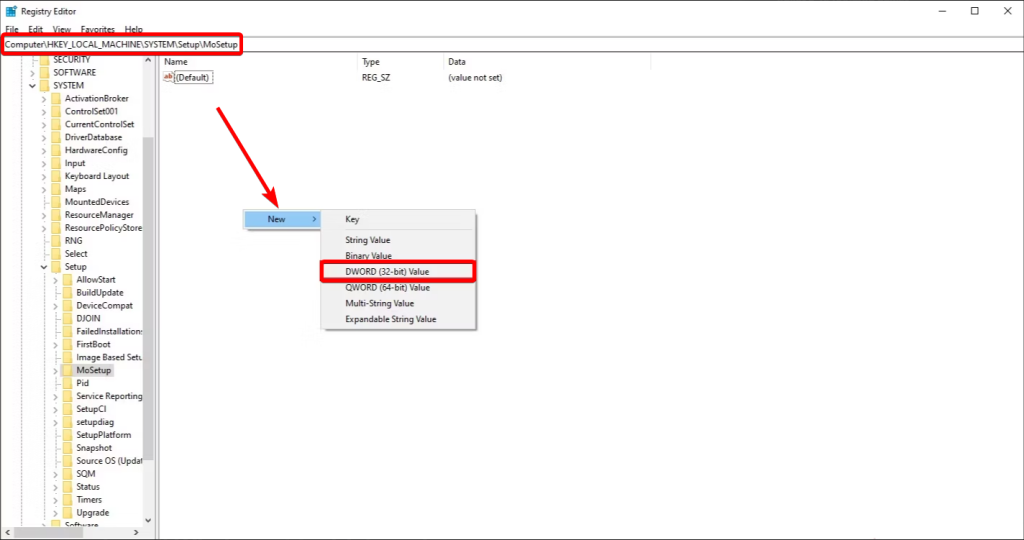
3. Right-click the space on the right pane, select New, then choose DWORD (32-bit) Value.
4. Enter AllowUpgradesWithUnsupportedTPMOrCPU as the name and save it. Then, double-click it and set the value to 1, then click OK.
Note: Any changes made to the registry using the Registry Editor or any other method can result in severe issues. In such cases, you might need to reinstall the operating system. Microsoft does not guarantee that these problems can be resolved. Hence, modifying the registry is a risk you assume on your own.
5. Double-click the downloaded ISO file to mount it as a virtual drive.
6. Run the setup file inside the mounted virtual drive and begin the installation.
7. The installation should proceed normally if your only issue is CPU compatibility or an older TPM.
Install Windows 11 With Launch Parameters
If you don’t have a USB drive and are experiencing problems with Windows 11 installation, there is another method you can try, although it can be risky. This involves treating the Windows 11 installer as a Windows Server installer to bypass compatibility checks that usually prevent installation.
However, this can result in driver and setting compatibility issues, especially if upgrading an existing PC. It’s recommended that less experienced users opt for the Rufus solution instead, but there are ways to minimize risks when using this trick.
1. Double-click and mount the ISO as a virtual drive; the new drive should open automatically.
2. Open a Command Prompt window. You can do this by searching for cmd in the Start menu and pressing Enter.
3. Enter the following text, replacing E: with the correct drive letter for your specific case: E:\setup.exe /Product Server /Compat IgnoreWarning /MigrateDrivers All
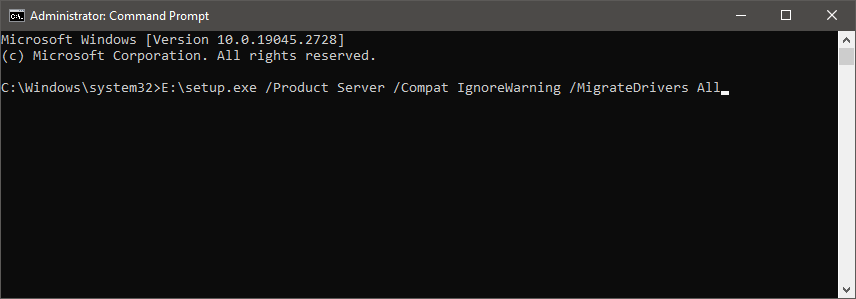
4. The setup should launch, labeled as a Windows Server installer.
5. Click through the process, and Windows 11 will begin installing.
6. There are possible compatibility issues with some drivers and settings during an upgrade, but there are ways to make it safer.
Upgrade to Windows 11 on Unsupported Hardware From ISO File
An alternative method to install Windows 11 on a device that doesn’t meet the system requirements is to perform an in-place upgrade with an ISO file. However, you must execute a script to bypass the TPM, Secure Boot, and processor check.
Bypass Windows 11 Requirement Checks
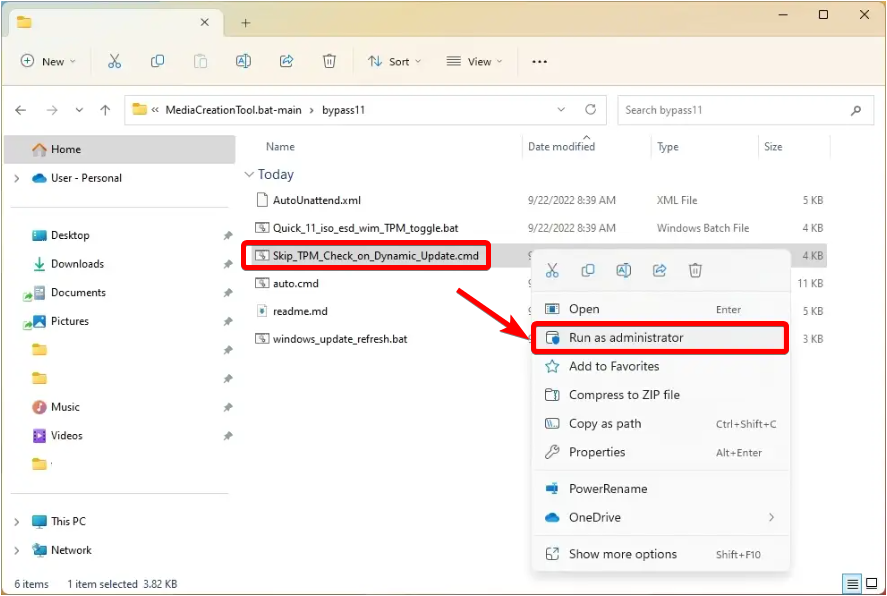
1. Download the GitHub MediaCreationTool.bat and click the Download button in the top-right corner.

2. Save the Zip file to your computer.
3. Go to the folder with the files and click the Extract All button.

4. Choose the location for extraction by clicking on the Browse button and selecting a folder.
5. Click on the Select folder button and then the Extract button.
6. If available, open the designated folder.
7. Right-click on the Skip_TPM_Check_on_Dynamic_Update.cmd file and choose the Run as administrator option.
After finishing the steps above, you can mount an ISO file to initiate the Windows 11 installation process on hardware not officially supported.
Upgrade to Windows 11 From ISO
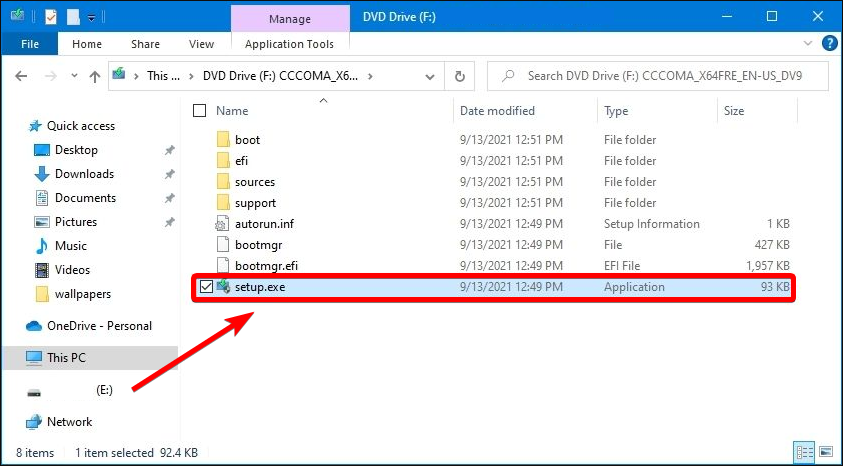
1. Right-click the ISO file you downloaded earlier and choose Open with > Windows Explorer.
2. Select the mounted drive from the left navigation pane.
3. Double-click the Setup file to start the Windows 11 upgrade process.
4. (Optional) Click the Change how Windows Setup downloads updates option.

5. When prompted to get updates, choose Not right now, click Next, then click Accept to agree to the terms.

6. Click the Install button to upgrade to Windows 11 while keeping your files and apps.

To perform a clean installation of Windows 11, choose the Change what to keep option and select Nothing, then click the Next button and then the Install button.
Once you have completed these steps, the setup process will upgrade your computer to the Windows 11 2022 Update (version 22H2). However, please note that Windows 11 will run in an unsupported state, which means that updates are not guaranteed, and Microsoft will not provide any support.
Install Windows 11 Using Windows 10 Bootable USB Drive
An alternative method to install Windows 11 on unsupported hardware involves tricking the installer into thinking it’s installing Windows 10, even if the PC meets only the minimum requirements for Windows 10. This method requires downloading the ISO files for Windows 10 and Windows 11.
While the Regedit method is sufficient for installing Windows 11 on incompatible hardware, including CPU and TPM, this method provides another workaround. Ensure you have the necessary items for this procedure, including a Windows 11 ISO file, a USB drive with at least 8GB of storage space, the Windows 10 Media Creation Tool, and a fast data connection.
After acquiring these items, you can create a Windows 10 bootable USB drive by inserting the USB drive into your computer, bearing in mind that any data saved on the USB drive will be lost during the process. Then, launch the MediaCreationTool21H2.exe file and choose the USB flash drive option.
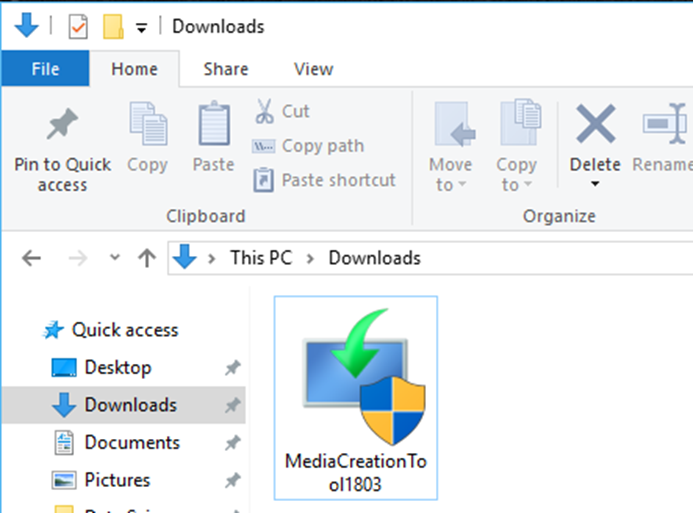
1. Double-click the MediaCreationToolW11.exe file to launch the tool.
2. Click the Accept button to agree to the terms.
3. Click the Next button and select the USB flash drive option, then the Next button again.
4. Select the USB flash drive to create the installation media.
5. Click the Next, then Finish button.
6. Right-click on the Windows 11 ISO file, select Mount, and click Open.
7. Open the folder and copy the file named install.wim.

8. Look for install.esd and delete this file and paste install.wim that you earlier copied into this folder.
9. Go back to the bootable USB flash drive and right-click the setup.exe file, then run it as administrator to start the installation of Windows 11 on unsupported hardware from USB.
Go Back to the Previous Version
If you encounter any problem after upgrading, you can use the Go Back feature to reverse the update and go back to the previous version of Windows 11. It is important to note that the Go Back option will only be available for seven days from the time of the upgrade. Beyond this period, the option will become inaccessible.
If you need to return to the previous version of Windows 11, follow these steps:
1. Press the Windows key, and I simultaneously launch Settings.
2. Scroll down and select the System tab.
3. Click on Recovery.

4. Under Recovery options, click on Go Back.

5. Follow the prompts on the screen to complete the uninstalling of the Windows 11 2022 Update (version 22H2).
Why Should I Upgrade to Windows 11?
There are several reasons why you might want to upgrade to Windows 11:
- New features and improvements: Windows 11 has several new features, including a redesigned Start menu, Snap Layouts, Snap Groups, and virtual desktops, among others. It also includes improvements to performance, security, and productivity.
- Better compatibility: Windows 11 is designed to work with modern hardware and software, so you’ll have a better experience running the latest apps and games.
- Support and updates: Microsoft will provide support and regular updates for Windows 11, including security updates, bug fixes, and new features.
- Modern design: Windows 11 features a modern and sleek design focusing on simplicity and ease of use.
- Improved multitasking: Windows 11 has several features that simplify multitasking, including Snap Layouts, Snap Groups, and virtual desktops. This can help you be more productive and efficient in your work.
Upgrading to Windows 11 can provide a better and more modern computing experience with improved performance, compatibility, and features.
Unlock Windows 11’s Potential on Any Device: A Guide to Installing It on Unsupported Hardware
This comprehensive guide has explored various methods to install Windows 11 on unsupported hardware. By following the steps provided, you can unlock the power of Windows 11 on your device and enjoy its new features and enhancements. Remember to proceed with caution and ensure compatibility before attempting any installation. With the right approach, you can use Windows 11’s innovative features and elevate your computing experience.
Frequently Asked Questions About Windows 11 on Unsupported Hardware
What Is a Secure Boot on Windows 11?
A Secure Boot is a feature found in Windows 11 that helps protect the system against malicious software. It works by preventing any unauthorized changes to the boot sequence of the operating system, ensuring only trusted code can be executed when starting up. This ensures that dangerous programs, such as viruses and rootkits, cannot be initiated at startup and thus cannot compromise the system.
Why Is My OS an Unsupported PC for Windows 11?
Your computer’s hardware may not meet the minimum system requirements to run Windows 11. Additionally, Microsoft may no longer support some older PCs that were originally running an earlier version of Windows so they won’t receive further updates and software upgrades.
How Long Does a Clean Install Take for Windows 11?
Depending on the type of hardware and software you have installed, a clean install of Windows 11 can take several hours to complete. This is because the installation process will need to configure all settings and drivers for your computer. Any additional programs installed or downloaded during installation could add more time to the total duration.
Why Is My Media Creation Tool Not Working on Windows 11?
Ensure that Windows 11 is compatible with your My Media Creation Tool version. You can check for compatibility information on the tool’s website or contact their support staff for more help. It’s also important to ensure your system meets the minimum requirements for Windows 11 and the My Media Creation Tool, as any software not meeting these requirements will not work properly.
Why Can’t I Install Windows on My PC?
If you’ve been trying to install Windows on your PC but have been having difficulty, there are several potential causes. One of the most common is that your hard drive may be too small for the version of Windows you’re attempting to install. Windows requires a certain amount of available storage space to function properly, and if your hard drive doesn’t have enough, the installation will be unsuccessful.
What Are the Minimum System Requirements for Windows 11?
The minimum system requirements for Windows 11 are as follows:
– Processor: 1GHz or faster processor
– RAM: 1GB for 32-bit or 2GB for 64-bit systems
– Hard disk space: 16 GB of free storage space
– Graphics card: DirectX 9 graphics device with WDDM 1
What Is an Unsupported Computer for Windows 11?
An unsupported computer for Windows 11 is a machine that does not meet the minimum system requirements to install and run the latest version of Windows. These computers are typically outdated models or machines with limited hardware capabilities, such as those running on Intel Atom-based processors.
What Is a Registry Hack on Windows 11?
A Registry Hack is a modification to the Windows 11 system registry. It can customize settings, run certain commands, or enable/disable features unavailable in the default user interface. A Registry Hack differs from a regular because it does not require additional software or programs to change the operating system.
Why Can’t My Windows 11 Load?
Several reasons exist why your Windows 11 operating system won’t load. A few of the most common issues include hardware or software compatibility problems, outdated drivers, malware infections, and corrupted system files.
Why Is My PC Considered Unsupported Hardware?
The most common reason your PC is considered unsupported hardware is that it does not meet the minimum requirements for running certain software or applications. For example, suppose your PC has an outdated operating system like Windows XP or limited RAM. In that case, newer programs and applications may be unable to run properly.
What Is a Secure Boot for Windows 11?
Secure Boot is a feature in Windows 11 designed to ensure that only trusted software can be loaded on a device. It works by verifying the digital signature of each piece of code before it is executed, ensuring that malicious software or malware cannot run on the system.