
Google Chrome is Unresponsive Issue – Full Repair Guide

Update Google Chrome
Chrome from Google receives regular updates that bring bug fixes and performance improvements. While the browser is set to update automatically, verifying the updates manually is recommended as well.
1. Open the Chrome menu by clicking on the 3-dots icon at the top-right corner of the screen.
2. Point your cursor to Help.

3. Select About Google Chrome.

4. This action will prompt the browser to scan and install any available updates.
Restart PC
Before attempting any further fixes, it is recommended to restart your PC or Mac, as it can usually resolve minor technical issues or system-related anomalies that may be causing Chrome and other applications to malfunction. So, go ahead and restart your device now.
Restart Google Chrome Browser
If a regular restart does not resolve the Chrome not responding issue, you can try another method to restart it. Chrome may continue running in the background even after you shut it down, causing this error to occur. Killing Chrome processes is quick and easy and should only take a minute. To do this, start by closing any open Chrome windows, then follow the steps below:
1. Press the Ctrl+Shift+Esc keys on your keyboard to open the Windows Task Manager window. Then, go to the Processes tab.
2. Look for Chrome processes in the list of Processes. You will find multiple processes here with the name Chrome and the memory they take up in your PC’s RAM. Select the Chrome process with the maximum memory usage and click on it.

3. Click the End Process button to delete the selected Chrome process. Repeat this step for any remaining Chrome processes until all are shut down.
4. Start Chrome again and check if the Google Chrome is not responding error occurs again.
Run SFC to Fix Google Chrome Not Responding Issue
You can run an SFC scan on your computer to ensure that System File errors are not causing the error in your Chrome browser. Running an SFC scan involves scanning your Windows system files for errors and fixing them automatically if found. Here are the steps to run an SFC scan on your PC:
1. Press the Windows key on your keyboard and type cmd in the search bar.
2. Right-click on Command Prompt and select Run as administrator.

3. In the Command Prompt window, type sfc /scannow and press Enter.
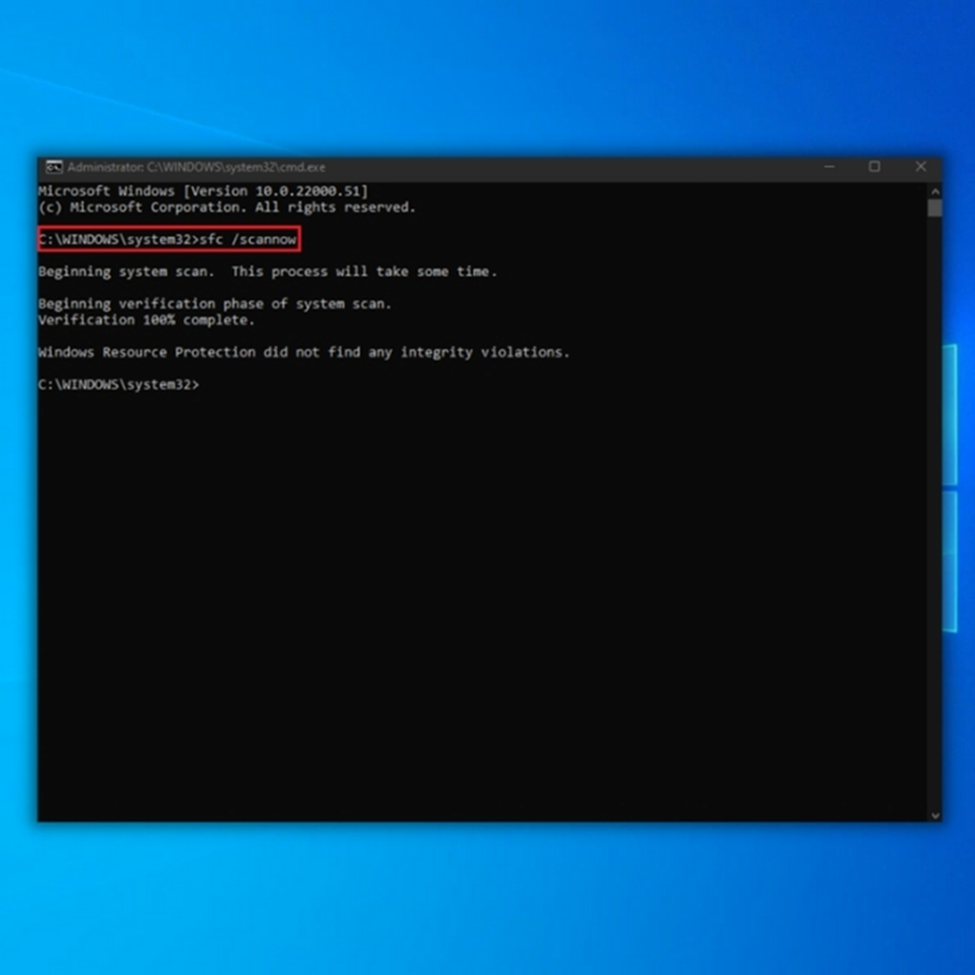
The SFC scan will commence and may take some time to complete, so it’s best to avoid interrupting it and wait until the scan is finished. Once the scan is complete, restart your PC. After restarting your PC, check if the Chrome error persists. You must run a DISM scan on your PC if the error still occurs.
The SFC scan may not have fully resolved all the system file errors. To ensure that all the system files are fixed, perform a DISM scan or Deployment Image & Servicing Management Scan. DISM scan can repair corrupt system files that prevent the SFC scan from running successfully.
To run a DISM scan, open Command Prompt in Admin mode as instructed in Step 1 above. Then, type the following command in the Command Prompt window:
DISM /Online /Cleanup-Image /RestoreHealth
After running the DISM scan, it may take some time to complete. Once it is finished, you will need to run the SFC scan again. Refer to the steps above to run the SFC scan.
Clear the DNS Cache and Reset IP
The Google Chrome is not Responding error in Windows 10 may also occur due to DNS Cache or IP settings preventing Chrome from accessing the internet. To determine whether the problem is related to your computer’s DNS or IP settings, you can try flushing the DNS Cache and resetting the IP address. Follow the steps below to do this:
1. Open the Command Prompt in Admin mode on your Windows 10 computer by pressing the Windows + X keys, selecting the Command Prompt (Admin) option from the menu that appears, and clicking Yes to confirm the Admin privileges.
2. In the Command Prompt window, run the following two commands in sequence:
- ipconfig /flushdns
- netsh winsock reset

These commands will flush DNS Cache and reset IP, respectively. Once the commands are executed successfully, open Chrome and check if the error persists. If the issue remains, proceed to the last method.
Disable Proxy
The reason why Chrome may not be responding in Windows 10 could be due to some proxy settings set up in Windows. Proxy settings have the potential to interfere with Chrome, so it is recommended to disable them if they are enabled. Disabling the proxy settings is a straightforward process, and you can follow the steps below to carry it out:
1. Press the Windows key + R together on your keyboard to open the Run command. Now, type inetcpl.cpl in the search box and hit Enter.
2. In the Internet Properties window, click on the Connections tab and then the LAN settings button.
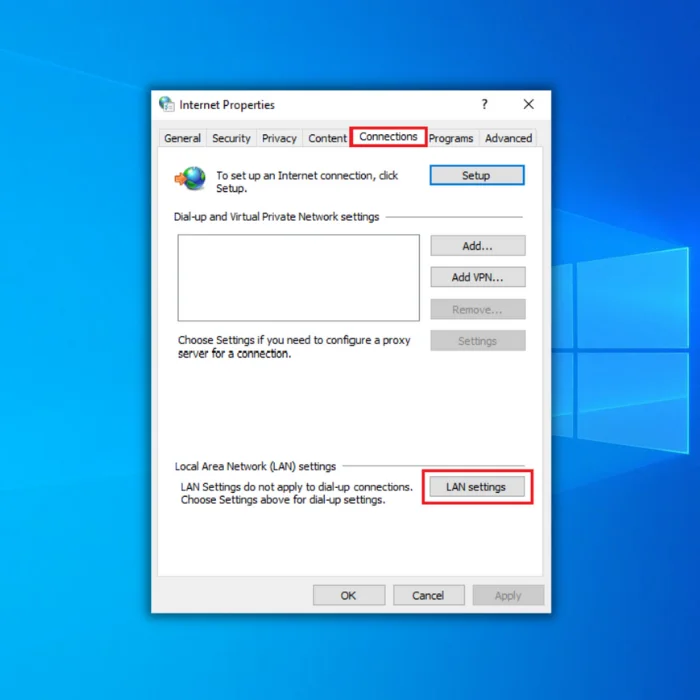
3. In the LAN settings window, under the Proxy server section, uncheck the box next to Use a proxy server for your LAN, and press OK to save the changes and exit.

Clear Cookies and Browser Cache
Clearing the Chrome cache is necessary to eliminate outdated browsing data as a possible cause of the Page Unresponsive error that may disrupt your website browsing experience. This step is crucial as outdated browsing data can potentially create various issues.
Clear Cache for a Specific Site
1. Open Chrome’s Settings screen.

2. Click on Privacy and Security in the sidebar.
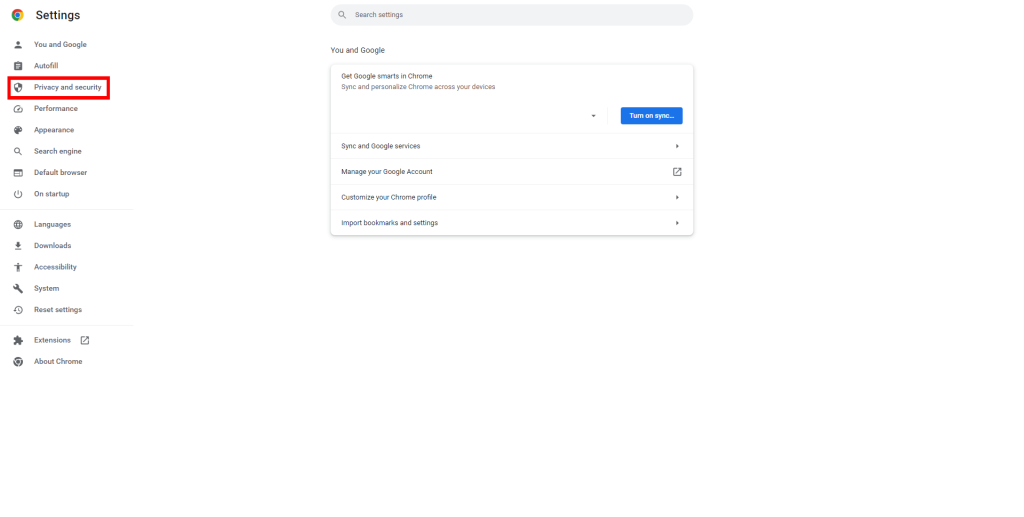
3. Click on Site Settings.

4. Click on View permissions and data stored across sites.
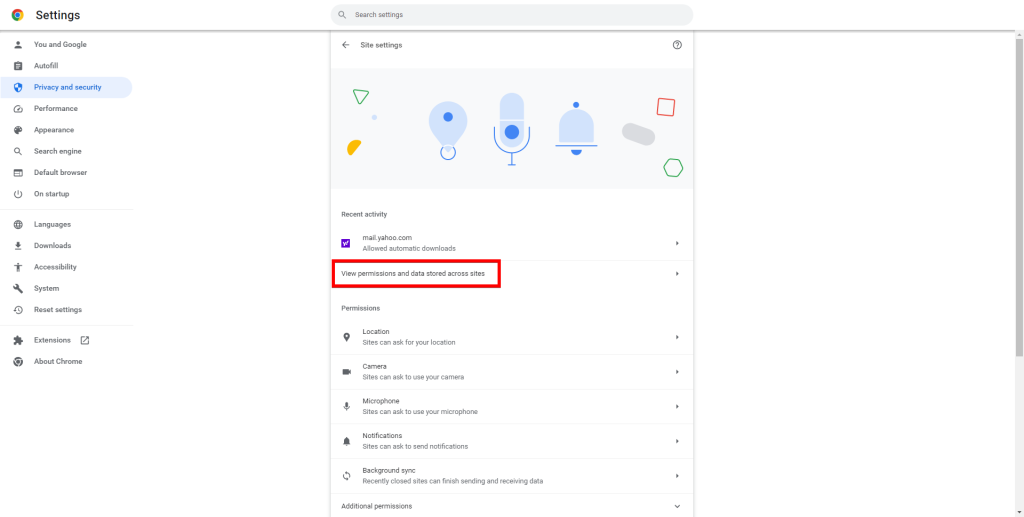
5. Select the site from the list and click on Clear data to remove the stored data for that specific site.

Clear the Entire Chrome Browser Cache
1. Open a new tab in Chrome.
2. Press Ctrl+Shift+Delete or Cmd+Shift+Delete to open the Clear browsing data box in Chrome.
3. In the Basic tab, tick the boxes next to Cookies, other site data, and Cached images and files.

4. Select All Time from the time range drop-down menu and click on Clear data to delete the selected items.

Disable Third-Party Cookies
Try disabling third-party browser cookies in Chrome if web pages take too long to load. This might help improve the loading speed.
1. Open the Chrome menu and select Settings.
2. Click on Privacy and Security in the sidebar.
3. Select the option labeled Cookies and other site data.
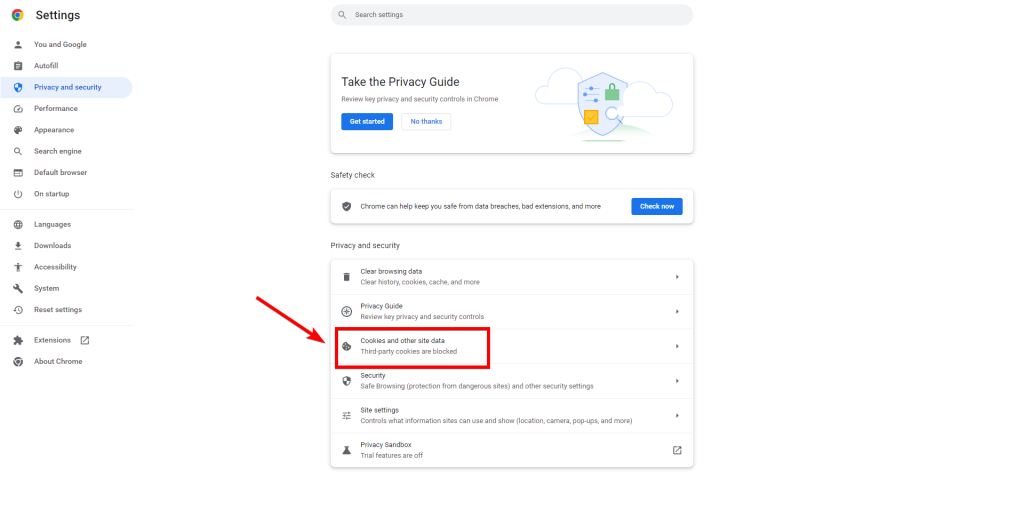
4. On the next screen, choose Block third-party cookies.

Disabling third-party cookies in Chrome may cause certain site functions to malfunction. It is recommended to re-enable them after you finish browsing the sites that encounter a Page Unresponsive error.
Disable Hardware Acceleration
Disabling hardware acceleration in Chrome can help resolve page rendering issues that may occasionally arise, despite it being an essential feature that speeds up browsing.
1. Open Chrome’s Settings screen.
2. Click on Advanced in the sidebar.
3. Scroll down and click on System.
4. Turn off the switch next to Use hardware acceleration when available.
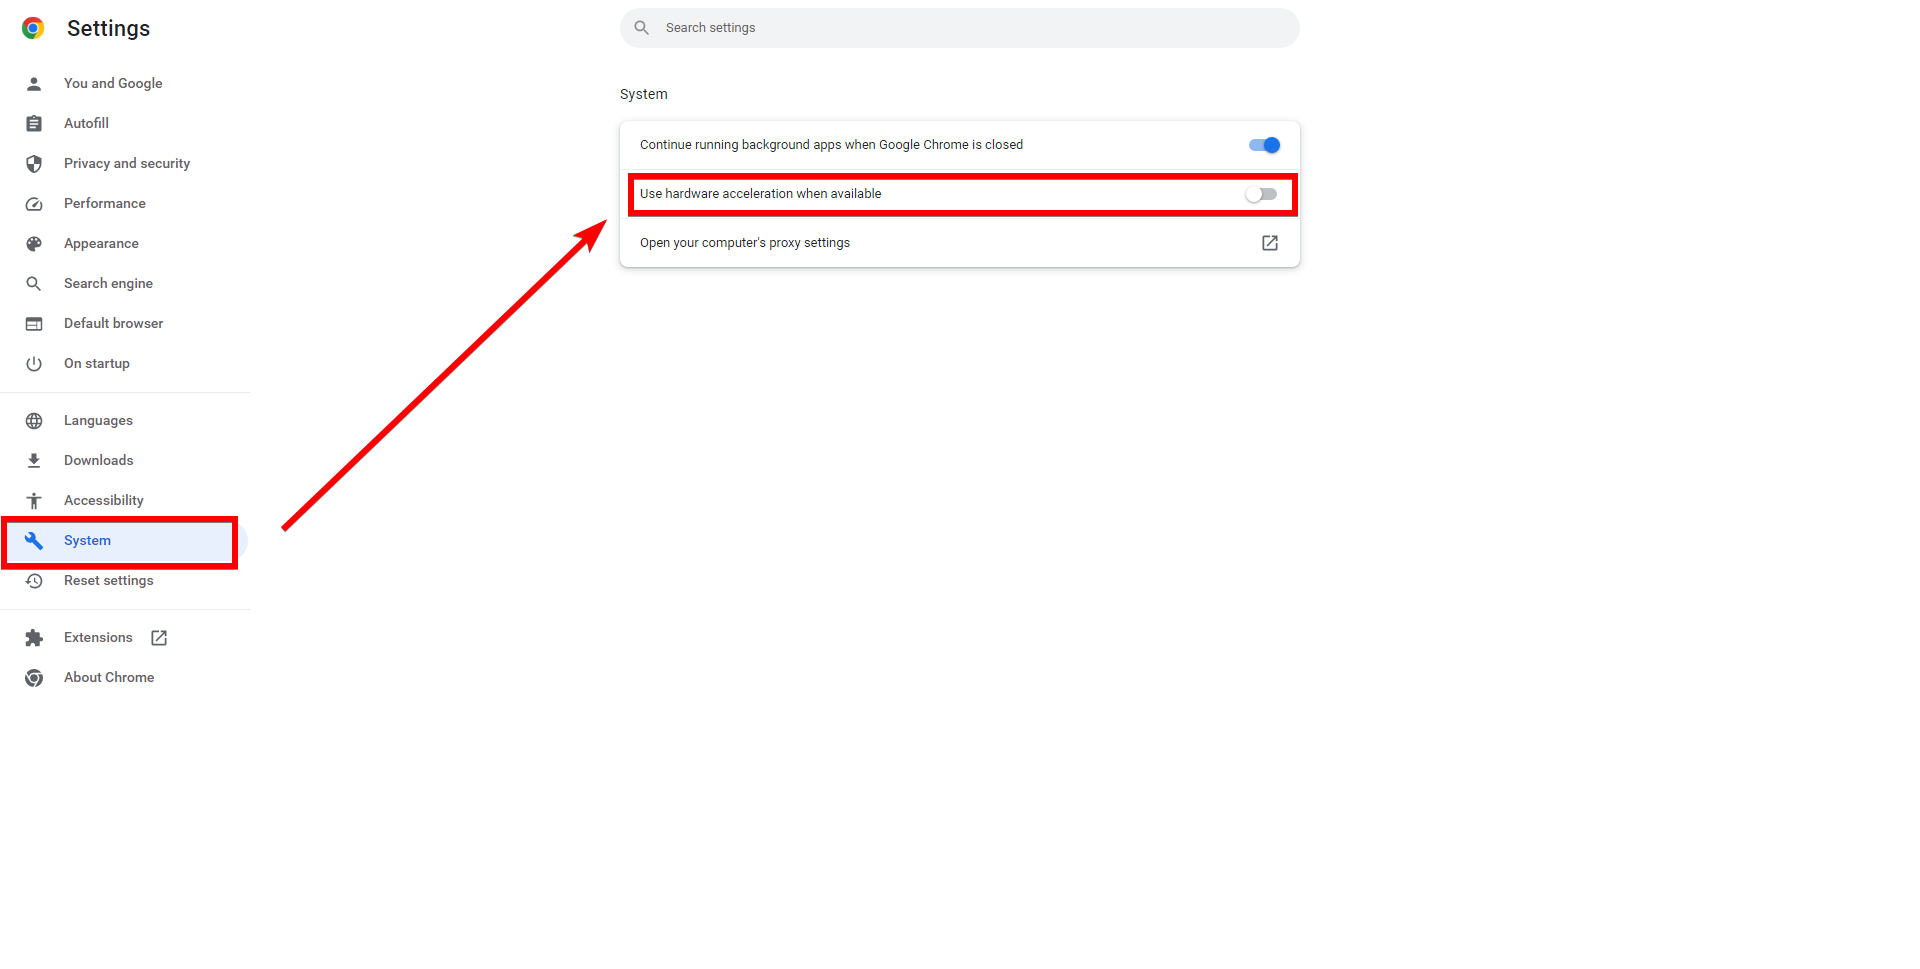
5. Select Relaunch to apply the changes.
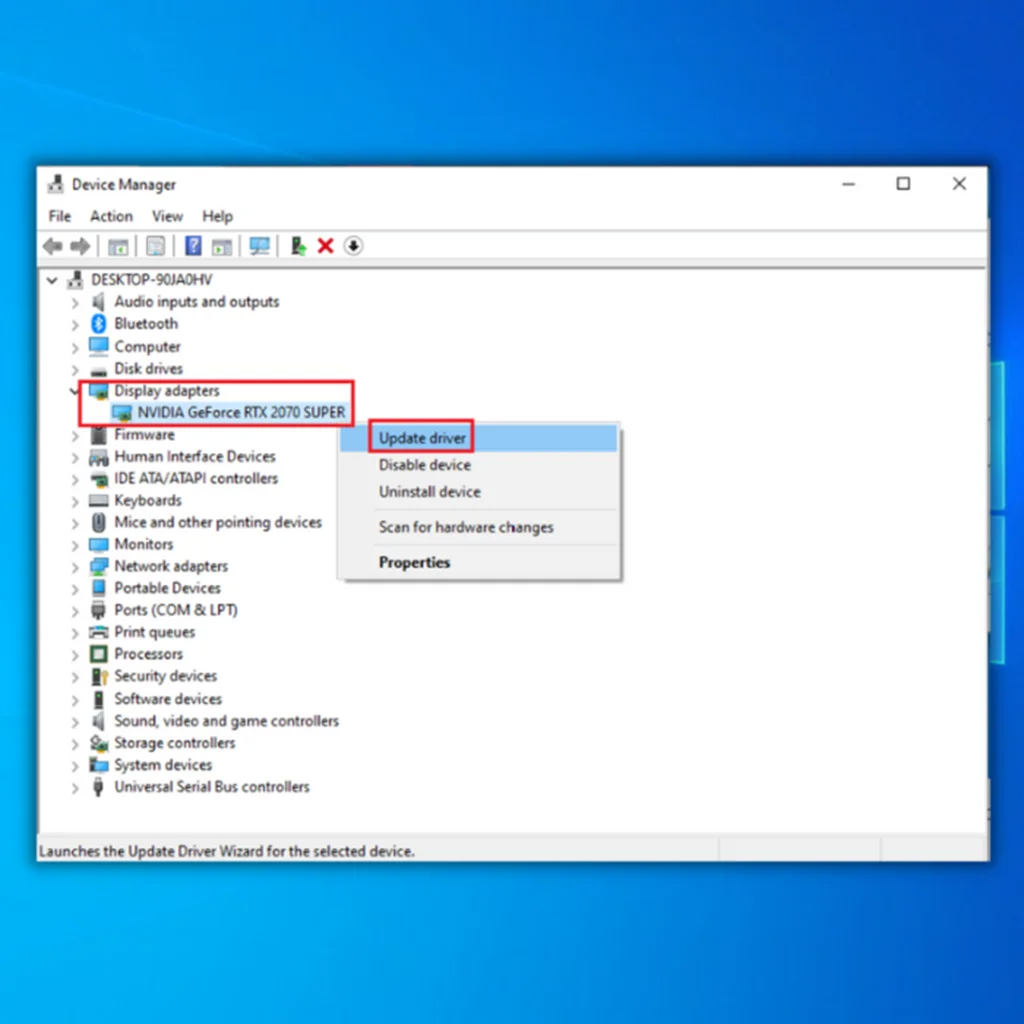
Update Graphics/Audio Drivers
After resolving the “Page Unresponsive” error in Chrome on a PC by disabling hardware acceleration, updating the graphics and audio drivers is advisable. This can help ensure that the drivers are up-to-date and compatible with the latest version of Chrome.
Here are the general steps to update graphics and audio drivers on a PC:
1. Press the Windows key + X and select Device Manager.

2. Locate the graphics card and audio device under their respective categories.
3. Right-click on each device and select Update driver.
4. Select the option to search for updated drivers automatically.
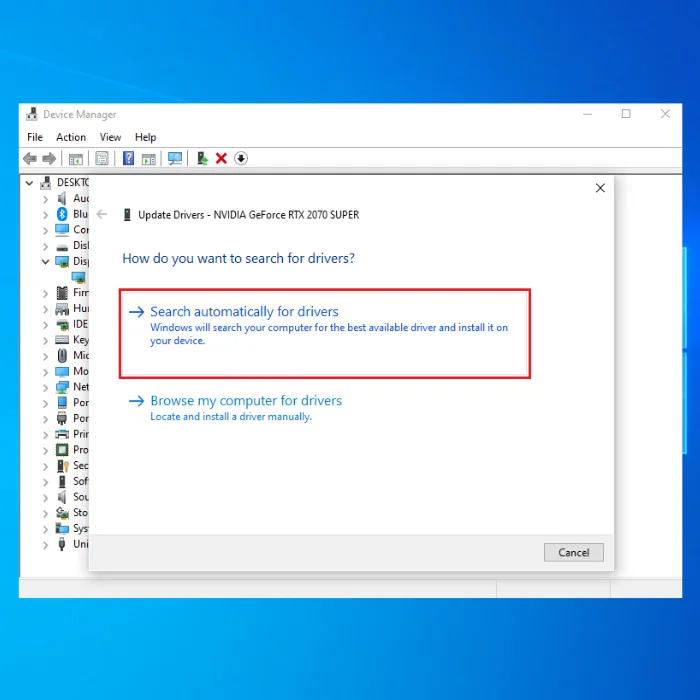
5. Follow the on-screen instructions to complete the driver update process.
Disable Extensions
Using too many Chrome extensions concurrently can consume system resources, cause the browser to slow down significantly, and ultimately result in Page Unresponsive errors. Additionally, certain extensions can create conflicts with site content, leading to problems with page functionality.
1. Click on the Extensions icon on the right side of the Chrome address bar.
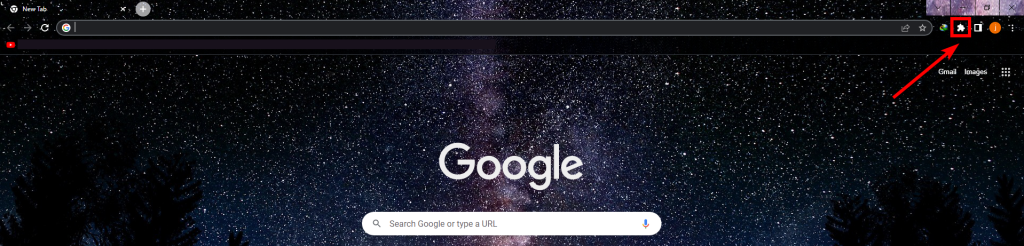
2. Select Manage Extensions from the drop-down menu.

3. Turn off all active extensions to disable them.

Remove Harmful Software
The Page Unresponsive error can sometimes occur due to malicious extensions and browser hijackers. You can use Chrome’s built-in harmful software scanning tool to address this issue. Please note that this tool is only available in the PC version of Chrome.
1. Open the Chrome menu and select Settings.
2. Click on Advanced > Reset and clean up from the sidebar.
3. Select Clean up computer > Find to scan and remove harmful software.
Update Windows
It is essential to keep the operating system on your PC up-to-date to provide Chrome with a stable platform to run on and reduce the risk of potential conflicts with Windows.
1. Go to the Start menu and select Settings.
2. Click on Update & Security > Check for updates

3. Select Download and Install to apply the latest Windows updates.
Create a New Chrome Profile
If none of the previously mentioned solutions resolved the issue, you may have a corrupted Chrome user profile. To address this, you can create a new user profile by renaming your current one through File Explorer or Finder. However, before proceeding, it is recommended that you sync your browsing data to a Google Account.
1. Close Chrome.
2. Open the Run box on your PC by pressing Windows + R.
3. Type or paste the appropriate folder path below and press Enter:
%userprofile%\AppData\Local\Google\Chrome\User Data\

4. Locate the Default folder and rename it to Default.old.

5. Launch Chrome, and it will create a new profile automatically. Sign in to your Google Account to start using the new profile.
Through Google Chrome Properties
1. Click the Start button on your desktop and search for Google Chrome.
2. Right-click on the Google Chrome result and select Open file location from the context menu.

3. Right-click on Google Chrome and select Properties in the file location.

4. Go to the Shortcut tab and add a space after chrome.exe in the Target field.
5. Type no-sandbox, click Apply, then OK to save the changes and exit.

6. Click on Continue on the prompt to allow administrator permission.
7. Restart Chrome, and the browser should no longer have any problems.
Use a High-Performance Profile
1. Press Windows + S and search for power settings.
2. Select Power Options from the search results.

3. Click on Additional power settings.

4. If the High-Performance plan is not already selected, click on Show additional Plans and select High Performance.

This should help prevent Chrome from becoming unresponsive and killing pages.
Remember that using this profile will consume more of your device’s battery power, causing it to drain faster. However, you should notice a performance improvement. After completing the steps, verify if the Chrome Page Unresponsive error in Windows 10 is resolved.
Consider Using Beta or Canary Versions

Suppose you frequently encounter the Page Unresponsive error while using Chrome on Windows 10. In that case, it may be worth considering switching to the Chrome Beta or Chrome Canary versions of the browser.
The Beta version is a variant of Chrome that includes upcoming features and patches. As a result, if you’re experiencing any problems with the current version of Chrome, trying the Beta version might be worthwhile.
Alternatively, the Canary version is available and is more experimental, with some upcoming features. While less stable than the Beta version, it should provide access to the most recent fixes.
Switch to a 32-Bit Version of Chrome
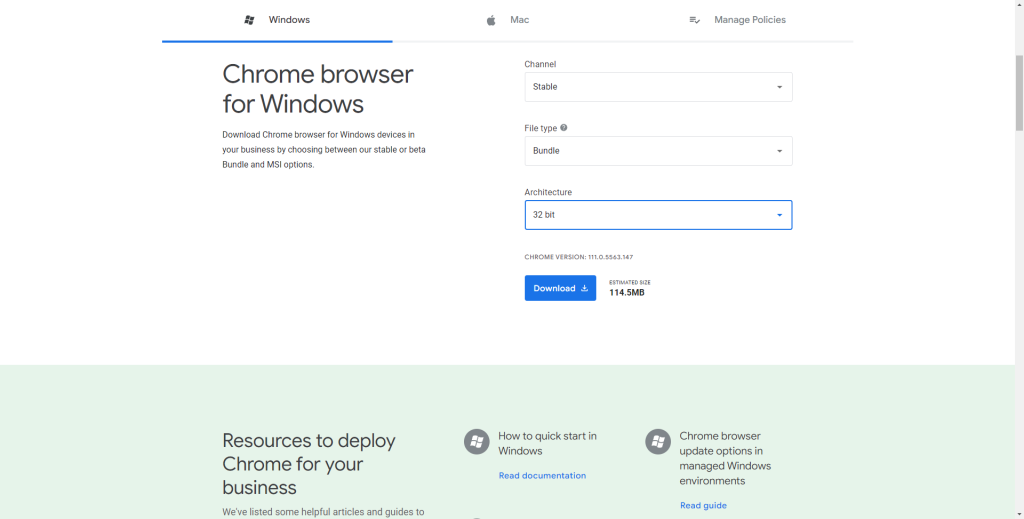
Users have reported that switching to the 32-bit version of Chrome may solve the problem. However, it should be noted that the 32-bit version may not provide the same level of performance as the 64-bit version. This is only a temporary solution, so being aware is important.
Reset Google Chrome
If you continue encountering frequent Page Unresponsive errors, resetting Google Chrome is necessary. This action will restore all browser settings and enable you to begin using Chrome in a fresh state. However, sync your browsing data to a Google Account before proceeding.
1. Go to the Chrome menu and click on Settings.
2. On the sidebar, select Advanced and then choose Reset and Clean up or Reset settings.

3. Click on the Restore settings to their defaults button and then select Reset settings to confirm.

Reinstall Chrome
1. Press Windows + R to launch the Run command.
2. Enter appwiz.cpl in the text field and click OK to open the Programs and Features window.

3. Find Google Chrome in the list of programs and select it.
4. Click Uninstall and follow the on-screen instructions to remove Google Chrome from your computer.

5. After the uninstallation, restart your computer to ensure the changes take effect.
6. Visit the official Google Chrome website and download the latest browser version.

7. Run the setup file and follow the on-screen instructions to install Google Chrome on your computer.
Get Chrome Back on Track: Concluding Steps to Resolve Unresponsiveness
In this comprehensive repair guide, we’ve provided effective solutions to tackle the unresponsive issue in Google Chrome. Following these steps, you can restore Chrome’s functionality and enjoy a seamless browsing experience. Say goodbye to unresponsiveness and get Chrome back up and running smoothly. Keep browsing with confidence!