
How to Easily Uninstall GeForce Experience

GeForce Experience is an application from NVIDIA that goes together with any GTX and RTX graphics cards. It lets users stream their gameplay to multiple platforms. GeForce Experience can also automatically optimize games, record gameplay, and keep your graphics driver up to date.
These features may sound great; however, other users do not enjoy having GeForce Experience installed on their computers. Users are having issues with GeForce Experience reporting that the application takes a huge chunk of resources from the memory and processor. This issue causes FPS drops and even their game freezing.
If you are a user not enjoying GeForce Experience, you can easily remove it from your computer. Although you will not be able to enjoy the features that it comes with, you can still enjoy your games with higher FPS or Frames Per Second.

- Your machine is currently running Windows 10
- Fortect is compatible with your operating system.
Recommended: To repair Nvidia GeForce Errors, use this software package; Fortect System Repair. This repair tool has been proven to identify and fix these errors and other Windows problems with very high efficiency. Download Fortect here.

- 100% safe as confirmed by Norton.
- Only your system and hardware are evaluated.
If you uninstall GeForce Experience, you are also letting go of the feature that automatically updates your graphics driver. However, updating your graphics driver manually is pretty easy to perform.
Today, we will show you how you can easily uninstall GeForce Experience from your computer and how you can manually update your graphics driver.
- Check out our post: Nvidia Control Panel for Beginners.
How to Uninstall NVIDIA GeForce Experience
- Hold down the “Windows” and “R” keys on your keyboard to bring up the run command line. Type in “appwiz.cpl” and press “enter” to bring up Program and Features.

- In the Programs and Features window, find Nvidia geforce experience and click “Uninstall/Change.” Follow the on-screen instructions and restart your computer to complete the NVIDIA GeForce Experience’s uninstallation process fully.

Manually Update Your NVIDIA Graphics Driver
Since you have already removed GeForce Experience from your computer, you will have to update your graphics driver manually. Updating your graphics driver might sound intimidating, but it’s pretty easy to perform.
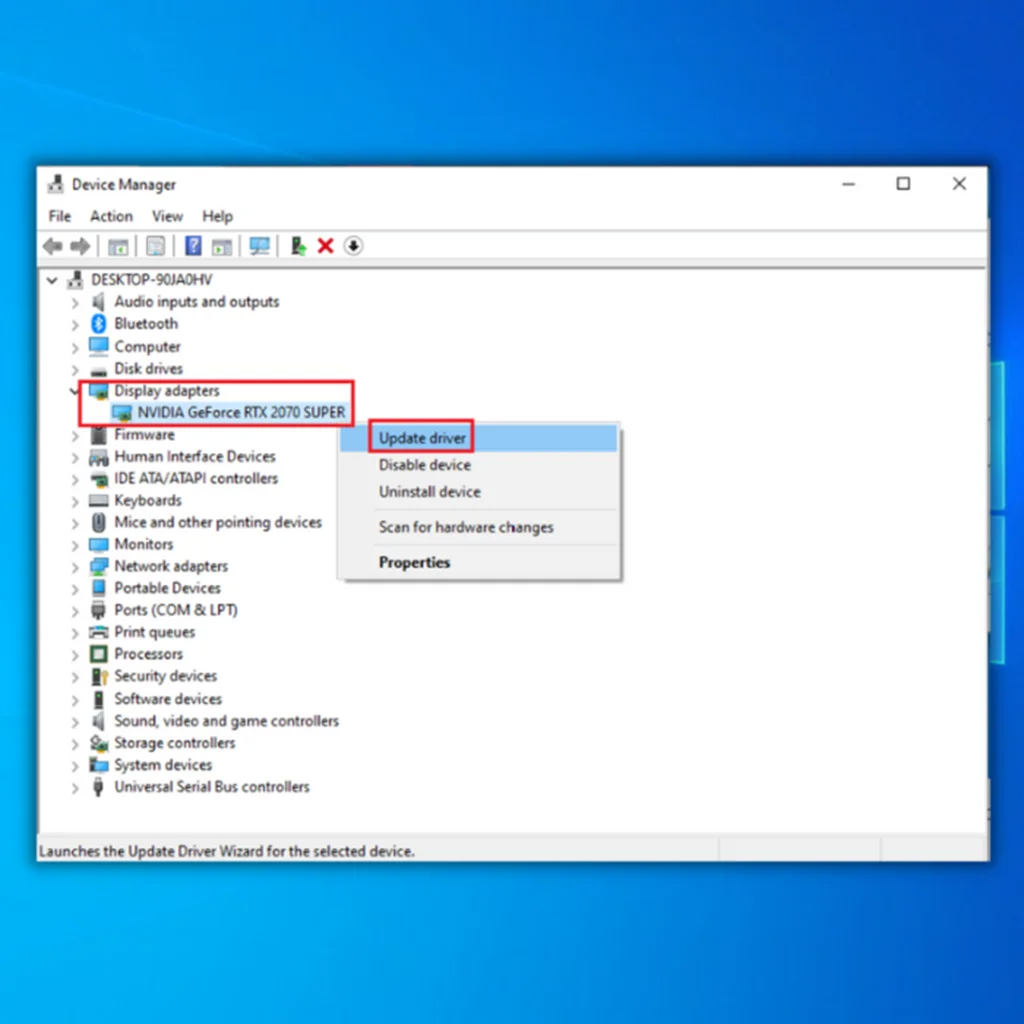
- Press the “Windows” and “R” keys and type in “devmgmt.msc” in the run command line, and press “enter.”

- In the list of devices in the Device Manager, look for “Display Adapters,” right-click on your Graphics Card, and Click on “Update driver.”
- In the next window, click “Search Automatically for Drivers” and wait for the download to complete and run the installation.

- Once the driver has been installed successfully, restart your computer.
Bonus Tip: How to install GeForce Experience
If you somehow want to reinstall GeForce Experience on your computer in the future, you can always download a fresh new copy of the installer from their website. If you need more guidance, follow these steps:
- Go to NVIDIA’s official website and click “Download Now” to get the latest installer for GeForce Experience.

- After downloading a fresh copy of GeForce Experience, double-click the executable file to launch the installation. Follow the on-screen instructions on the installation wizard as per usual.
Uninstall GeForce Experience: Our Final Words
We hope that NVIDIA does something about the issues with FPS drops, as every NVIDIA graphics card owner deserves to enjoy the full features of their graphics card. If we get an update from NVIDIA regarding this issue, you can try reinstalling it on your machine.
Frequently Asked Questions
How do I completely Uninstall GeForce Experience?
To completely uninstall GeForce Experience, you must access the control panel and remove the program from your computer. This can be done by selecting the “Uninstall a Program” option from the control panel and selecting the “GeForce Experience” program from the list of installed programs. Once the program has been uninstalled, you will need to restart your computer for the changes to take effect.
Is it okay to Uninstall Nvidia GeForce experience?
Uninstalling the Nvidia GeForce experience should not pose any major problems or risks. It may offer some benefits, such as freeing up storage space and reducing the potential for software conflicts.
Does uninstalling GeForce Experience improve FPS?
GeForce Experience is a tool that helps optimize game settings for NVidia graphics cards. It is not uncommon for users to notice a decrease in FPS after installing the tool. Uninstalling GeForce Experience may improve FPS for some users.
How do I remove GeForce Experience from Windows 11?
There are a few ways to remove GeForce Experience from Windows 11. One way is to go into the control panel and uninstall it from there. Another way is to go into the Programs and Features section and uninstall it from there. Finally, you can also delete the folder that contains the GeForce Experience files.
Why can’t I uninstall GeForce Experience?
There are a few reasons you might be unable to uninstall GeForce Experience. First, it’s possible that you don’t have the correct permissions set on your computer. Second, it’s possible that the files associated with GeForce Experience are corrupt or missing. Finally, it’s possible that your computer is infected with malware preventing you from uninstalling the program. You can always contact the support team for help if you’re still having trouble.
Is Nvidia GeForce experience needed?
GeForce Experience is not a necessary component for NVIDIA graphics cards. However, the software does provide several benefits that can improve your gaming experience. For example, GeForce Experience can automatically optimize graphics settings for your specific hardware configuration, update your drivers with one click, and capture and share in-game screenshots and video footage.
Is GeForce Experience a bloatware?
GeForce Experience is a software utility created by Nvidia designed to optimize your gaming experience. However, some users have dubbed it bloatware due to its resource-intensive nature. While it does offer some features that can be useful for gamers, such as game optimization and the latest driver updates, its resource usage can be prohibitive for some users.
What will happen if I uninstall graphics driver?
If you uninstall your graphics driver, your computer will no longer be able to display any images or graphics. This can be a problem if you rely on your computer for work or school, as you cannot complete any tasks that require visuals. Additionally, uninstalling your graphics drivers may cause problems with other drivers on your computer, which could lead to even more issues.
What is the point of GeForce Experience?
GeForce Experience is a software application created by Nvidia designed to give you optimum graphics performance while gaming. The program analyzes your computer’s hardware and provides you with the optimize graphics settings for your games. GeForce Experience also includes game streaming, screenshot capture, and video capture.
Does disabling GeForce overlay affect FPS?
The GeForce overlay is a game performance monitoring tool that lets players see real-time game performance data. However, some users have reported that disabling the overlay can improve their game performance. While there is no conclusive evidence that this is the case, it is possible that the overlay is causing a slight decrease in FPS for some users. If you are experiencing poor game performance, you may want to try disabling the GeForce overlay to see if it improves your FPS.
Do I need Nvidia if I don’t play games?
No, you do not need Nvidia if you don’t play games. Games are not the only reason to have a graphics card, but if you don’t play games, there are other uses for a graphics card. With Nvidia, you can use G-Sync, which allows your monitor’s refresh rate to be synchronized with your graphics card. This can help reduce screen tearing and input lag. You can also use Nvidia’s PhysX technology to improve the realism of in-game physics.
Should I install GeForce Experience or just the driver?
If you are looking to optimize your gaming performance, it is recommended that you install GeForce Experience. This software provides the latest drivers for your graphics card, optimizes game settings, and provides other features, such as game streaming.