![[Full Guide] How to Reinstall Microsoft Solitaire](https://cdn.techloris.com/app/uploads/2023/03/how-to-reinstall-microsoft-solitaire.png)
[Full Guide] How to Reinstall Microsoft Solitaire

Microsoft Solitaire Card Games is a popular and addictive game pre-installed on Windows 10 computers. However, there may be instances where the game might stop functioning or get uninstalled accidentally, leaving users wanting to reinstall it.
Reinstalling the Microsoft Solitaire Collection on your Windows 10 computer is a simple process that can be done quickly and easily. This article will guide you through reinstalling the Microsoft Solitaire Collection on your Windows 10 computer.
What Are the Microsoft Solitaire Collection Features
Here are some features of the Microsoft Solitaire Collection:
- Multiple Game Modes: The collection includes five different solitaire games, including Klondike, Spider, FreeCell, TriPeaks, and Pyramid. Each game mode has its own set of rules and challenges.
- Daily Challenges: Players can participate in daily challenges that provide unique gameplay scenarios and allow them to earn badges and rewards.
- Xbox Live Integration: Players can sign in with their Xbox Live account to compete against others on the leaderboards and earn achievements.
- Customizable Themes: The game features various themes and backgrounds, allowing players to personalize their gaming experience.
- Hints and Undo: Players can use the hint and undo features to help them solve difficult puzzles or undo a move they regret.
- Statistics Tracking: The game tracks players’ statistics, including their win-loss ratio, total games played, and average time per game.
- Accessibility Features: The game includes various accessibility features such as high contrast mode and keyboard shortcuts, making it easier for users with visual impairments or disabilities to play.
Start Reinstalling Solitaire Collection With These Methods
Reinstall the Microsoft Solitaire Collection Game via Settings
Sometimes, Microsoft Solitaire can pose issues that call for a resolution. To fix the Microsoft Solitaire collection, remove it from your device:
- Launch the Settings app and navigate to the Apps > Apps & Features page.

2. Locate the Microsoft Solitaire Collection entry and click on it to display the concealed Uninstall button. Select the Uninstall button.

3. Confirm the action by clicking the Uninstall button in the confirmation prompt.
4. After uninstalling Solitaire, open the Store app, search for Microsoft Solitaire Collection, and reinstall it.

Reinstall Microsoft Solitaire Collection Using Command Prompt
To remove Microsoft Solitaire Collection from your Windows 10 PC, follow these steps:
- Open Windows PowerShell as an administrator. You can do this by typing “Windows PowerShell” in the Start menu or taskbar search box, right-clicking on the result, and selecting “Run as administrator.”

2. Copy the command provided below and paste it into PowerShell:
Get-AppxPackage solitairecollection | Remove-AppxPackage

Press Enter to execute the command and uninstall the game from your PC. Once completed, you can close the PowerShell window.
3. Shut down all active programs and restart your PC.
4. Access the Microsoft Store app and look up Microsoft Solitaire Collection using the search bar.
5. Click on the game tile to visit its official Store page.

6. Tap the “Install” button to initiate the download and installation process of the game.
Note: This process applies to users with a local user account. If prompted to sign in, use the same Microsoft account to avoid accidentally switching your user accounts.
- Once installed, launch the game from the Start menu and enjoy!
Reinstall Microsoft Solitaire Collection Using CCleaner
If you encounter errors or are unfamiliar with PowerShell, use CCleaner to uninstall Microsoft Solitaire Collection. Here’s how:

- Get the free version of CCleaner and install it.
- Launch CCleaner, click “Tools,” and select the “Uninstall” tab to view your installed apps and programs.
- Right-click on Microsoft Solitaire Collection, select “Uninstall,” and click “OK” to confirm.
After uninstalling, restart your PC.
- Open the Microsoft Store app, search for Microsoft Solitaire Collection, and reinstall it.
Run Built-in Windows Store Apps Troubleshooter
To troubleshoot installation issues in Windows Store, follow these steps:
- Press the Windows Key and type “troubleshoot,” then select “Troubleshoot” from the list.

2. Click “View all” on the left side panel, and then choose the “Windows Store Apps” troubleshooter from the list to run it.

3. Click “Advanced,” make sure to check “Apply repairs automatically,” and select “Run as administrator.”
4. Click “Next” and complete the troubleshooting process.
After troubleshooting, check if you can install the desired app.
Reset Windows Store Cache
To download Microsoft Solitaire on your Windows device, you can visit the Microsoft Store. Suppose you encounter issues with the Solitaire Collection not launching on Windows 10/11. In that case, you can attempt resetting the Windows Store to resolve any potential cache-related problems associated with Windows Store applications.
Steps to follow:
- Search for “wsreset” in the search box, and press Enter to initiate the reset of the Windows Store cache.

2. Restart your Windows 10 device for the changes to take effect.
Once you’ve completed the procedure, you should notice that the Windows Store has been reset, which may resolve the issue of Solitaire not opening and the Solitaire error 124.
Reset Microsoft Solitaire Collection
To fix the issue of unavailable Solitaire Collection, you can try resetting the application itself in case of corruption. Here’s how to do it:
- Open the Start menu and go to Settings, then click on Apps.

2. Under Apps & Features, locate Microsoft Solitaire Collection and click on Advanced options.
3. Scroll down to find the Reset button and click on it to reset Microsoft Solitaire Collection.
4. Restart your PC to apply changes.

After resetting Microsoft Solitaire Collection, the problem of it not starting should be resolved. However, resetting the application will reset all settings to their defaults. So, if needed, you can reconfigure the settings.
Re-Register Windows 10 Solitaire
If resetting Microsoft Solitaire doesn’t work, it may be helpful to register it to ensure it functions properly after installing the latest Windows 10 updates. To do this, follow these steps:
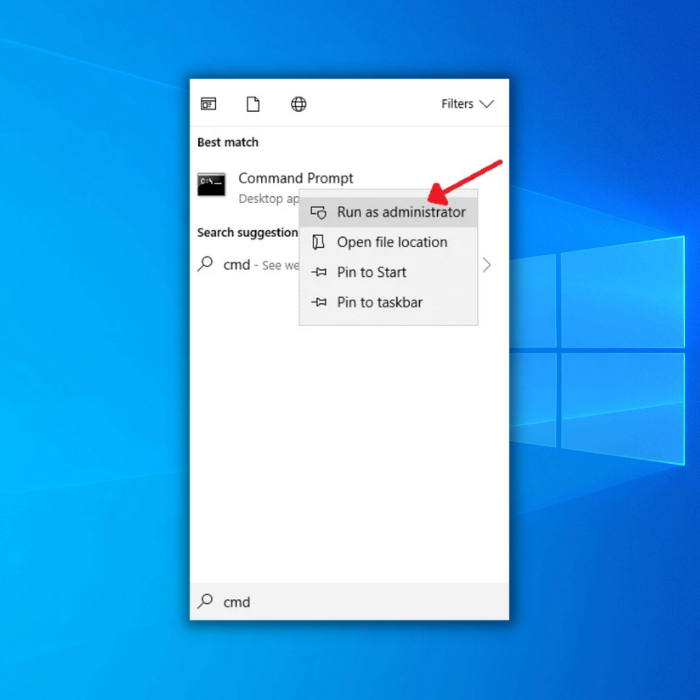
- Search for Command Prompt in the search box and right-click it to open it as an administrator.
2. In Command Prompt, enter the following command and press Enter to re-register Solitaire for Windows 10:
Get-AppxPackage -allusers MicrosoftSolitaireCollection | Foreach {Add-AppxPackage -DisableDevelopmentMode -Register “$($_.InstallLocation)\AppXManifest.xml”}

- It may be necessary to restart your PC for the modifications to be implemented.
Once you’ve registered for the Solitaire Collection, you can launch and play the card game on Windows 10.
Check for Windows 10 Updates
Microsoft Solitaire updates are typically released alongside Windows system updates, which means that Microsoft Spider Collection and Microsoft Solitaire Collection may appear differently on various versions of Windows.
Considering this, it’s important to ensure your Windows 10 system is current, as new features may help restore the Solitaire Collection’s functionality.
To check for Windows 10 updates, follow these steps:
- Go to Start > Settings > Update & Security.

2. Click the “Check for updates” button under Windows Update.

Once you’ve updated Windows 10, launch the Solitaire Collection to verify that it can launch and run properly.
Run Windows 10 App Troubleshooter
Since Microsoft Solitaire Collection is now one of Microsoft’s applications, it’s important to troubleshoot any issues that may arise when the Solitaire game stops working on Windows 10.
To run the Windows 10 system troubleshooter for programs, follow these steps:
1. Search “Troubleshoot” in the search box and press Enter.

2. Scroll to “Windows Store Apps” under Troubleshoot, then click “Run the troubleshooter”.

Run Games in Game Mode
Every gamer wants to enjoy smooth and seamless performance games, including the Microsoft Solitaire Collection, Minecraft, PUBG, League of Legends, and more. It’s important to ensure that your computer’s game drivers, components, and running priority are optimized for Microsoft and other games.
To simplify the process and ensure accuracy, consider using a tool like Driver Booster to automatically update game drivers and support. Additionally, use this tool to check for unnecessary applications running in the background and prepare your PC for Game Mode to maximize gaming performance.
Update Game-needed Drivers and Components Automatically:
Here are the steps you can follow to optimize your computer for gaming using Driver Booster:
- Download, install, and launch Driver Booster.
2. Click “Scan” to scan your computer for outdated or missing drivers, such as network and graphics drivers.

3. Update the outdated or missing drivers that the program identifies.

4. Locate the “Game Support” option and update it as needed.

To optimize your gaming experience using Driver Booster, follow these steps:
- Click on “Boost” in the program, and then turn on “Game Boost” on the right side.
- This will allow you to turn off any unnecessary programs or services in game mode.
Get Your Favorite Game Back: Reinstall Microsoft Solitaire – A Complete Guide
Reinstalling Microsoft Solitaire Collection on Windows 10 is an opportunity for learning and reflection. By following the steps outlined in this guide, you not only fix the issue with the game but also improve your computer’s performance and potentially prevent similar issues from happening in the future.