![[Fixed] Dell Touchpad Not Working – Full Repair Guide](https://cdn.techloris.com/app/uploads/2023/03/Dell-Touchpad-Not-Working.png)
[Fixed] Dell Touchpad Not Working – Full Repair Guide

Check Touchpad Settings
If the Dell touchpad is not working error displays on the screen; it could be due to the Dell touchpad tab sensitivity that is set too low. In this context, resetting the touchpad settings to enhance touchpad functionality can resolve the issue. In Dell laptops, it could be done via Windows settings. Here are the steps to follow:
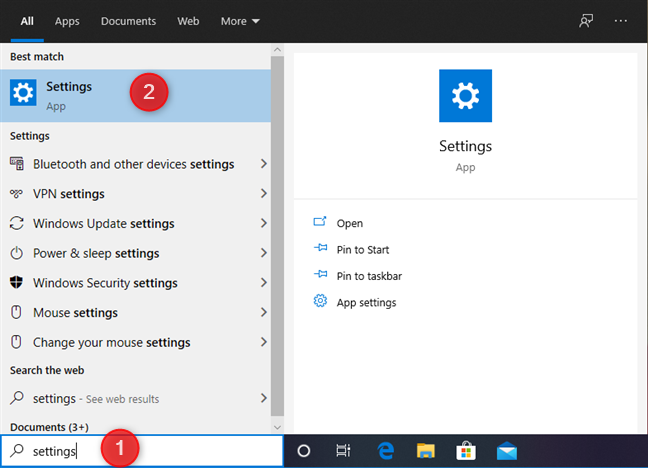
Step 1: Launch Windows settings from the main menu. Type settings in the taskbar’s search and double-click the option in the list to launch the menu.
Step 2: In the settings menu, select the option of devices.

Step 3: In the devices window, select the option of Bluetooth and devices from the left pane.

Step 4: Click on the touchpad and select the reset option in Bluetooth and devices window. Once the reset is complete, check if the error persists.

Check Touchpad Settings in Bios
Another possible way to resolve the Dell touchpad not working error in Dell laptops is by enabling the touchpad settings through BIOS settings. Enabling the touchpad from BIOS will help it to auto-run at each startup. Here are the steps to follow:
Step 1: Restart your device and open the BIOS settings menu.
Step 2: In the BIOS menu, locate the option of touchpad settings, i.e., internal pointing device.

Step 3: Enable the option in the window of the internal pointing device. Save changes and exit BIOS.

Enable Touchpad From Control Panel
The main issue causing the Dell touchpad not working error is that the pointing device is disabled from settings. It can be activated/enabled via various Windows utilities. In this regard, a control panel can also enable the touchpad in Dell laptops. Here are the steps for allowing the touchpad to function for Dell laptop users.
Step 1: Launch the Run utility with the keyboard’s Windows key+ R shortcut keys. Type the control panel in the run command box and click ok to continue.

Step 2: In the control panel menu, navigate to the hardware and sound option, then select mouse and touchpad.
Step 3: Click additional mouse options in the mouse and touchpad window. A new window for mouse properties will open. In the window, toggle the button for the touchpad on/off option, and it will enable the touchpad.

Step 4: If you don’t find any toggle option, launch the run utility by following step 1, and in the command box, type main.cpl. Click ok to continue.

Step 5: In the window, navigate to the Dell Touchpad tab and click the link of Click to change Dell Touchpad settings.

Step 6: Now toggle the button on for the touchpad in the new window; click apply, followed by ok to save changes.

Enable Touchpad From Settings
Dell touchpad in devices can be enabled via Windows settings. Here are the steps to follow:
Step 1: Launch settings from the main menu, i.e., click the Windows icon and search for the gear icon. Double-click the icon to launch it.
Step 2: In the settings menu, click on devices.
Step 3: Select the touchpad option from the left pane in the devices menu.
Step 4: In the next window, under the touchpad option, toggle the button on.

Remove Other Mouse Drivers
If you use other pointing devices parallel to the Dell touchpad, the conflicting drivers and software can result in Dell touchpad errors. In this context, you must remove or disable the other mouse drivers. It can be done from the Windows device manager. Here are the steps to follow:
Step 1: Launch the device manager from the run utility. Launch run via Windows key+ R shortcut and type devmgmt.msc in the run command box. Click ok to continue.

Step 2: In the device manager window, navigate t the option of Mice and other pointing devices and expand it.
Step 3: From the list, right-click the other mouse driver, e.g., HID-compliant mouse, and select uninstall the device from the context menu. Click yes in the UAC to confirm the action.

Update Touchpad Drivers
The Dell touchpad error can be fixed by updating the driver through the device manager. Here are the steps to follow:
Step 1: Launch device manager from the Windows main menu, Type device manager in the taskbar’s search, and double-click the option to launch.

Step 2: In the device manager menu, move to the option of Mice and other pointing devices. Expand the option.

Step 3: In the list, right-click the Dell touchpad and select the properties option from the context menu.

Step 4: Navigate to the driver’s tab in the Dell touchpad properties window. Click Uninstall to remove the corrupted driver.

Step 5: Now click the update driver option followed by clicking Search automatically for updated driver software in the next window. It will update the driver.

Enable Touchpad From Device Manager
Device manager can be used for enabling the Dell touchpad to avoid touchpad functionality errors. Here is how you can enable the Dell touchpad on a Dell computer.
Step 1: Launch the device manager from the Windows main menu. Click Windows key +X shortcut from the keyboard and select the device manager option from the list.

Step 2: In the device manager menu, move to the option of Mice and other pointing devices. Expand the option.
Step 3: In the list, right-click the Dell touchpad and select the properties option from the context menu.
Step 4: In the Dell touchpad properties window, navigate to the driver tab. In the list, make sure that the device is enabled.

From Registry Editor
Dell touchpad can also be enabled from the Windows configuration registry, i.e., the registry editor. It keeps the database for all configurations. To enable the Dell touchpad via the registry editor, here are the steps to follow:
Step 1: Launch the registry editor from the run utility. Click Windows key+ R, and in the run command box, type regedit and click ok to continue. It will launch the registry editor.

Step 2: In the registry editor window, type the following key in the address bar and click enter to continue.
HKEY_LOCAL_MACHINE\SOFTWARE\Microsoft\Windows\CurrentVersion\Policies\System
Step 3: In the next window, select the option of EnableCursorSuppression and click enter to continue.

Step 4: In the pop-up window, change the Dword value from 1 to 0 and click ok to complete the action.

Perform Clean Boot
Rebooting your device in safe mode can help to resolve errors. In case Dell’s touchpad not working still exists, then performing a clean boot is your viable option. Here are the steps to follow:
Step 1: In the window’s main menu, type msconfig in the taskbar’s search box. Click on the option to launch.

Step 2: Right-click msconfig to select run as administrator from the menu. It will launch a system configuration utility.
Step 3: In the system configuration utility pop-up window, select the General tab and the selective startup option.

Step 4: In the next step, uncheck the option of load startup items.
Step 5: Navigate to the services tab and checkmark the option of hide all Microsoft services, followed by clicking disable all button option. Click ok to proceed.

Step 6: Restart the device to start the normal mode.
Get Your Touchpad Working Again
In conclusion, with the help of this comprehensive repair guide, you can troubleshoot and fix the Dell touchpad not working issue. By checking settings, updating drivers, and performing other simple steps, you’ll regain complete control over your touchpad and enjoy smooth navigation on your Dell laptop. Say goodbye to touchpad troubles and get back to a seamless computing experience.
Frequently Asked Questions About the Touchpad Not Working on Dell Operating Systems
Why Can’t I Use the Touchpad on My Dell Laptop?
The touchpad on your Dell laptop is an essential part of its usability. Unfortunately, sometimes it can stop working due to a hardware or software issue. If your touchpad has stopped responding, there are a few steps you can take to try and diagnose the problem and potentially get it working again.
Should I Use an External Mouse if My Dell Touchpad Isn’t Working?
You should use an external mouse if your Dell touchpad is not working. When your touchpad stops working, it can be caused by several different issues. These may include hardware problems such as loose connections or bad drivers, software issues such as viruses or outdated drivers, and even interference from other devices near the laptop.