Recommended: Use Fortect System Repair to repair Vwifimp.sys errors. This repair tool has been proven to identify and fix errors and other Windows problems with high efficiency. Download Fortect here.
- ✓
Vwifimp.sys is a system file associated with the Virtual WiFi Miniport adapter driver in Windows operating systems. This file helps enable the virtual Wi-Fi feature, allowing your computer to emulate a wireless access point. It plays a crucial role in managing wireless connections and facilitating the sharing of internet connections between devices.
If there are issues with the vwifimp.sys file, it can cause disruptions to your computer's wireless connectivity and functionality.
Understanding Common Issues with Sys Files
Sys files, such as vwifimp.sys, are integral to your computer's functioning, but they can sometimes run into problems. These issues might arise due to file corruption, accidental deletion, or conflicts with new software. When such problems occur, they can cause system instability, including slowdowns, crashes, or even the dreaded Blue Screen of Death (BSOD).
- Hardware or Software Failures: Malfunctioning applications or hardware could suggest that the corresponding .sys file is damaged.
- Error Messages: Upon booting the computer, running specific software, or installing a new program, you may encounter error messages tied to a .sys file.
- Unanticipated System Crashes: If your computer often crashes or reboots without any warning, it could be due to a problematic .sys file.
- Reduced Performance: The computer may become notably slow, a common symptom of a corrupted .sys file.
- Blue Screen of Death (BSOD): The computer's screen turning blue and showing an error code is a classic sign of .sys file problems.
File Analysis: Is Vwifimp.sys a Virus?
The file in question, vwifimp.sys, has been thoroughly scanned and shows no signs of virus detection, as evidenced by the clean results from 0 distinct virus scanners. It's always reassuring to encounter files with no known associated threats, as these pose a lesser risk to your system's integrity and performance.
Maintaining System Security
A healthy computing environment is achieved through attentive management and proactive protective measures. Keep your system's defenses updated and periodically scan files to maintain your computer's security and performance.
How to Remove Vwifimp.sys
If you ever find the need to completely wipe the vwifimp.sys file from your system, follow these steps with caution. Dealing with system files requires careful handling to avoid unexpected system behavior.
-
Locate the File: Start by identifying the location of vwifimp.sys on your computer. You can do this by right-clicking the file (if visible) and selecting Properties, or by using the File Explorer's search feature.
-
Secure Your Data: Before proceeding, ensure you have a backup of important data. This safeguards your essential files in case of any mishaps.
-
Delete the File: Once you've located vwifimp.sys, right-click on it and choose Delete. This action moves the file to the Recycle Bin.
-
Empty the Recycle Bin: After deleting vwifimp.sys, don't forget to empty the Recycle Bin to completely remove the file from your system. Right-click on the Recycle Bin and select Empty Recycle Bin.
-
Verify System Integrity: Following file removal, perform a thorough system scan using a trusted antivirus tool to ensure there are no residual file fragments or potential threats.
Note: Be aware that if vwifimp.sys is associated with a specific program, its removal may impact the program's functionality. If you encounter issues after deletion, consider reinstalling the software or consulting a tech expert for guidance.
Repair Vwifimp.sys Error Automatically

In this guide, we will fix vwifimp.sys and other SYS errors automatically.

-
Click the Download Fortect button.
-
Save the Fortect setup file to your device.

-
Locate and double-click the downloaded setup file.
-
Follow the on-screen instructions to install Fortect.

Perform a Clean Boot
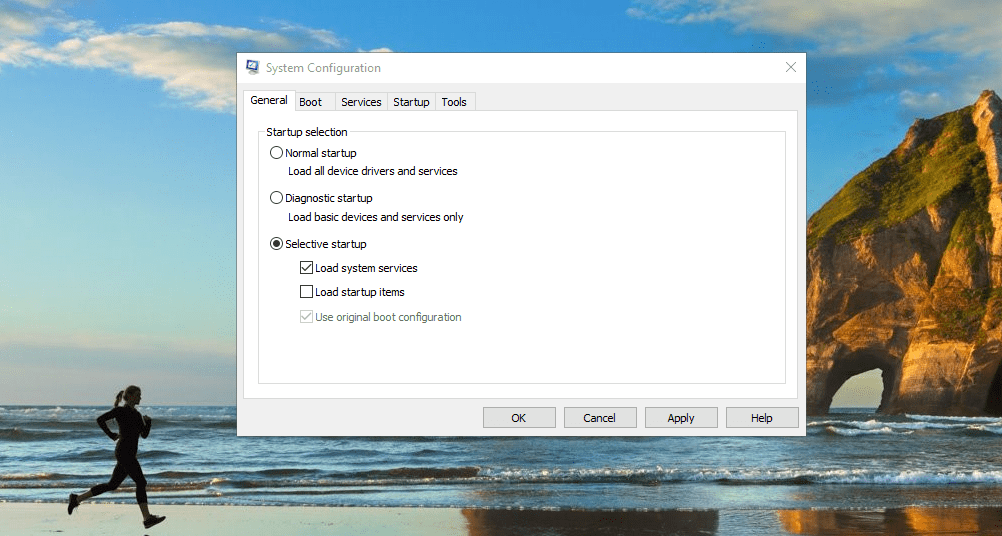
How to perform a clean boot. A clean boot is a troubleshooting technique that allows you to isolate a problem involving vwifimp.sys.


-
In the General tab, select Selective startup.
-
Uncheck Load startup items.
-
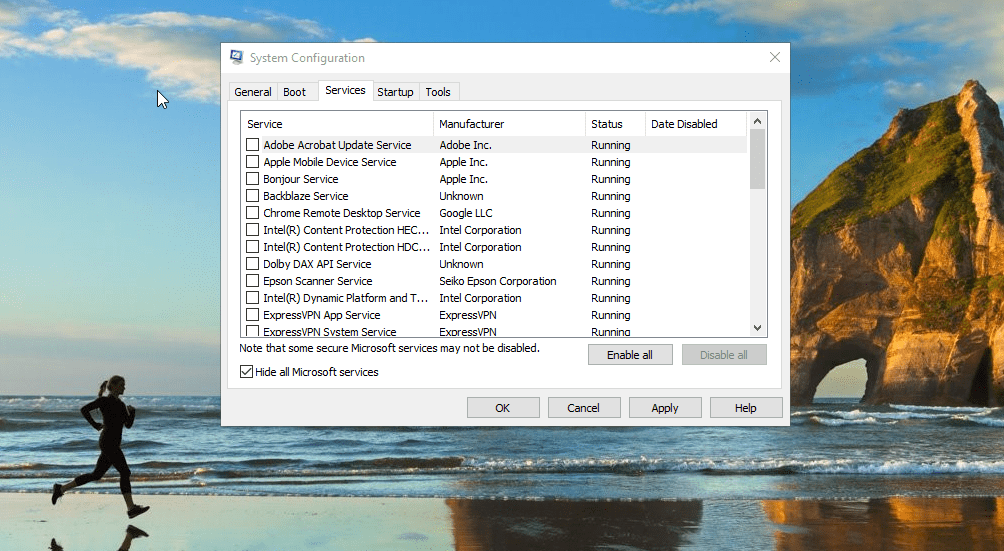
Go to the Services tab.
-
Check Hide all Microsoft services.
-
Click Disable all.
-
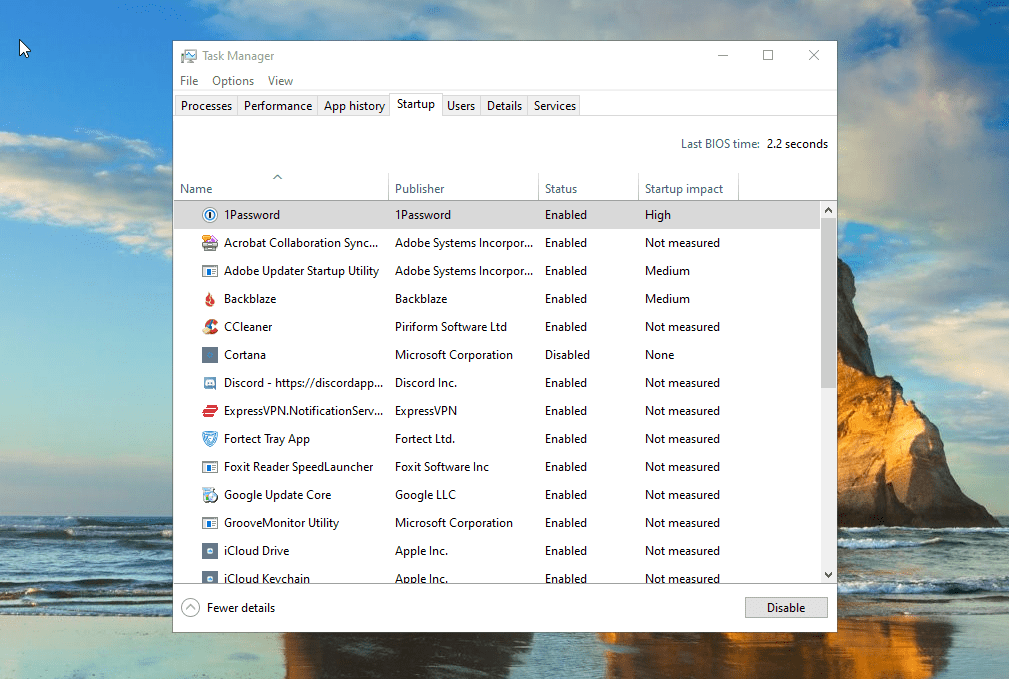
Open Task Manager.
-
Go to the Startup tab.
-
Disable all the startup programs.


Run a System File Checker (SFC) to Fix the vwifimp.sys Error
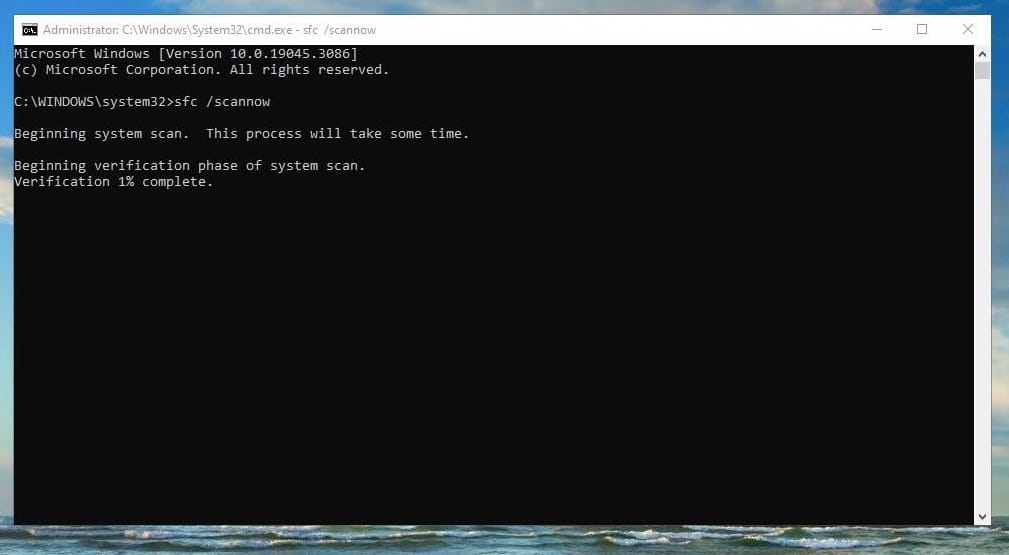
In this guide, we will attempt to fix the vwifimp.sys error by scanning Windows system files.

-
Press the Windows key.
-
Type
Command Promptin the search bar. -
Right-click on Command Prompt and select Run as administrator.
-
In the Command Prompt window, type
sfc /scannowand press Enter. -
Allow the System File Checker to scan your system for errors.

Software that installs vwifimp.sys
| Software | File MD5 | File Version |
|---|---|---|
| 39e78c9e9463c8d096021ea08682b5c3 | 10.0.19041... | |
| 4fc7c344f352bff9d5d167de1b3b2363 | 10.0.22621... | |
| 73fa1a41a97a5c34adc03b3577ff1a86 | 6.2.9200.1... | |
| 0b48e0dfb44ee475f4fd8a8ee599af30 | 6.3.9600.1... | |
| 6a638fc4bfddc4d9b186c28c91bd1a01 | 6.1.7600.1... | |
| 6a638fc4bfddc4d9b186c28c91bd1a01 | 6.1.7600.1... |