Recommended: Use Fortect System Repair to repair PCSpeedUp.sys errors. This repair tool has been proven to identify and fix errors and other Windows problems with high efficiency. Download Fortect here.
- ✓
PCSpeedUp.sys is a vital system file for Windows operating systems. It plays a crucial role in the performance and stability of the computer. This file is responsible for various system functions and should not be altered or removed in order to ensure the proper functioning of the PC.
Understanding Common Issues with Sys Files
Sys files, such as PCSpeedUp.sys, are integral to your computer's functioning, but they can sometimes run into problems. These issues might arise due to file corruption, accidental deletion, or conflicts with new software. When such problems occur, they can cause system instability, including slowdowns, crashes, or even the dreaded Blue Screen of Death (BSOD).
- System Crashes: Frequent and sudden system crashes or reboots can be another indicator of corrupted .sys files.
- Sluggish System Performance: Your computer might slow down significantly if a .sys file becomes corrupted.
- Error Messages: Users may see errors related to a .sys file when booting up, while running software, or during program installations.
- Blue Screen of Death (BSOD): A blue screen accompanied by an error code often signals a .sys file corruption.
- Functionality Issues: If some applications or hardware don't work properly, it could be because a .sys file related to them has been corrupted.
File Analysis: Is PCSpeedUp.sys a Virus?
Scanning Results
The file in question, PCSpeedUp.sys, has been thoroughly scanned and shows no signs of virus detection, as evidenced by the clean results from 0 distinct virus scanners. It's always reassuring to encounter files with no known associated threats, as these pose a lesser risk to your system's integrity and performance.
Application Association
This file is part of a software application, suggesting that its functions are primarily tied to the operations of this software. However, as with all system files, it is essential to remain vigilant, ensuring it continues behaving as expected.
Maintaining a Healthy Computing Environment
A healthy computing environment is achieved through attentive management and proactive protective measures. Keep your system's defenses updated and periodically scan files to maintain your computer's security and performance.
- Stay vigilant with system files
- Update your system's defenses regularly
- Periodically scan files for potential threats
How to Remove PCSpeedUp.sys
If you ever find the need to completely wipe the PCSpeedUp.sys file from your system, follow these steps with caution. Dealing with system files requires careful handling to avoid unexpected system behavior.
-
Locate the File: Start by identifying the location of PCSpeedUp.sys on your computer. You can do this by right-clicking the file (if visible) and selecting Properties, or by using the File Explorer's search feature.
-
Secure Your Data: Before proceeding, ensure you have a backup of important data. This safeguards your essential files in case of any mishaps.
-
Delete the File: Once you've located PCSpeedUp.sys, right-click on it and choose Delete. This action moves the file to the Recycle Bin.
-
Empty the Recycle Bin: After deleting PCSpeedUp.sys, don't forget to empty the Recycle Bin to completely remove the file from your system. Right-click on the Recycle Bin and select Empty Recycle Bin.
-
Verify System Integrity: Following file removal, perform a thorough system scan using a trusted antivirus tool to ensure there are no residual file fragments or potential threats.
Note: Be aware that if PCSpeedUp.sys is associated with a specific program, its removal may impact the program's functionality. If you encounter issues after deletion, consider reinstalling the software or consulting a tech expert for guidance.
Repair PCSpeedUp.sys Error Automatically

In this guide, we will fix PCSpeedUp.sys and other SYS errors automatically.

-
Click the Download Fortect button.
-
Save the Fortect setup file to your device.

-
Locate and double-click the downloaded setup file.
-
Follow the on-screen instructions to install Fortect.

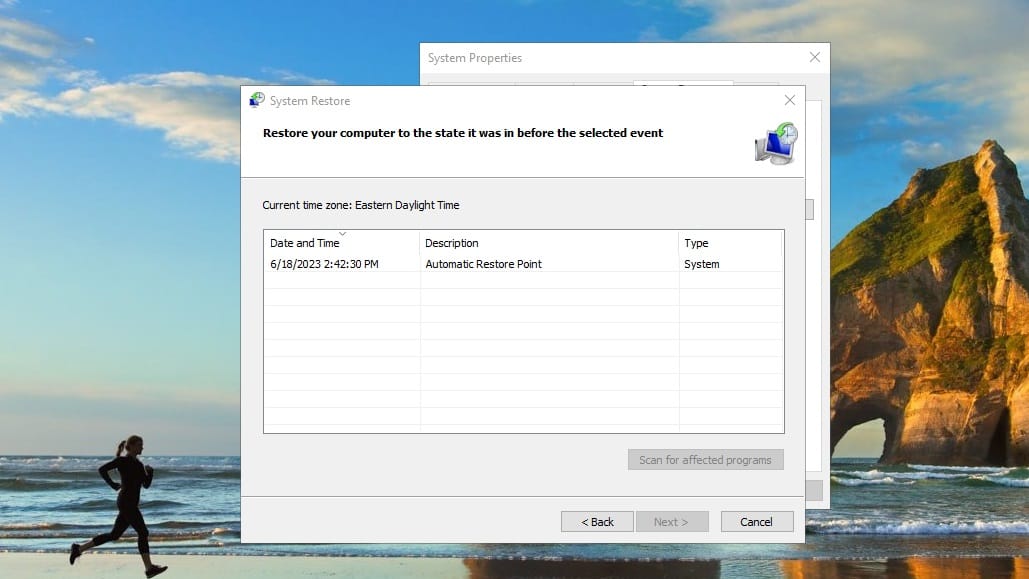
Perform a System Restore to Fix System File Errors

How to perform a System Restore to repair the PCSpeedUp.sys issue.
-
Press the Windows key.
-
Type
System Restorein the search bar and press Enter. -
Click on Create a restore point.
-
In the System Properties window, under the System Protection tab, click on System Restore....
-
Click Next in the System Restore window.
-
Choose a restore point from the list. Ideally, select a point when you know the system was working well.


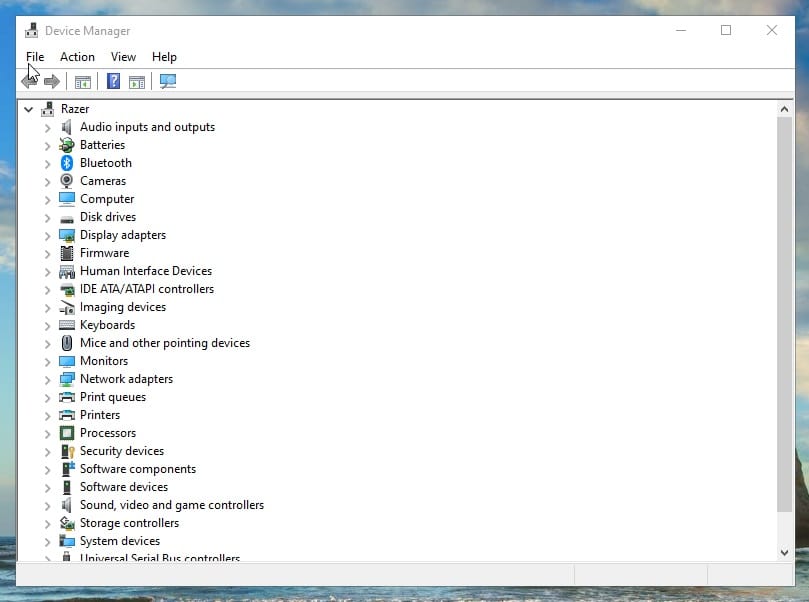
Update Your Device Drivers

How to update device drivers on your PC. Occasionally, PCSpeedUp.sys errors can be attributed to incompatible drivers.
-
Press the Windows key.
-
Type
Device Managerin the search bar and press Enter.
-
In the Device Manager window, locate the device whose driver you want to update.
-
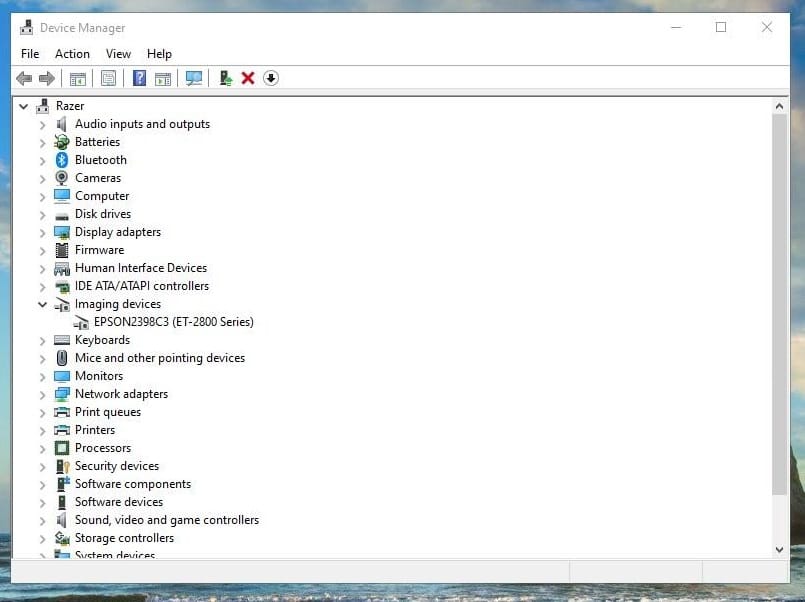
Click on the arrow or plus sign next to the device category to expand it.
-
Right-click on the device and select Update driver.
-
In the next window, select Search automatically for updated driver software.
-
Follow the prompts to install the driver update.
Software that installs PCSpeedUp.sys
| Software | File MD5 | File Version |
|---|---|---|
| 5d5d9e6863713367e5e7a5d927dc4821 | 3.3.2.0 | |
| d52827b6b8b9b7bf1a419ff74607ac82 | 3.9.5.0 | |
| a2c5b60ab421547ca47c54fb3e288a7c | 3.8.3.0 | |
| 5d5d9e6863713367e5e7a5d927dc4821 | 3.9.3.0 | |
| d52827b6b8b9b7bf1a419ff74607ac82 | 3.6.6.0 | |
| 5d5d9e6863713367e5e7a5d927dc4821 | 3.2.6 | |
| 333d2de1e04c6385bc1978f096dbb17c | 3.1.2.1 |