Recommended: Use Fortect System Repair to repair Cpnmouse.sys errors. This repair tool has been proven to identify and fix errors and other Windows problems with high efficiency. Download Fortect here.
- ✓
Cpnmouse.sys is a system file that is essential for the correct functioning of the mouse on Windows operating systems. This file acts as a driver for the mouse, facilitating communication between the hardware and the operating system. Without cpnmouse.sys, the mouse may not work properly or at all, leading to a frustrating user experience.
When troubleshooting mouse issues on a Windows computer, it's important to ensure that cpnmouse.sys is functioning correctly.
Understanding Common Issues with Sys Files
When your computer hits a snag, often it's a .sys file, like cpnmouse.sys, at the root of the problem. These files can become corrupted, be deleted inadvertently, or clash with newly installed software. The resulting issues might lead to system instability, performance slowdowns, or even the notorious Blue Screen of Death.
- Software and Hardware Malfunctions: You might notice that certain applications or hardware peripherals aren't working as expected. This might be due to a .sys file associated with that software or hardware becoming corrupt.
- Reduced Performance: The computer may become notably slow, a common symptom of a corrupted .sys file.
- Error Pop-ups: These messages related to a .sys file can appear when starting the computer, running certain applications, or installing programs.
- System Crashes: Frequent and sudden system crashes or reboots can be another indicator of corrupted .sys files.
- Blue Screen of Death (BSOD): A blue screen accompanied by an error code often signals a .sys file corruption.
File Analysis: Is Cpnmouse.sys a Virus?
The file named cpnmouse.sys has successfully passed tests from various virus detection tools with no flagged security issues. This is certainly good news as it minimizes the risk to your computer's overall health and performance.
Maintaining Security
However, even with such reassuring results, not letting your guard down is important. Regular system updates and routine security scans are pivotal in maintaining your computer's security and operational effectiveness. This way, you can continue to confidently use cpnmouse.sys as part of your daily computer activities.
How to Remove Cpnmouse.sys
In case you need to completely eradicate the cpnmouse.sys file from your system, follow these steps with caution. When dealing with system files, it's essential to proceed carefully to avoid unexpected system behavior.
-
Locate the File: Begin by locating cpnmouse.sys on your computer. You can do this by right-clicking the file (if visible) and selecting Properties, or by using the File Explorer's search feature.
-
Safeguard Your Data: Before proceeding, ensure you have a backup of important data. This safeguards your vital files in case of any issues.
-
Delete the File: Once you've identified the location of cpnmouse.sys, right-click on it and choose Delete. This action moves the file to the Recycle Bin.
-
Empty the Recycle Bin: After deleting cpnmouse.sys, remember to empty the Recycle Bin to thoroughly remove the file from your system. Right-click on the Recycle Bin and select Empty Recycle Bin.
-
Perform a System Scan: After file removal, conduct a comprehensive system scan using a trusted antivirus tool to ensure there are no lingering file fragments or potential threats.
Note: Keep in mind that if cpnmouse.sys is associated with a specific program, its removal may impact the program's functionality. If issues arise after deletion, consider reinstalling the software or seeking assistance from a tech expert.
Repair Cpnmouse.sys Error Automatically

In this guide, we will fix cpnmouse.sys and other SYS errors automatically.

-
Click the Download Fortect button.
-
Save the Fortect setup file to your device.

-
Locate and double-click the downloaded setup file.
-
Follow the on-screen instructions to install Fortect.

Perform a Repair Install of Windows

How to perform a repair install of Windows. A repair installation resets all Windows system files while preserving your personal files and applications.

-
Go to the Microsoft website and download the Windows 10 Media Creation Tool.
-
Run the tool and select Create installation media for another PC.
-
Follow the prompts to create a bootable USB drive or ISO file.
-
Insert the Windows 10 installation media you created into your PC and run setup.exe.
-
Follow the prompts until you get to the Ready to install screen.

-
On the Ready to install screen, make sure Keep personal files and apps is selected.
-
Click Install to start the repair install.

-
Your computer will restart several times during the installation. Make sure not to turn off your computer during this process.

Perform a System Restore to Fix System File Errors

How to perform a System Restore to repair the cpnmouse.sys issue.
-
Press the Windows key.
-
Type
System Restorein the search bar and press Enter. -
Click on Create a restore point.
-
In the System Properties window, under the System Protection tab, click on System Restore....
-
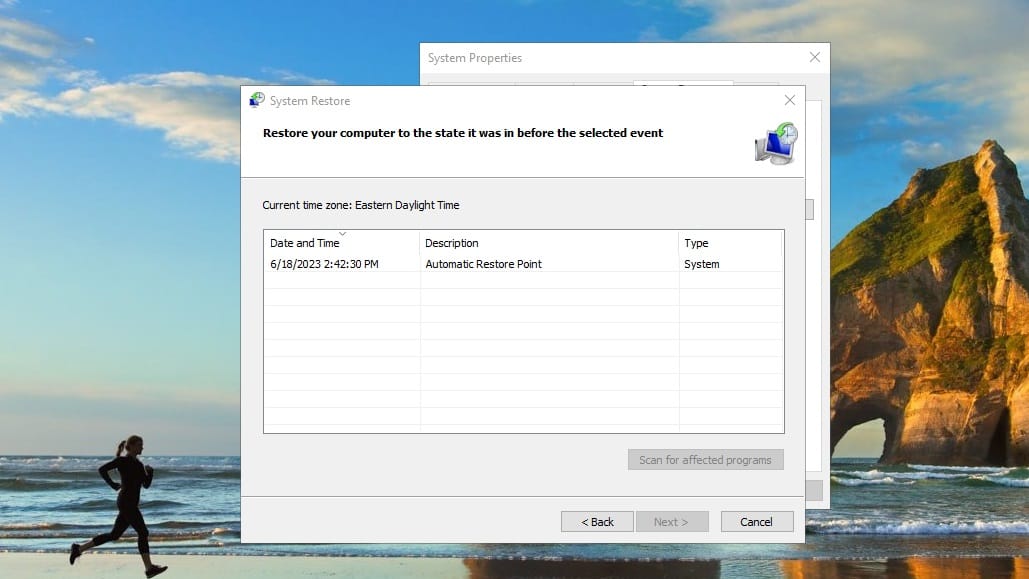
Click Next in the System Restore window.
-
Choose a restore point from the list. Ideally, select a point when you know the system was working well.


Software that installs cpnmouse.sys
| Software | File MD5 | File Version |
|---|---|---|
| – | 6.05.0003 | |
| – | 3.043.067 |