Recommended: Use Fortect System Repair to repair Wav2lipsync.exe errors. This repair tool has been proven to identify and fix errors and other Windows problems with high efficiency. Download Fortect here.
- ✓
If you're experiencing issues with the wav2lipsync.exe file from DarkVOICES for DBPro, you're not alone. These types of problems can be frustrating, but there are solutions. In this article, we'll cover common errors associated with this file, troubleshooting methods to resolve them, the possibility of malware infiltration, and steps to uninstall the related software.
Let's get started.
Common Wav2lipsync.exe Errors on Windows
Dealing with wav2lipsync.exe errors can often be perplexing, given the variety of issues that might cause them. They can range from a mere software glitch to a more serious malware intrusion. Here, we've compiled a list of the most common errors associated with wav2lipsync.exe to help you navigate and possibly fix these issues.
- Wav2lipsync.exe File Not Executing: This error message indicates that the system is unable to run the executable file. This could be due to issues like corrupted file data, incorrect file permissions, or system resource limitations.
- Unable to Start Correctly (0xc000007b): This error usually occurs when a user tries to run applications that are designed to run on non-compatible versions of Windows.
- Not a Valid Win32 Application: This error message signifies that the program is incompatible with the Windows version in use, or the program file could be damaged.
- Error 0xc0000005: This alert emerges when there is an issue related to access violation, often the result of memory faults, presence of malware, or drivers that are no longer up-to-date.
- Insufficient System Resources Exist to Complete the Requested Service: This error message shows up when the system lacks the necessary resources to carry out the service requested, possibly due to overuse of system memory or high CPU usage.
File Analysis: Is Wav2lipsync.exe a Virus?
The file named wav2lipsync.exe has successfully passed tests from various virus detection tools with no flagged security issues. This is certainly good news as it minimizes the risk to your computer's overall health and performance.
Maintaining Security
However, even with such reassuring results, not letting your guard down is important. Regular system updates and routine security scans are pivotal in maintaining your computer's security and operational effectiveness. This way, you can continue to confidently use wav2lipsync.exe as part of your daily computer activities.
How to Remove Wav2lipsync.exe
In case the removal of the wav2lipsync.exe file is required, the ensuing steps should be adhered to. It's always important to be cautious when altering system files, as unintended modifications could trigger unforeseen system reactions.
-
Find the File: The initial step involves locating wav2lipsync.exe on your system. The File Explorer search feature can assist you in doing this.
-
Secure Your Data: Always back up essential data before changing your system files. This is a critical safety step.
-
Eliminate the File: After identifying the location of wav2lipsync.exe, you can delete it. Just right-click the file and select Delete. This action moves the file to your Recycle Bin.
-
Finalize the Deletion: To ensure wav2lipsync.exe is completely eradicated from your system, you should empty your Recycle Bin. Right-click on the Recycle Bin and choose Empty Recycle Bin.
-
Verify System Health: Conduct a comprehensive system scan with a reliable antivirus tool once you've disposed of the file. This ensures there are no remnants of the file lurking in your system.
Note: It's important to mention that if wav2lipsync.exe is associated with the a program, its removal may impact its functionality. If any issues arise post deletion, consider reinstalling the program or consult a technology professional for guidance.
Repair Wav2lipsync.exe Error Automatically

In this guide, we will fix wav2lipsync.exe and other EXE errors automatically.

-
Click the Download Fortect button.
-
Save the Fortect setup file to your device.

-
Locate and double-click the downloaded setup file.
-
Follow the on-screen instructions to install Fortect.

Perform a System Restore to Fix Exe Errors

How to perform a System Restore to repair wav2lipsync.exe issues.
-
Press the Windows key.
-
Type
System Restorein the search bar and press Enter. -
Click on Create a restore point.
-
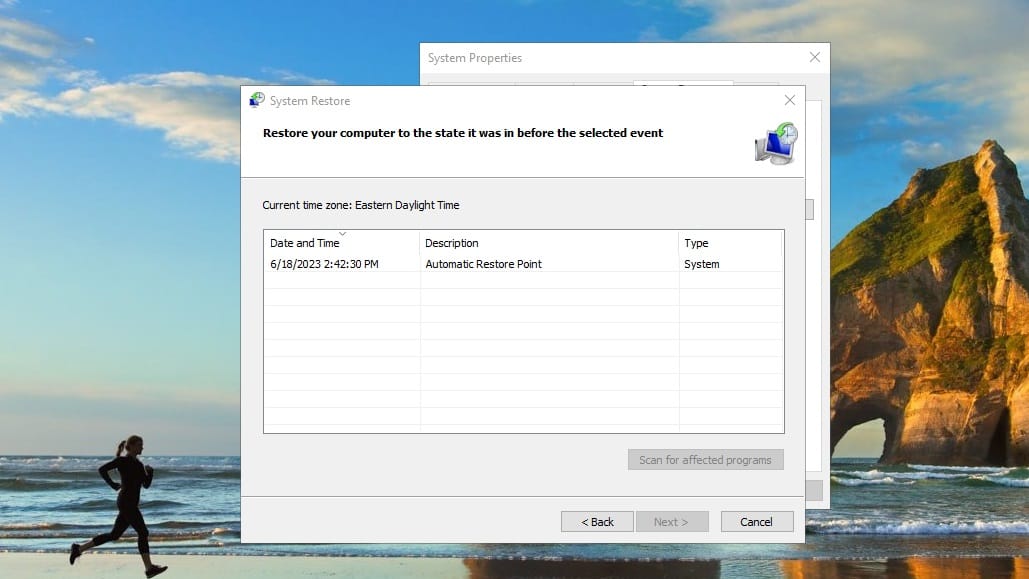
In the System Properties window, under the System Protection tab, click on System Restore....
-
Click Next in the System Restore window.
-
Choose a restore point from the list. Ideally, select a point when you know the system was working well.


Run the Windows Check Disk Utility
How to use the Windows Check Disk Utility. Scans your disk for wav2lipsync.exe errors and automatically fix them.

-
Press the Windows key.
-
Type
Command Promptin the search bar and press Enter. -
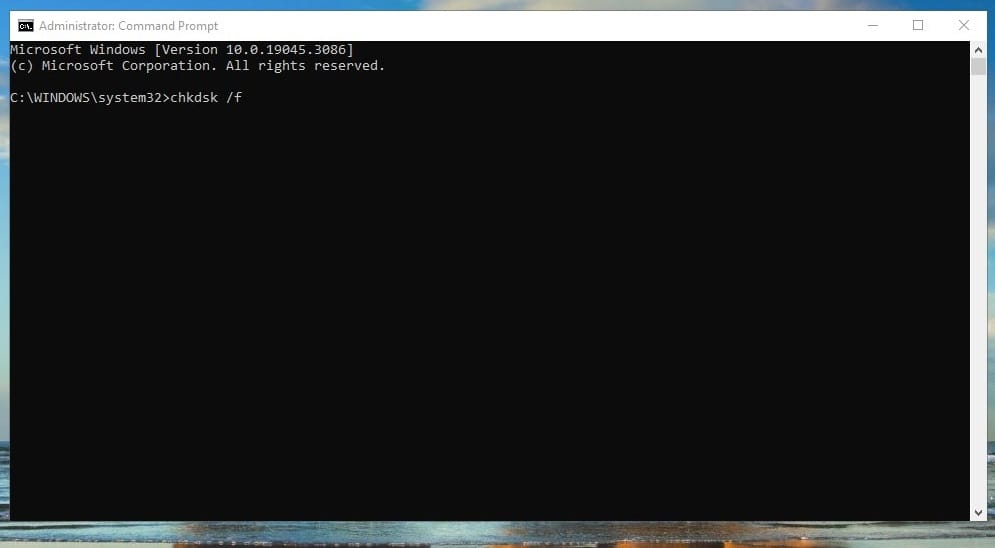
Right-click on Command Prompt and select Run as administrator.
-
In the Command Prompt window, type
chkdsk /fand press Enter. -
If the system reports that it cannot run the check because the disk is in use, type
Yand press Enter to schedule the check for the next system restart.

-
If you had to schedule the check, restart your computer for the check to be performed.
Software that installs wav2lipsync.exe
| Software | File MD5 | File Version |
|---|---|---|
| – | 1.0.0 |