Recommended: Use Fortect System Repair to repair PDA Autoupdater.exe errors. This repair tool has been proven to identify and fix errors and other Windows problems with high efficiency. Download Fortect here.
- ✓
If you're encountering issues with the PDA Autoupdater.exe file, you're not alone. This article will guide you through troubleshooting common errors, addressing malware concerns, and safely uninstalling the related software, Angel PDA 7 by Angel Broking Limited. Stick around to learn how to solve these problems and get back to using your device smoothly.
Common PDA Autoupdater.exe Errors on Windows
Encountering errors associated with PDA Autoupdater.exe can be frustrating. These errors may vary in nature and can surface due to different reasons, such as software conflicts, outdated drivers, or even malware infections. Below, we've outlined the most commonly reported errors linked to PDA Autoupdater.exe, to aid in understanding and potentially resolving the issues at hand.
- Not a Valid Win32 Application: This error surfaces when a program cannot be initiated because it's not compatible with the version of Windows being used, or the file itself might be corrupt.
- PDA Autoupdater.exe has Stopped Working: This error might show up when an application crashes. It could be due to various reasons like incompatible system files, faulty or outdated drivers, or a software conflict.
- Blue Screen of Death (BSOD): Although not strictly an PDA Autoupdater.exe error, certain .exe files can cause system instability leading to a BSOD, indicating a fatal system error.
- Missing PDA Autoupdater.exe File: This error occurs when the operating system can't locate PDA Autoupdater.exe. This might be due to a faulty installation, unintentional deletion, or a malware infection.
- PDA Autoupdater.exe - System Error: This error message shows up when the executable file triggers a system malfunction. This could be due to issues such as software conflicts, corrupted system files, or inadequate system resources.
File Analysis: Is PDA Autoupdater.exe a Virus?
Scanning Results
The file in question, PDA Autoupdater.exe, has been thoroughly scanned and shows no signs of virus detection, as evidenced by the clean results from 0 distinct virus scanners. It's always reassuring to encounter files with no known associated threats, as these pose a lesser risk to your system's integrity and performance.
Application Association
This file is part of a software application, suggesting that its functions are primarily tied to the operations of this software. However, as with all executable files, it is essential to remain vigilant, ensuring it continues behaving as expected.
Maintaining a Healthy Computing Environment
A healthy computing environment is achieved through attentive management and proactive protective measures. Keep your system's defenses updated and periodically scan files to maintain your computer's security and performance.
- Stay vigilant with executable files
- Update your system's defenses regularly
- Periodically scan files for potential threats
How to Remove PDA Autoupdater.exe
Should you need to remove the PDA Autoupdater.exe file from your system, please proceed with the following steps. As always, exercise caution when modifying system files, as inadvertent changes can sometimes lead to unexpected system behavior.
-
Identify the file location: The first step is to find where PDA Autoupdater.exe resides on your computer. You can do this by right-clicking the file (if visible) and choosing Properties or searching for it in the File Explorer.
-
Backup your data: Before making any changes, ensure you have a backup of important data. This way, if something goes wrong, you can restore your data.
-
Delete the file: Once you've located PDA Autoupdater.exe, right-click on it and select Delete. This will move the file to the Recycle Bin.
-
Empty the Recycle Bin: After deleting PDA Autoupdater.exe, don't forget to empty the Recycle Bin to remove the file from your system completely. Right-click on the Recycle Bin and select Empty Recycle Bin.
-
Scan your system: After removing the file, running a full system scan with a trusted antivirus tool is a good idea. This will help ensure no leftover file pieces or other potential threats.
Note: Remember, if PDA Autoupdater.exe is part of a sprogram, removing this file may affect the application's functionality. If issues arise after the deletion, consider reinstalling the software or seek assistance from a tech professional.
Repair PDA Autoupdater.exe Error Automatically

In this guide, we will fix PDA Autoupdater.exe and other EXE errors automatically.

-
Click the Download Fortect button.
-
Save the Fortect setup file to your device.

-
Locate and double-click the downloaded setup file.
-
Follow the on-screen instructions to install Fortect.

Perform a Clean Boot
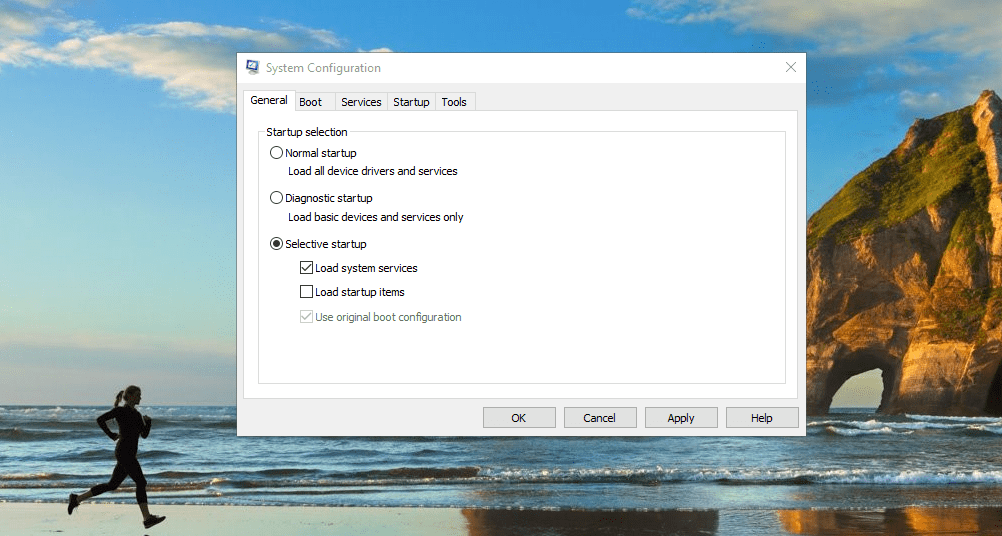
In this guide, we will demonstrate how to perform a clean boot. A clean boot can repair PDA Autoupdater.exe problems.


-
In the General tab, select Selective startup.
-
Uncheck Load startup items.
-
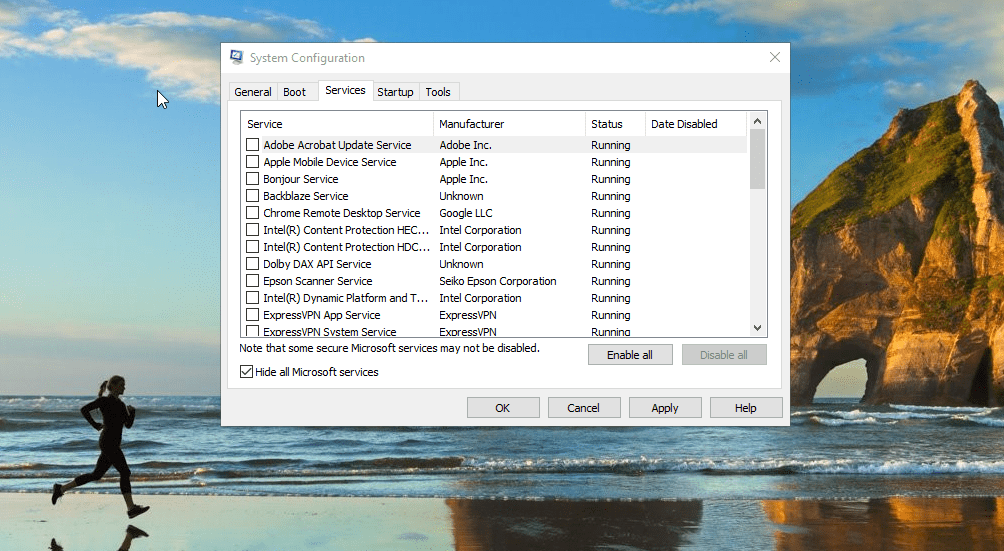
Go to the Services tab.
-
Check Hide all Microsoft services.
-
Click Disable all.
-
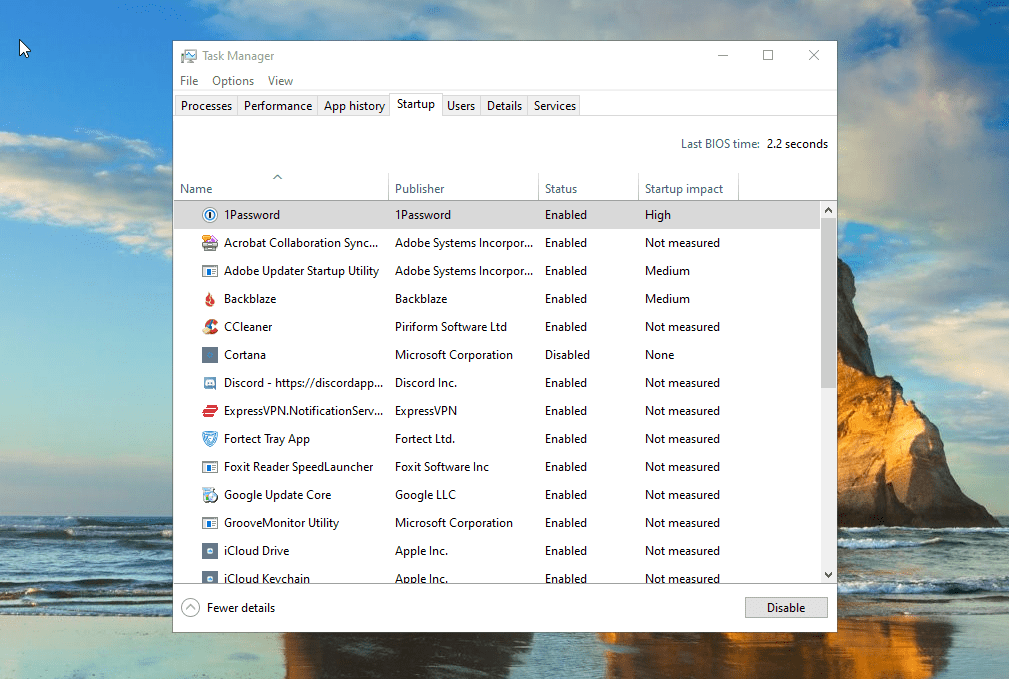
Open Task Manager.
-
Go to the Startup tab.
-
Disable all the startup programs.


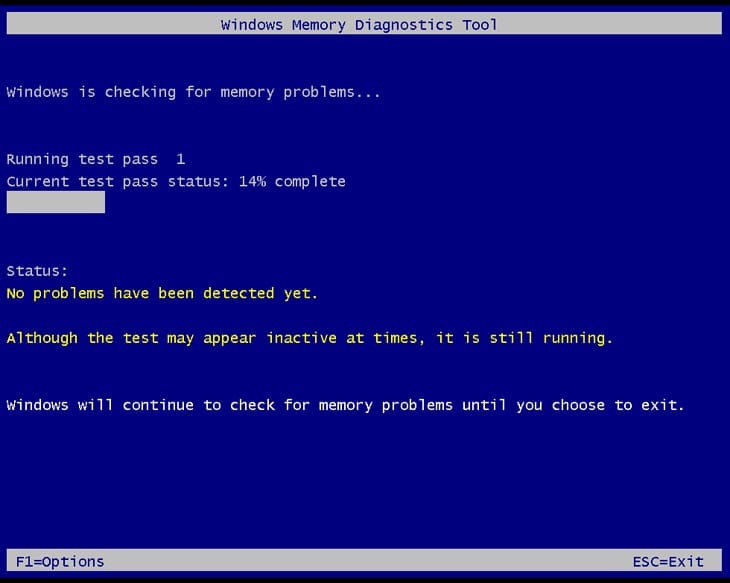
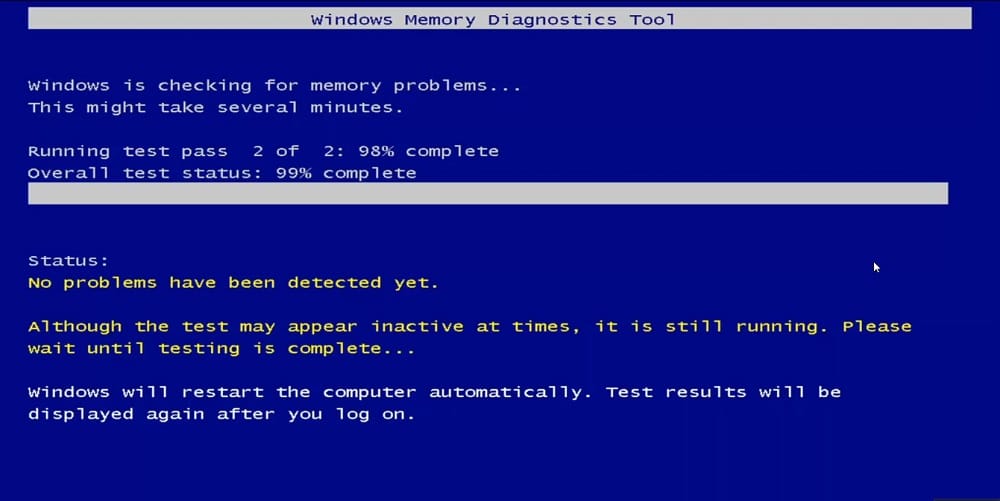
Run the Windows Memory Diagnostic Tool
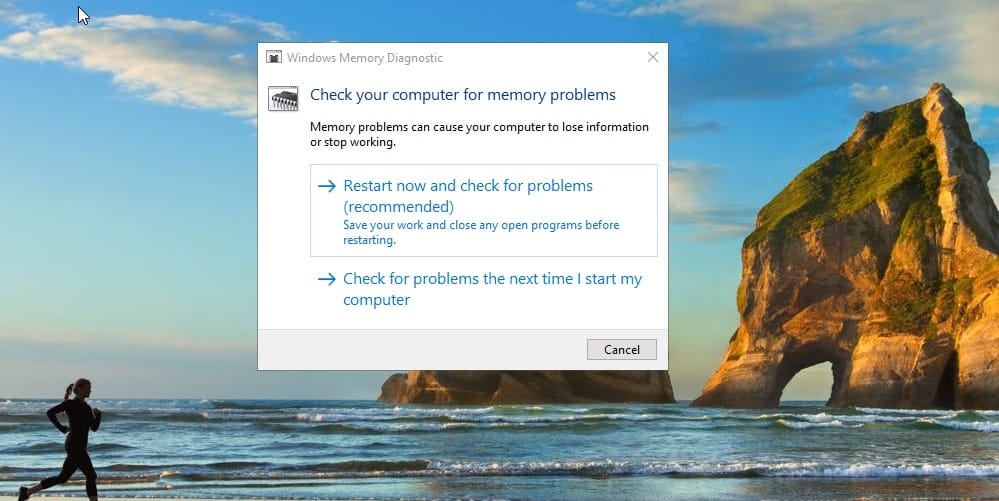
How to run a Windows Memory Diagnostic test to check for PDA Autoupdater.exe errors related to memory issues.
-
Press the Windows key.
-
Type
Windows Memory Diagnosticin the search bar and press Enter.
-
In the Windows Memory Diagnostic window, click on Restart now and check for problems (recommended).

-
Your computer will restart and the memory diagnostic will run automatically. It might take some time.
-
After the diagnostic, your computer will restart again. You can check the results in the notification area on your desktop.
Software that installs PDA Autoupdater.exe
| Software | File MD5 | File Version |
|---|---|---|
| 3f53396832278e7f0b936ce0bbc1cf35 | 7.0.1.1 |