Fix: Page Fault in a Non Paged Area- Step by Step Guide

Windows 10 users occasionally face annoying blue screen issues. When this occurs, it can turn into a big nightmare. The page fault error in non-paged area is one of the blue screen issues that plague laptop and desktop users.
Some of the error codes associated with this issue include STOP: 0x50, STOP: 0X00000050, ntfs.sys, etc. And it is not limited to Windows 10 users alone. It can happen in Windows 7, Windows 8 and Vista, too.
Recommended: To easily install drivers automatically, use the tool below.
But don’t worry: The issue generally is a temporary one that can be fixed with the automatic restart that it is sure to trigger. If the problem persists or occurs as soon as you boot up, you will need to find a permanent fix for it. Read on if the page fault in a non-page area error is frustrating you.
Common Reasons for Page Fault in Nonpaged Area Windows 10 Issues
Understanding the common reasons behind the Page Fault in Nonpaged Area error in Windows 10 will help you identify the root cause and fix the problem accordingly. Below is a list of typical factors leading to this annoying blue screen issue:
- Faulty Hardware: One of the primary causes of the page fault error is faulty hardware components, such as hard drives, RAM, or even the motherboard. These hardware malfunctions can lead to inconsistencies in the system, ultimately resulting in the error.
- Damaged or Corrupted System Files: Corrupted or damaged system files can also cause the Page Fault in Nonpaged Area error. These files might have been damaged due to a malware attack, abrupt system shutdown, or software clashes.
- Outdated or Incompatible Drivers: When the drivers of your hardware components are outdated, incompatible, or not correctly installed, they can trigger the blue screen error. Ensuring your drivers are up-to-date and compatible with your system can help avoid the issue.
- Improperly Configured Paging File: A wrongly configured paging file might contribute to the Page Fault in Nonpaged Area error. Modifying the paging file settings and ensuring it is set up correctly can potentially fix the problem.
- Third-Party Software Conflicts: Certain software applications, particularly antivirus programs from less reputable companies, can cause conflicts in the system, leading to the error. Removing or disabling the problematic software can help resolve the issue.
- Overclocking: Overclocking your system can cause instability and result in multiple errors, including the Page Fault in Nonpaged Area. Returning your system settings to factory defaults or adjusting the overclocking settings can help prevent the error.
- Power Failure: An unexpected power failure can lead to RAM malfunction which may cause the page fault error. Resetting the RAM module and making sure it is properly inserted can help fix the issue.
By identifying the exact cause behind the Page Fault in Nonpaged Area error, you can quickly apply the appropriate solution and save valuable time and effort. Make sure to analyze your system thoroughly and try the different solutions mentioned in this guide to find the one that works for you.
How to Fix Page Fault in Nonpaged Area Windows 10
Check Your Device Disk and Memory
This blue screen issue can occur when errors are present on the hard drive or if it is damaged. To identify if this is the cause of the Page Fault issue, you have to run the Check Disk scan command in your system. Here is how you do it:
Step 1:
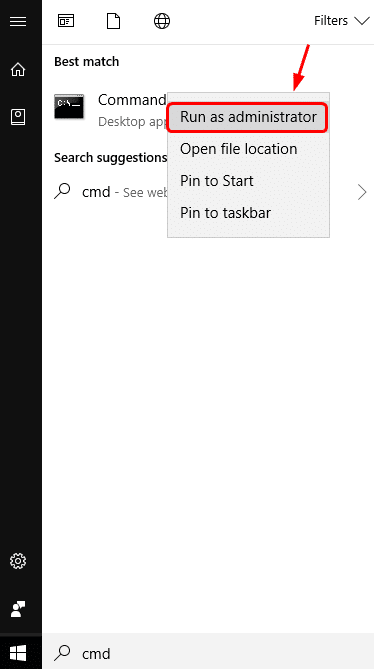
Enter ‘cmd’ in the Taskbar search box.

In the window that opens, right-click on the ‘Command Prompt’ and select ‘Run as Administrator’.
Step 2:
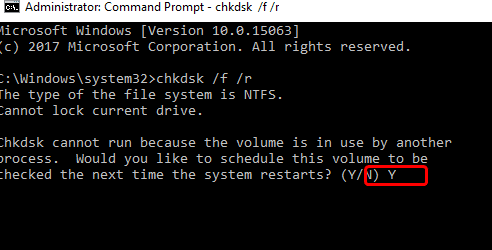
When the Command Prompt opens, enter the command below:
chkdsk /f /r

If a message appears informing you that the hard drive is locked and you must give permission to schedule a full Check Disk scan on restart, you should type Y for to confirm your permission.
Now restart the computer to allow the Check Disk scan time to complete. This is comparatively faster in Windows 10 than it was in the 7 and 8 versions.
Step 3:
Once the Check Disk scan is done, press [R] and the [Windows] key simultaneously and enter the following command into the Run prompt:
mdsched.exe

Step 4:
Choose Restart now and check for problems. The system will immediately reboot.

Step 5:
This scan will take about 20 minutes to complete. Once it is over, check to see if your issue is resolved.

Undo Any Recent Changes
Any recent changes you made to the system might trigger the blue screen issue. This includes recently added software or hardware. Remove the recently added items and revert recent changes to the default to resolve a problem related to these.
Update Your Drivers
An outdated, corrupt or faulty driver can also trigger the blue screen problem. You have to check all the devices on the system for the right driver. Update any devices that do not have the proper drivers. Here are the steps to do this:
Step 1:
Enter ‘Device Manager’ into the taskbar search box.

Step 2:
Use the right-click feature on the recently updated driver device.
Step 3:
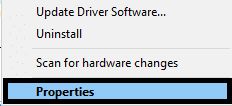
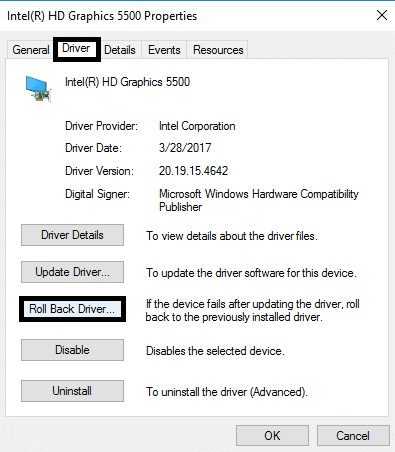
Choose ‘Roll Back Driver.’ If the above option is not found by right-clicking, it indicates that the driver is the only one installed for the specific device. This can also be done by choosing the ‘Properties’ option after right clicking on the device in the Device Manager window and choosing the Driver tab on it. Then you will see the button with the ‘Roll Back Driver’ option.
Step 4:
Choose ‘Uninstall’ and reboot the system. The driver will be installed automatically as the system restarts.
Generally, a faulty device can be easily identified by an exclamation mark in yellow that appears beside it. Rolling back drivers can resolve the problems causing the page fault in nonpaged area errors on your computer.
Disable / Adjust Automatic Paging File Size
Doing minor changes to the paging file can often fix the issue effectively, primarily if it is not related to hardware problems.
Step 1:
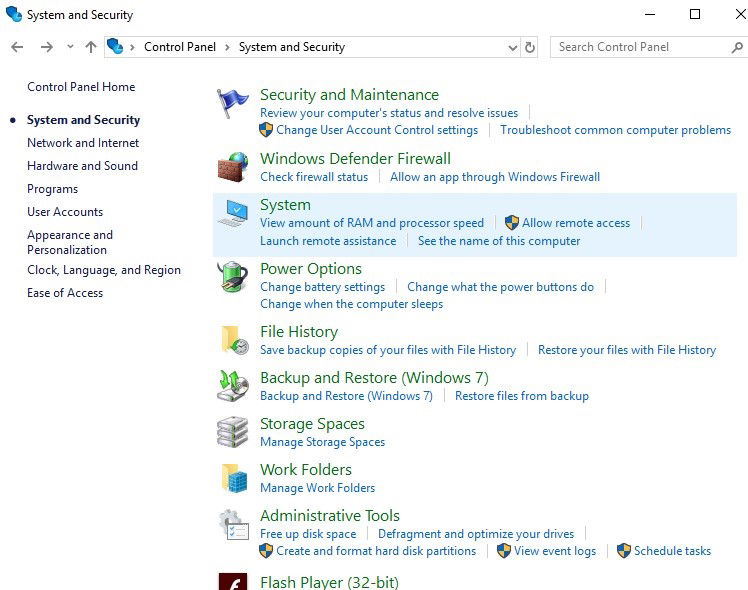
Open ‘Control Panel’ by entering it in the taskbar search box and clicking the appropriate choice. Select ‘System and Security’ and then just ‘System.’
Step 2:
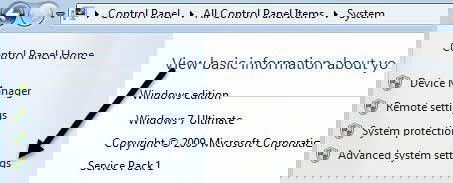
Choose ‘Advanced System Settings’ from the sidebar on the left side.
Step 3:
On the page that opens, choose the Settings option under the Performance tab.

Step 4:
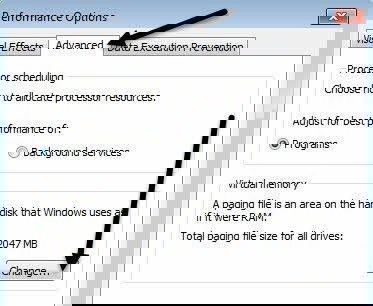
From the Performance settings, choose the ‘Advanced’ tab and click on the Change button found under the ‘Virtual Memory’ heading.
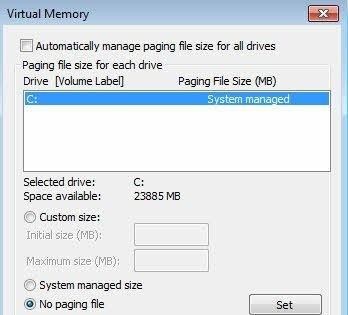
Step 5:
Untick the box next to ‘Automatically manage paging file size for all drives’. Click on the ‘OK’ button to save the settings change you made. Exit the page now.
Step 6:
Restart the system and check to see if the problem is resolved.
Temporarily Disable Antivirus Software
The anti-virus software you have may also be the culprit. If this is the case, you have to uninstall the anti-virus program and reboot the system completely.
While it is rare for anti-virus software to cause this particular problem, it is best to check if this is the case. Anti-virus programs from companies that are not well-established have been known to create this type of problem. If uninstalling the program resolves the issue, you should find a different anti-virus to use on your computer.
Check Your RAM
The RAM in your system may cause a Page Fault in Non-Paged Area Error. This occurs when the computer’s RAM is defective. Since most systems possess more than one RAM chip, you can resolve the issue by removing the defective chip and leaving the remaining chips as they are. You need to pop a chip out and start your computer. Some computers have a unique port that allows you to access the RAM easily, but others may require you to take the computer apart. Follow the instructions below to resolve the issue if it is related to the RAM:
Step 1:
Sometimes a power failure causes the RAM to malfunction and produce the page fault in a nonpaged area error. To begin, shut down the computer, unplug it and remove the battery, and access the RAM. Remove each RAM chip and reinsert it correctly.
Step 2:
Once all the RAM is reinserted, plug the computer back in and reboot the computer to see if the fault is corrected. If it is, you are done. If not you will need to continue checking each RAM chip one at a time.
Step 3:
Again, shut down the computer, unplug it and remove the battery, and access the RAM. Remove only one of the RAM chips this time, making sure to leave all the others in place. (If you just have one RAM chip, you will need to buy another one and replace it. Be sure to replace it with a RAM chip that is compatible with your computer.) The computer will not run without at least one compatible RAM chip installed.
Step 4:
Restart your computer and see if the problem is resolved. If you have removed the faulty chip, the issue will be resolved. If you still see the blue screen error, you have to reinsert the RAM chip you removed and remove another RAM chip. Go through each of the RAM chips in your computer by repeating Steps 3 and 4.

Conclusion: Page Fault in Nonpaged Area
We hope the page fault in non-paged area error has been resolved with one of the above methods. If after trying all the mentioned methods you still see the error, it indicates the problem is more complicated and needs professional care to function properly.